• Resin Tree Ornament Tutorial

    tutorial-blank

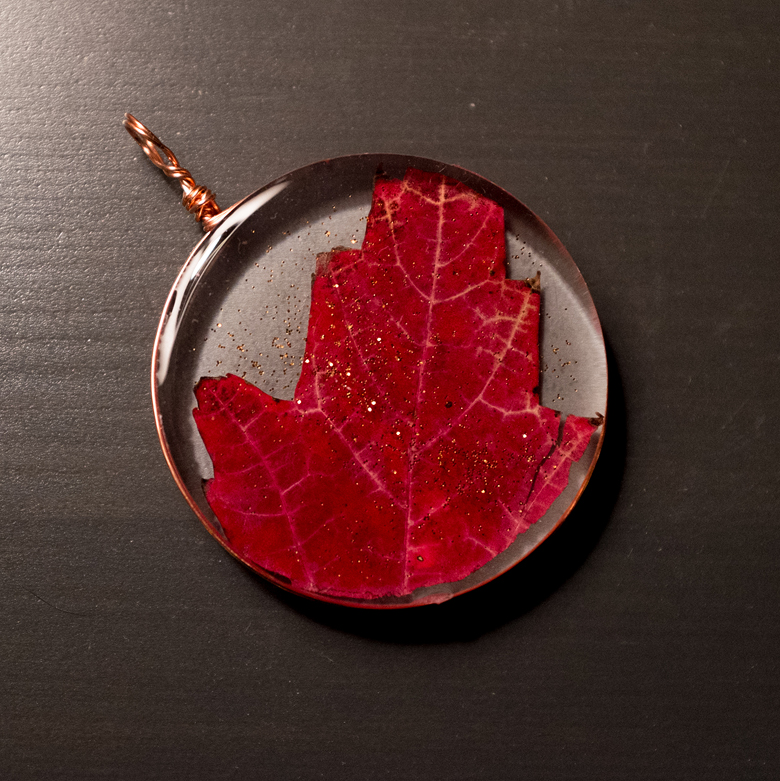
    Of course, resin had to be an installment in my holiday-related crafting tutorials, and I honestly think they’re the prettiest ones yet (I’m biased though!). Tito and I made these for our vets, to thank them for the awesome care they have shown our diabetic kitty this year.
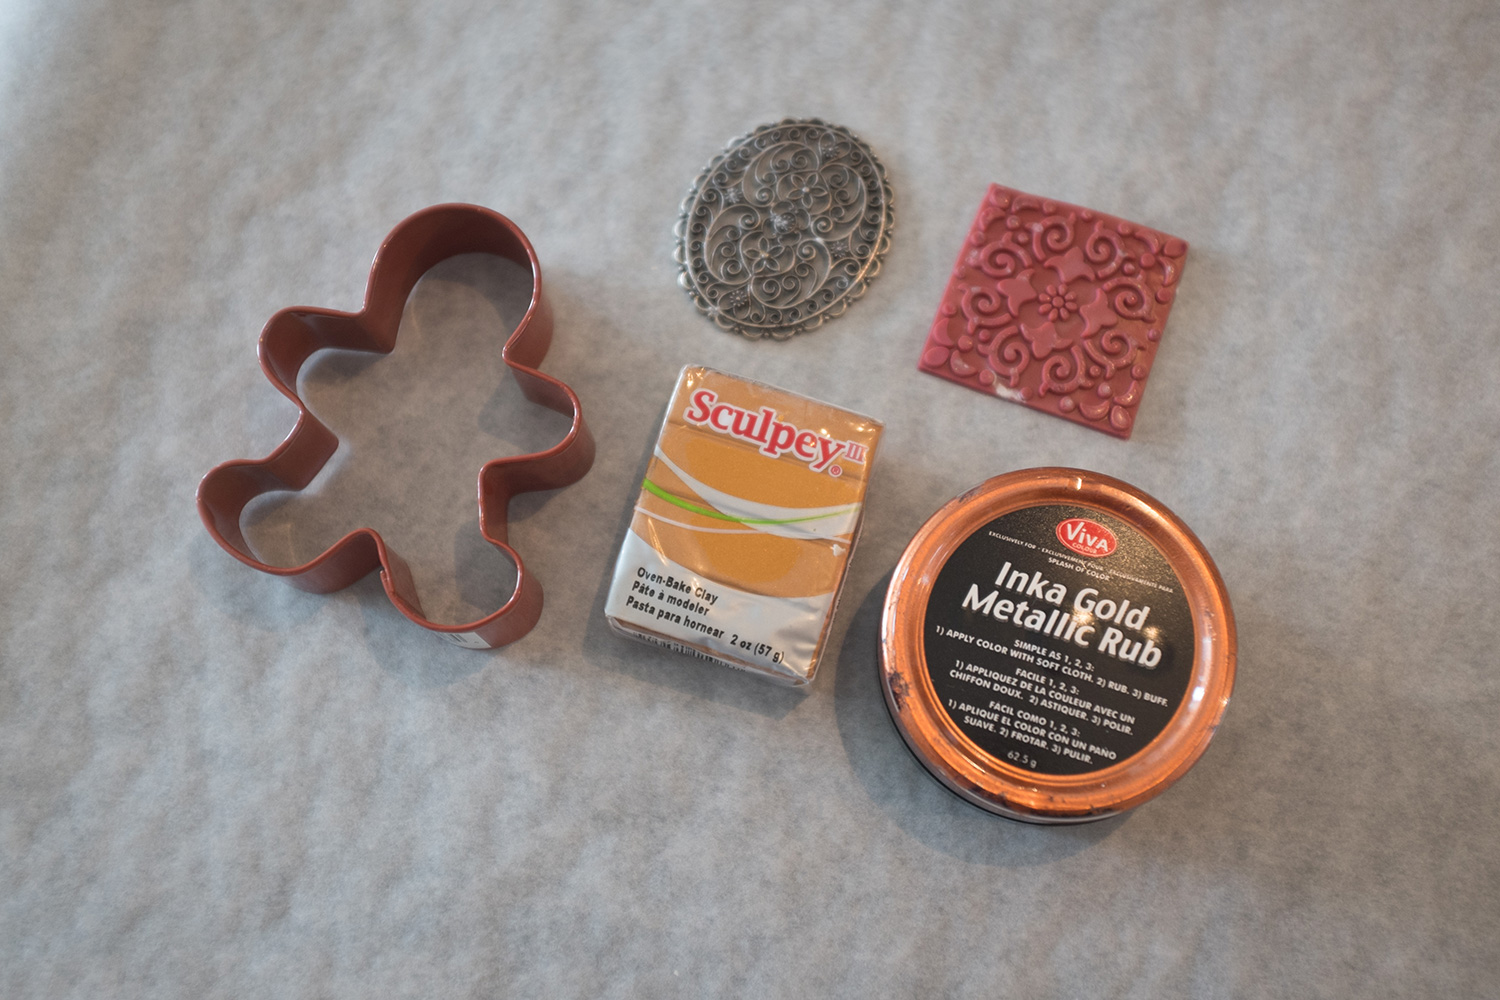
    DSCF0350

    You will need:

    • Contact (sticky) paper
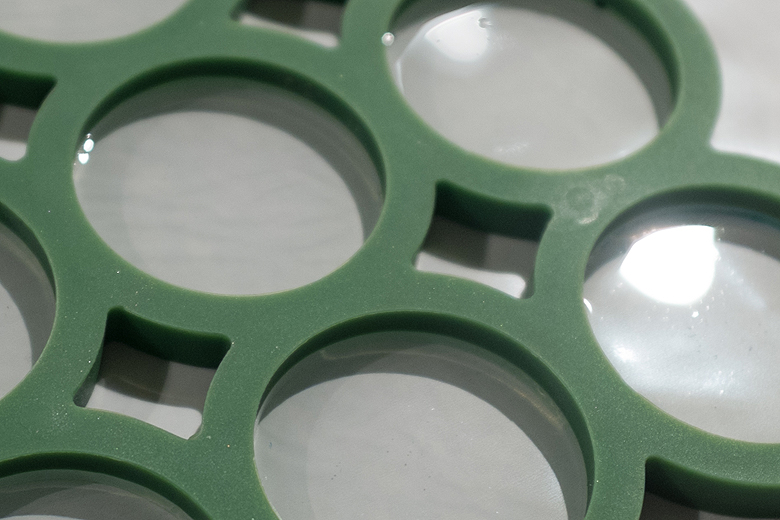
    • A silicone trivet (Click here to buy the one I’m using online)
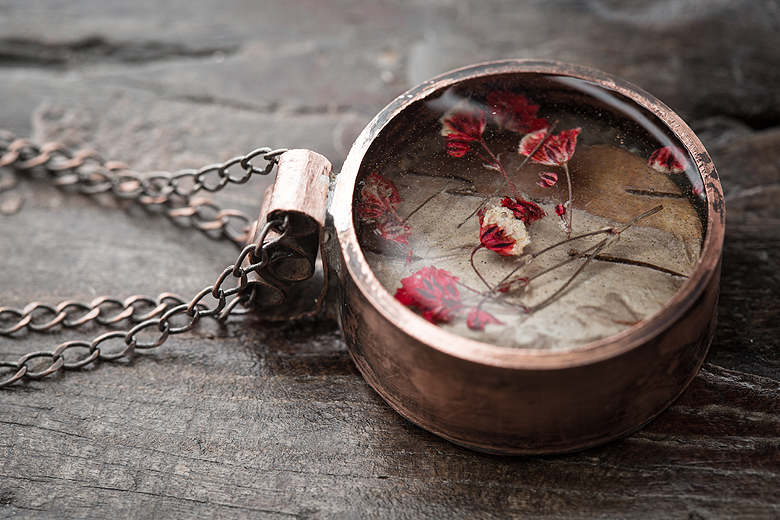
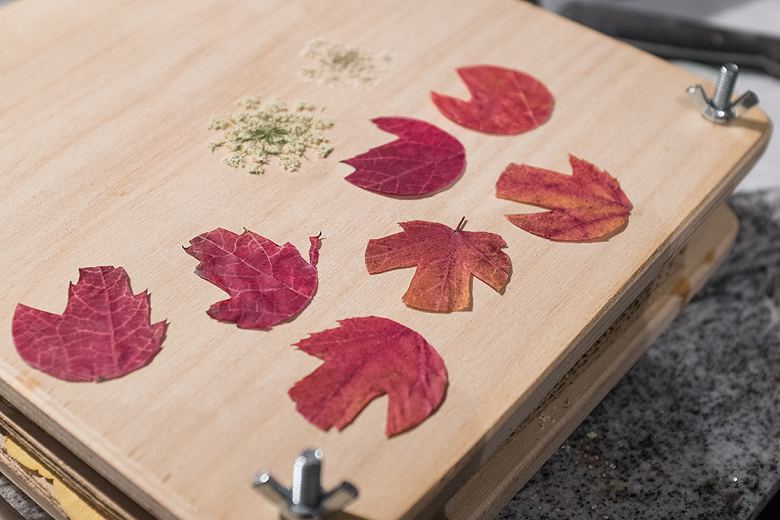
    • Dried Autumn leaves
    • Glitter
    • Ice Resin

    1. Peel the non-adhesive side off the contact paper and lay it down, sticky side up. Place the trivet down on the paper and press firmly to create a seal.

    DSCF0238

    2. Mix your resin and pour a 2mm thick layer of resin into every circle.

    DSCF0239

    3. While that layer is curing, cut out your autumn leaves into shapes that will fit into the trivet. To get the sizing right, I made a template out of paper by tracing the shape of the trivet and cutting it out.

    DSCF0240

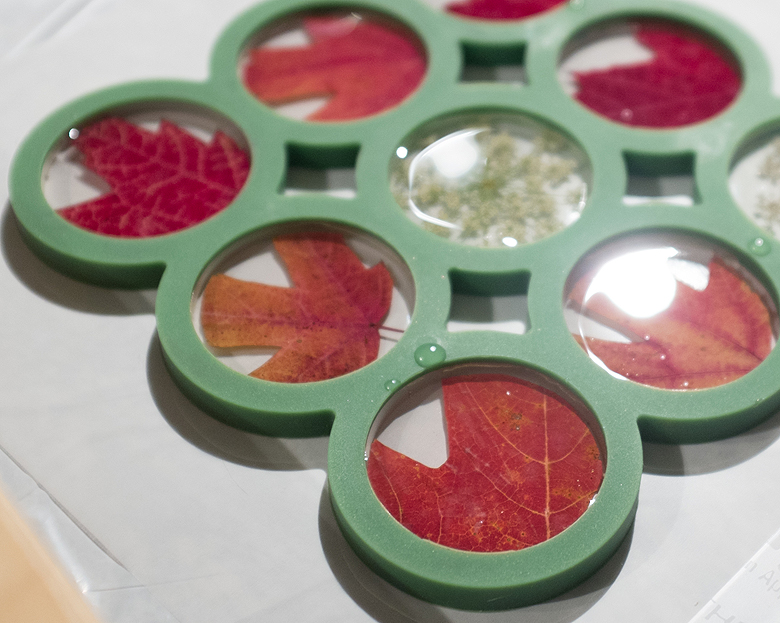
    4. When the first layer of resin is about 2-3 hours old, press the leaves gently down into each circle. Mix up another batch of resin and add another layer, just 1-2mm thick, to seal the leaves in place.

    DSCF0247

    5. This is the stage where you can add some glitter if you want to dress it up more. I like to pinch a bit of glitter between my fingers and sprinkle it on like salt, so I can control the amount I end up with and avoid pouring too much by accident.

    DSCF0248

    6. About 2-3 hours later I mixed up another fresh batch of resin and poured it into every circle, this time trying to get the resin level with the top of the trivet. I let this layer cure completely (72 hours).

    DSCF0250

    7. Here is the fun part! Pull off the trivet.

    DSCF0251

    8. Gently peel the paper off each of your shiny new ornaments.

    DSCF0346

    9. Use them however you like :) you can glue them onto gifts, wrap wire around them to hang, or drill holes in them to run string through. If you enjoyed this tutorial, and you’re curious about what can be done with resin, please check out my book, Resin Jewelry to learn more!

    DSCF0336

  • Faux Glazed Tree Ornaments

    tutorial-blank

    Continuing on with my Christmas theme, I wanted to share a tutorial on another method for making polymer clay ornaments with a completely different look-faux glazed pottery.  This is super simple, fun, and the results are so pretty!

    You will need:

    • Alcohol inks
    • Fimo liquid clay
    • White polymer clay (I’m using Sculpey)
    • A pasta machine, or acrylic roller
    • Parchment paper
    • Molds for making designs (I’m using soap molds and dollar store jewellery)
    • Cookie Cutters
    • Talcum Powder
    • A drinking straw

    1. Cover your work surface with parchment paper to protect it. Roll out your clay until you have an even sheet about 1/4 inch thick. To avoid distorting your piece, work directly on the surface you plan to bake it on if possible.

    3

    2. In a separate area, mix liquid Fimo clay with a few drops of alcohol ink. Leave this aside to give the alcohol a few minutes to evaporate.

    2

    3. Dust some talc powder onto your clay, to prevent the mold from sticking. Press your mold firmly into the clay. You want your recessed areas to be deep enough for the glaze to pool, but not so deep that you create thin, fragile areas in the clay.

    5

    4. Press your cookie cutter firmly onto the clay.

    6

    5. Remove the clay that’s outside of the cookie cutter, leaving your piece in place. You can use your drinking straw at this stage to creat a hole for hanging, simply press the straw down into the clay to remove a cylinder for a hole. My pieces do not show holes because I chose to drill them afterwards, which is also an option.

    8

    6. When you’ve made a few, bake according to the manufacturers instructions.

    9

    7. While your pieces are cooling, mix the ink into the liquid Fimo until you get a consistent colour.

    10

    8. Using your fingertips, scoop up some of the coloured liquor clay and smooth it onto your piece. The liquid will pool in the recess and be thinner on top,creating a pottery glaze look.

    11

    9. Re-bake your pieces for another 30 minutes, and set aside to cool before hanging.

    15

    These little pieces make great ornaments for your tree, and also make great gift tags, or even pendants :) For a more metallic look, try adding Jacquard Pearl EX powder to the liquid clay instead of alcohol ink, there are tons of possibilities!

  • Gingerbread Tree Ornament Tutorial

    1

    Today I wanted to share a super simple technique for producing gingerbread men tree ornaments! Tito and I will be giving these to our friends as stocking stuffers this Christmas, but they also make very cute gift tags.

    You will need:

    • Polymer clay (I’m using Sculpey III, colour ‘gold’)*
    • Talcum powder
    • Cookie cutters
    • Inka Gold Metallic Rub (optional)
    • Acrylic Ink, and a small paintbrush
    • Something for making impressions in the clay (I’m using soap molds and dollar store jewellery)
    • Either a pasta machine or an acrylic roller to roll out the clay
    • Resin (optional)
    • Drinking straw
    • Wax paper

    *A quick note on polymer clays:

    Sculpey is more brittle than fimo when cured. Fimo is stiffer and harder to work with when not cured. I prefer Sculpey, but to add strength and gloss to my pieces I add a coat of resin at the end. If you are skipping the resin stage, I recommend making your gingerbread pieces at least a quarter inch thick to make sure they won’t break easily.

    1

    1. Protect your working surface with a sheet of wax paper. Roll out a length of clay, larger than your cookie cutter

    2

    2. Dust some talc powder on the clay. This will prevent your molds from sticking.

    3

    3. Use your molds to make impressions in the clay. The impressions need to be deep enough to allow ink to pool in them, but not so deep that they create thin, fragile areas in your clay.

    4

    4. Press your cookie cutter down and remove the clay outside of the cutter. If possible, remove the cutter without peeling the clay away from the working surface, to minimize distortion. If you are skipping the resin stage, use your drinking straw as a punch to create a hole for hanging. If you are using resin, I prefer to wait until the piece is cured and drill the holes instead.

    5

    5. I like to pull my entire wax sheet onto a pizza stone for baking, but you can also use a cookie sheet. Try to minimize handling the pieces so they don’t distort.

    7

    6. Once your pieces are cured, and dry, paint a thin coat of black acrylic ink onto the entire piece. Give the ink at least 15 minutes to dry.

    8

    9

    7. Using a damp paper towel, wipe off the excess ink, leaving ink pooled in the recessed areas of your design.

    10

    11

    8. These look lovely just the way they are, but if you wish to take it further, open up the Inka Gold Metallic Rub and, using your fingers, gently rub the metallic finish onto your piece. It takes very little to cover a large area.

    12

    13

    9. Let the metallic rub lay undisturbed for a few hours before hanging. If you wish to add a coat of resin, this is the time to do it! Resin will protect your design, add strength to the final piece and create a lovely glossy finish.

    10. Once your piece is completely cured, run a piece of ribbon, yarn or string through to complete! Give them away this Christmas, or hang them on your tree :)

    00_start

    00_hanging

  • Cast on Cast off – Fiber shopping in St. John’s

    Of the grand plans that Rayna and I had made (fiber touring through every town we drove through, which would have meant Montreal, Quebec City, Moncton, Edmunston, Sydney, and St. John’s) we only managed to get in one store, on the second-to-last day of the trip. Crazy! 

    Cast on Cast off is an adorable little yarn store in St. John’s, and though I wasn’t there for long I felt confident that Rayna was not stuck in a place that, for all it’s loveliness, was going to leave her stranded in a sea of 100% acrylics. The selection is very awesome, and the store has all kinds of cute details.

    DSCF0174

    This guy had a name, and I’ve totally forgotten it, but isn’t it cute?

    DSCF0164

    I’m fairly confident that this was Reggie.

    DSCF0167

    *Drool*.

    DSCF0169

    My purchases: 2 self striping sock yarns (one for me, one for Tito), a gift skein from the local Indie dyer and one skein of Sweet Fiber, which I had never used before and now officially rocks my world.

    IMG_8021

    And this is what’s become of that skein so far :) Hopefully an FO shot is coming soon!

    Pattern: Grove by Jared Flood.

  • Stained Glass

    I”m sort of in between things today, so I’ll leave you with a shot of my current spinning WIP :) This is ‘Stained Glass’ by Julie Spins. It’s slightly felted, which makes it a tough spin, but the colours more than make up for it!

    PS- Apparently the thing to do with sales this weekend is to let them go until ‘Cyber Monday’ so the Resin Jewelry book is on sale til then!

    PPS: I hope everyone had a wonderful Thanksgiving!

    DSCF0227

  • Resin Jewelry Black Friday Sale

    I’ve received a few emails asking if I would consider putting the Resin Jewelry book on sale for Black Friday, here are the details!

    From 8:30am EST until 10:30 EST tomorrow, the e-book will be $15 ($10 off the regular price). If you prefer a printed book, it will be on sale for $28.95 ($6 off the regular price). Read on for purchase links and more information on the book, including project photos and a table of contents :)

    promo2

    book_etsybook_craftsybook_blurb

    DSCF0649

    Create stunning jewelry and keepsakes from leaves, paper, fabric, or virtually any other material you can imagine. Jeweler’s grade resin is a fun, versatile compound that cures to a clear and durable finish, offering an ideal medium for preserving everything from photos to flowers.

    Resin Jewelry ©Shireen Nadir 2014

    Featuring step-by-step photography, and detailed written directions, Resin Jewelry, 2nd Edition is a comprehensive guide to working with resin to create one-of-a-kind pieces you will want to keep forever, or share as unique and personal gifts. This edition expands on the knowledge of the original book with these exciting additions:

    • The use of pigments to create a number of new effects, including enamel and faux opal
    • How to pour, sand, and finish a resin bangle
    • How to use a vacuum chamber for perfect, bubble-free castings

    Resin Jewelry ©Shireen Nadir 2014

    Through 16 progressively challenging do-it-yourself projects, you will quickly build skill and confidence while creating beautiful pieces of jewelry. A further 18 pieces are explained using the skills you learn along the way, providing additional opportunities to practice and refine your technique.

    Resin Jewelry ©Shireen Nadir 2014

    Each page is filled with beautiful photography to excite your imagination and inspire you to take your skills to the next level. Troubleshooting, tips, and tricks are included to help you get the best results.

    Resin Jewelry ©Shireen Nadir 2014

    Whatever it is you want to create, no matter the material you want to encapsulate, this book is an invaluable companion to anyone who wants to make beautiful resin pieces that will last a lifetime.

    Resin Jewelry ©Shireen Nadir 2014

    Here are some of the other great things artists have had to say about Resin Jewelry

    “I must say that I am blown away at the detail you go into for understanding the processes and the beautifully colorful step by step instructions for how to attain an amazing finished result. You answer my immediate questions within the first five pages and then “wow” me with the projects and finesse my mind around all of those mysterious nuances that left me in the dark before looking at your book. This is more than a book; it is a work of art. Two thumbs up. Thank you very much!!
    ~Susan

    “Your book is one of the best tutorials I’ve ever seen, so I can’t express enough how happy I am to see there’s a second edition coming. More breathtaking pictures and more mind blowing tips, hurray!”
    ~Karolina

    “The only book on resin I have seen that covers how to prepare organic material for incorporating into resin jewellery. A great resource.”
    ~Rosemary

    “I love the pics you have posted and am so eager to see this 2nd edition! I am waiting eagerly – knowing there are some really good things to come!! It’s like Christmas in September!!”
    ~Aims

    “Thank you so much for such a wonderful book, I absolutely love it!!!!”
    ~TP

    Resin Jewelry

    Table of Contents:

    • 4 Intro
    • 5 Where to get supplies
    • 6 Preserving materials
    • 7 Preserving materials – Leaves
    • 8-12 Preserving materials – Flowers
    • 13 Preserving materials – Paper and photographs
    • 13 Preserving materials – Other organic material
    • 14 Preparing your materials
    • 15 Working with resin-Mixing
    • 16-17 Working with resin-Using a Vacuum Chamber
    • 18-19 Working with resin-Pouring and Doming
    • 20-21 Attaching a Bail
    • 22 Projects:
    • 22-23 Project 1: Getting your feet wet – Basic Resin Pendant
    • 24-25 Project 2: Working with resin molds – Ice Cube Pendant
    • 26-27 Project 3: Using a sealant to preserve elements – Washi Earrings
    • 28-29 Project 4: Using Fabric in Resin – The Lingerie Bangle
    • 30-31 Project 5: Using Printed Transparencies – The Filigree Bangle
    • 32-33 Project 6: Layering Elements in the Resin – I ♥Autumn Ring
    • 34-37 Project 7: Working with open backed bezels – Transparent Pendant
    • 38-39 Project 8: Using a Spherical Mold – The Jungle Pendant
    • 40-43 Project 9: Using Silicon Texture Molds – The Wrought-Iron Pendant
    • 44-45 Project 10: Using Pigments 1 – The Faux Enamel Bracelet
    • 46-49 Project 11: Using Pigments 2 – The Faux Opal Pendant
    • 50-51 Project 12: Using Pigments 3 – The Cherry Blossom Pendant
    • 52-53 Project 13: Using Pigments 4 – White Resin Lace Pendant
    • 54-55 Project 14: Using Pigments 5 – the ‘Stash Buster’ Pendant
    • 56 Bonus Project: The Queen Anne’s Lace Spherical Pendant
    • 57 Bonus Project: Preserving an Entire Dandelion Head
    • 58-65 Inspiration gallery and mini project pages
    • 66-67 Troubleshooting tips
  • Brigus South

    3V8A0457

    Back to Newfoundland for a few more pics – These are from the little village of Brigus South.

    3V8A0463

    There are 2 things about Brigus South that I found especially charming. The first thing was this odd little group of birds.

    3V8A0359

    The Goose (note the capital ‘G’) appears to be the Boss. Everywhere s(he?) went, this little crowd of ducks would follow. It was super cute, and, much like Newfoundlanders, the birds were incredibly, (and, to city folk like us, oddly) friendly. Domesticated maybe?

    3V8A0352

    The other charming thing was the graveyard. The cemetery appears to go back at least to the 1700’s, but instead of traditional markers there was only one cross marking a grave, a large cross that was a war memorial, and the rest of the graves were marked simply with pieces of the headland wedged into the ground.

    3V8A04423V8A0449 3V8A0452

    This was the headland where we guessed the headstones had come from. It has a certain charm, to be laid to rest in such a beautiful place, with a piece of the cliff as your marker, don’t you think?

    3V8A0496 3V8A0486

    Only a few more Newfoundland photos to get through, but I am also knitting, designing, resining and spinning, so look for the return of the crafty stuff soon!

  • Queen Anne’s Lace in Handmade Bezels

    DSCF0211

    I thought I might take a break from photos of Newfoundland to show off some of my latest resin work. I harvested a lot of Queen Anne’s lace before their season was over, and kept them preserved.

    DSCF0224

    Last weekend Tito made a few bezels for me, and I decided to fill them all with these simple, gorgeous flowers.

    DSCF0220

    The pendants are poured in 3 stages, and open on both sides to allow the light to shine though. I cover off this technique in my resin jewellery book if you’re curious, or looking to make your own!

    DSCF0212

    I think I’ll be whipping a few of these off for Christmas gifts, maybe it’s time to try poinsettias!

  • Pouch Cove

    It’s pronounced ‘Pooch Cove’ and it is said that they are the “first to see the sun” rise in North America. It’s also the town where Rayna was born, hence ‘First Light Handcrafts’ :)

    3V8A0017 3V8A0013 3V8A0114 3V8A0096 3V8A0085 3V8A0070 3V8A0055 3V8A0027 3V8A0024

  • Petty Harbour

    After leaving Cape Spear on our first morning in Newfoundland, Jerry drove us to Petty Harbour for a quick visit. Petty Harbour is the favourite place of our friend Chase, the inspiration behind the Petty Harbour Socks by Rayna and easily one of the prettiest places we got to see on the trip.

    From Wikipedia:

    The present town is approximately 200 years old, though the site has been continuously occupied since at least 1598, predating the arrival of the Mayflower and making it one of the oldest European settlements in North America.

    3V8A9258 3V8A9271 3V8A9296 3V8A9312 3V8A9314 3V8A9322 3V8A9330 3V8A9332 3V8A9254