
Tutorial – The Colour Shifting Scarf
By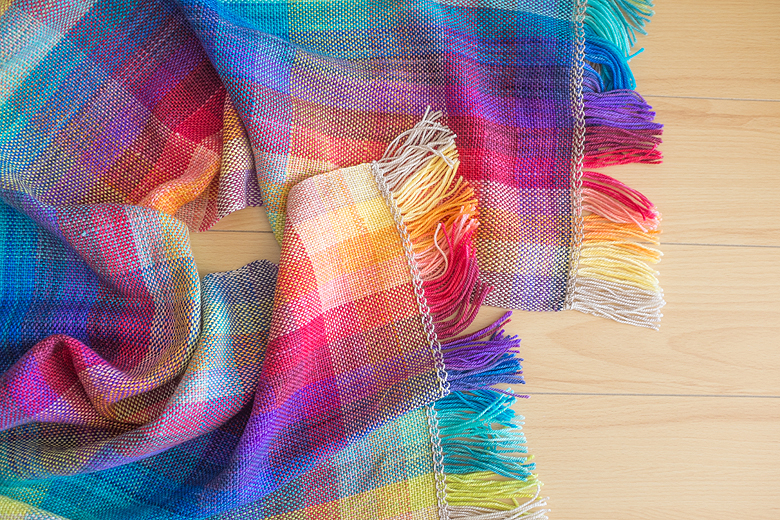
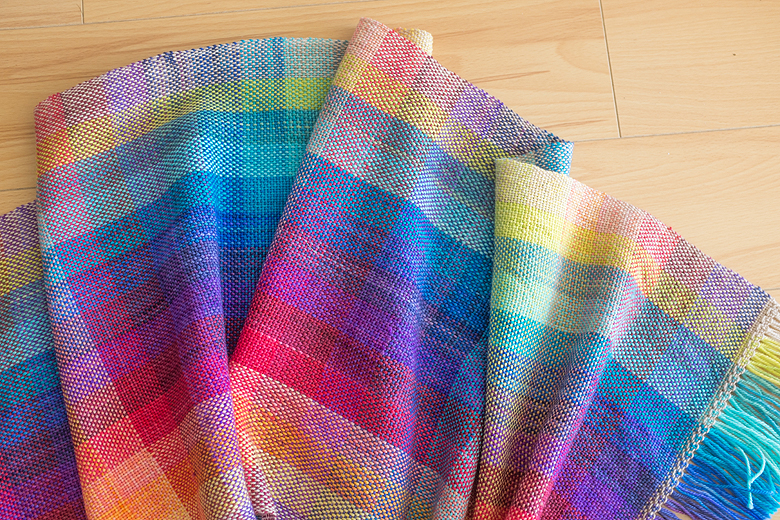
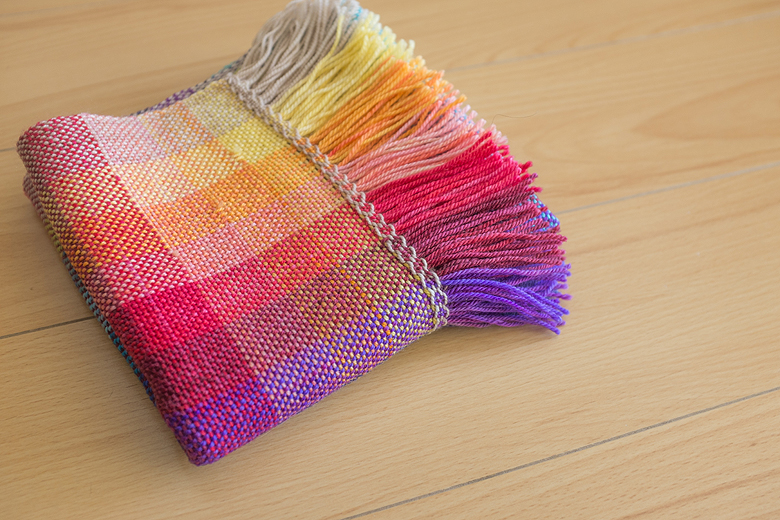
This winter has been super cold, grey and monochromatic. So when Tanis Fiber Arts came out with mini-sock yarn skeins I was inspired to weave a colourful rainbow scarf, to give myself a cheerful pop of colour on these grey days. Changing colours as often as I did can be a bit fiddly, but oh-my the results are worth it, this is the perfect grey day scarf!
In Newfoundland they say ‘There is no such thing as bad weather. There is only inappropriate clothing’. Well, it’s -40 out there today, that strange, cold place where celsius and fahrenheit say the same thing. I think that the spirit as well as the body needs to be armed against weather like this, and this scarf is the answer. 
You will need:
- 2 packs of Tanis Fiber Arts Mini Sock Yarn Skeins
- Optional: approximately 120 yards in a neutral colour (I’m using Koigu KPM, colour 2360)
- A rigid heddle loom (I am using the Ashford 24” knitters loom)
- A 12-dent heddle (Better for sock weight, but work with what you’ve got)
- A boat shuttle with extra bobbins*
- Tapestry needle
- Scissors
*Most looms come with stick shuttles, but because you’ll be changing colours frequently, a boat shuttle with enough extra bobbins to give you one bobbin per colour is much easier. Also, a boat shuttle gives you a smoother pass through the shed, and because the bobbin spins freely it doesn’t do that awful snag thing when you’ve passed your stick shuttle though without a long enough length of yarn. If you enjoy weaving, it’s a worthwhile investment.
**//EDIT//**
I made another one of these later on, and I made a few tweaks that really improved the design. I used a 10-dent heddle instead of 12 which greatly improved the drape and allowed me to warp to 80”, which meant that after I cut off the loom waste Tanis was left with a more generous sized scarf at 65” long and about 15” wide. Because I had fewer dents to work with, I warped 6 threads of each colour instead of 7, and when weaving I wove 12 picks of each colour instead of 14. She loved it :)
Click here for the hemstitching tutorial I wrote while weaving this scarf.
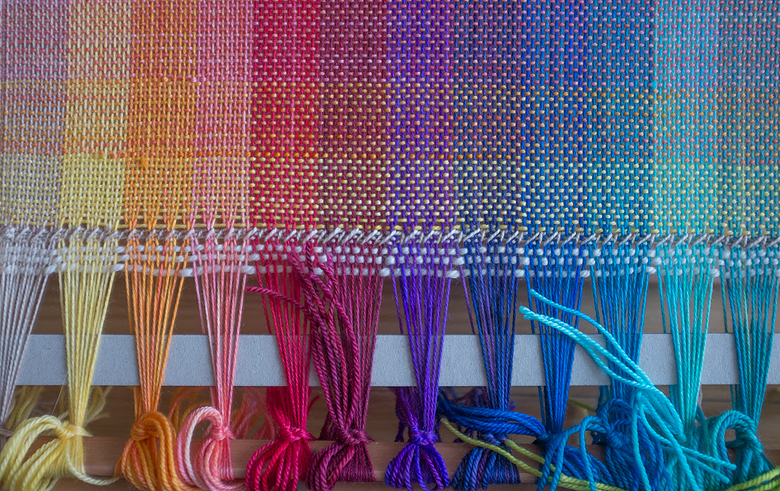
1. Open up the packs of yarn. Enjoy how ridiculously happy it makes you.
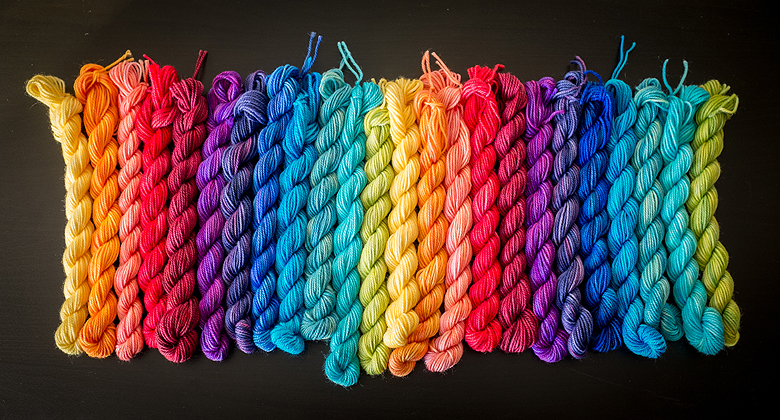
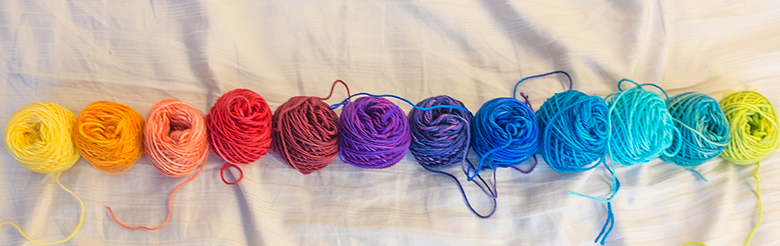
2. Wind up the yarn into little balls and work out the order that you’d like your colours to appear in the warp. I went for something close to a natural spectrum. You will use one ball of each colour for your warp, and one ball of each colour for the weft, so keep the 2 sets separated.
3. Do some math. You can change this to suite your preferences, but mine looked like this:
- Intended scarf length: 60 inches
- Intended scarf width: 15 inches
- Estimated loom waste: 18 inches
- Total warp length: 78”
Because a warp is under tension, pieces often seem shorter than you’re expecting when they get cut off. To account for this, I gave myself a buffer of 7”, increasing my total distance between the back apron rod of the loom and the warping peg to 85”.
Each mini skein is approximately 34 yards. With an 85” warp, this should let you fill about 7 slots of the heddle with each colour (remember, that means 14 warp ends per colour).
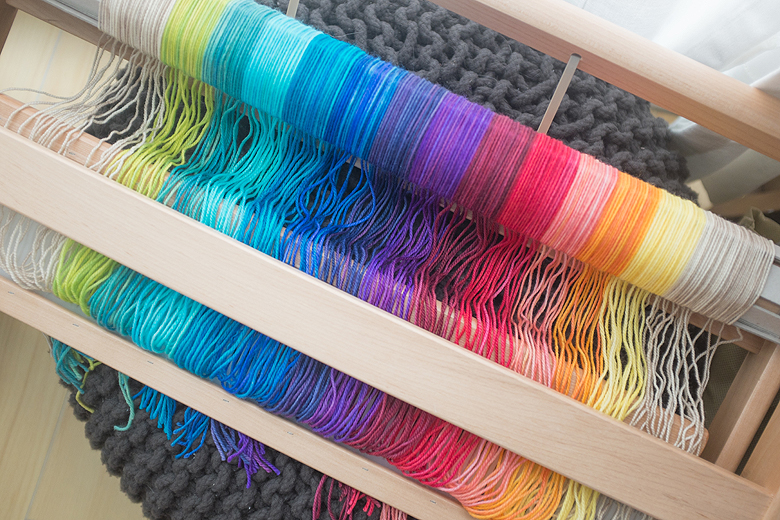
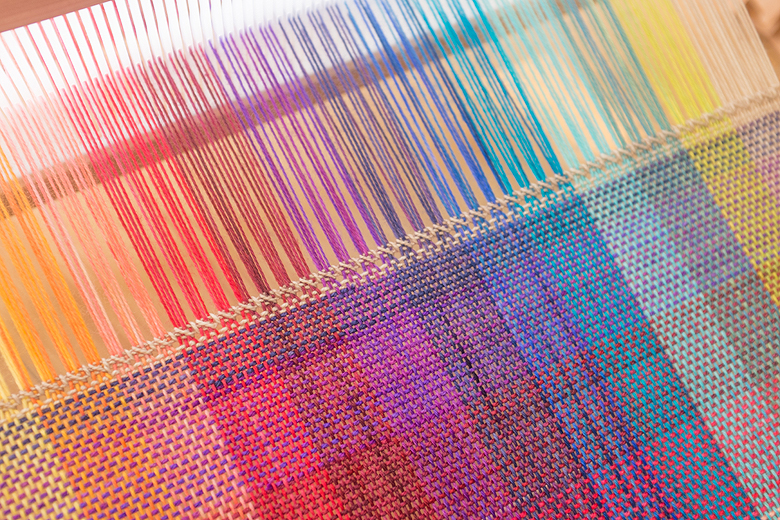
4. I chose to frame my scarf with a neutral colour, which has the added benefit of making it wider. This is optional, but if you choose to do the same thing then begin warping your loom with the neutral colour. I warped 8 threads of the neutral, and then proceeded to the first colour in my rainbow. Work your way across the loom, warping the colours in the order you set out in step 2, filling 7 slots with each colour.
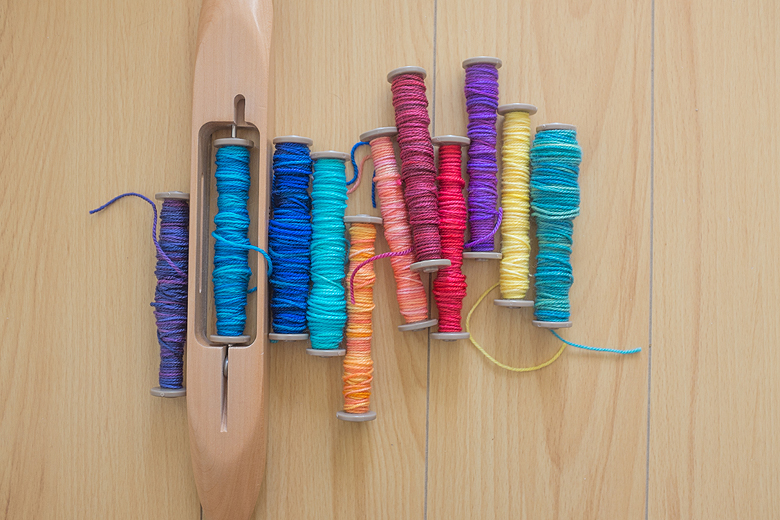
5. Now grab the other set of yarn cakes. Pre-wind your bobbins, one with each colour.
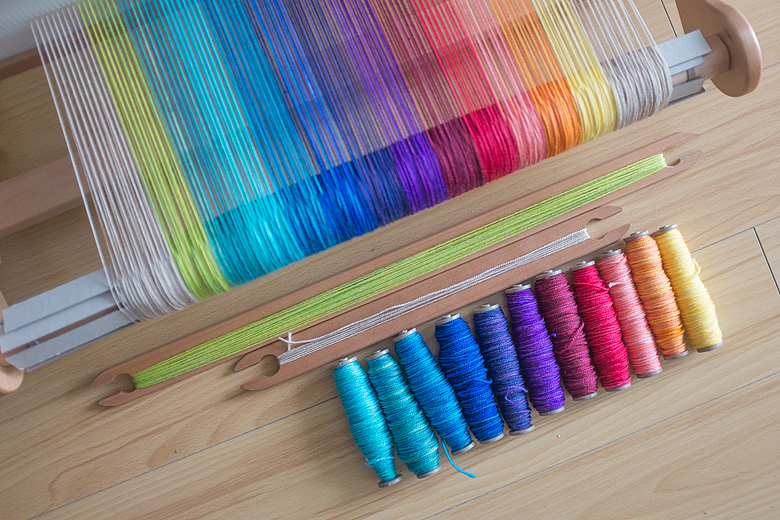
6. Begin weaving. After you weave the leader, weave a few picks with the neutral colour and leave a tail at least 4 times the width of your piece. (You will use this to hemstitch the piece after weaving a few inches. This is my favourite hemstitching tutorial). Starting with the first colour in your rainbow, weave 14 picks. Using the visual guide below, change to the next colour, staying in the order you set out in step 2.
Tip: Changing colours: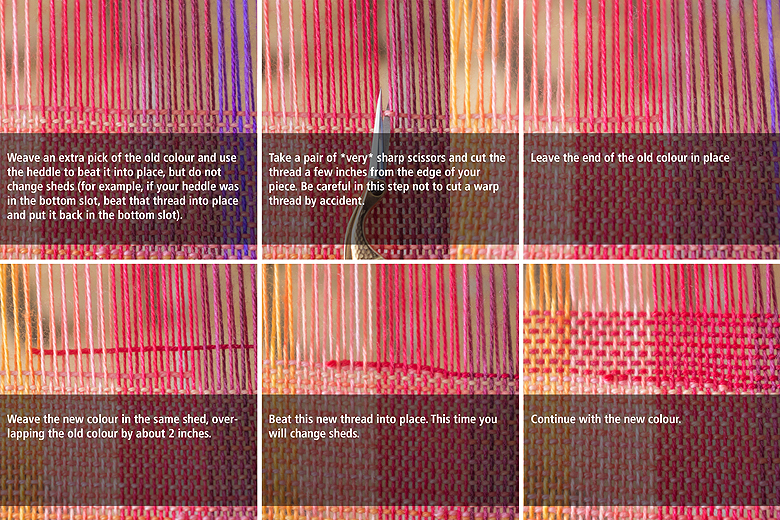
7. When you get to your last colour, simply start again with the first colour. Continue weaving to the end of your warp. End by weaving a few picks of the neutral colour and hemstitching. On my scarf, this meant 3 full repeats of my 12-colour rainbow, and a little less than half of a 4th repeat before I ran out of warp.
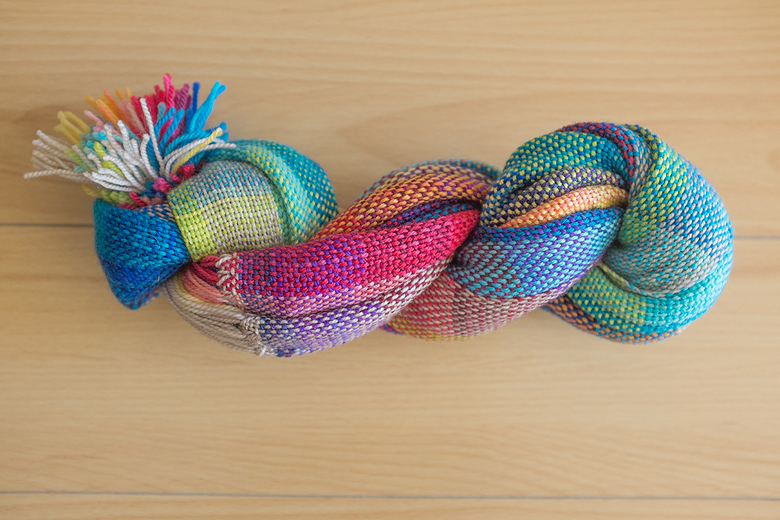
8. Cut the scarf off your loom, wet-block, trim your fringe and buffer both body and soul against Old Man Winter!


This is pretty and colourful Shireen!
LikeLike
Sent from my iPad Happy trails Joan
LikeLike
Hi Shireen, wonderful scarf I love your hem stich could you share. Miles of smiles.
LikeLike
Hello Shireen, fabulous scarf, love Tanis Yarn amazing colours, could you share your hemming technique just love it. Miles of smiles. ♥
LikeLike
Gorgeous! I don’t weave, but I’m tempted to get this yarn for something else- maybe a knitted scarf?
LikeLike
Wow! This is stunning.
LikeLike
Very colorful! Definitely what we need when the weather is not cooperating!
LikeLike
And now I know what to do with those two sets of rainbow dk mini skeins from Cephalopod Yarns….
LikeLike
OMG this is so beautiful!!!!!!!!
LikeLike
Wow this is really nice (original) can we take a class somewhere for this?
LikeLike
this is just stunning. I am in awe.
LikeLike
[…] colour shifting scarf has been featured on Tanis’ blog today, check it […]
LikeLike
Really gorgeous!! Thanks for the wonderful tutorial. Can I ask what kind of boat shuttle you use? I’ve been weaving for years but never thought to get one.
LikeLike
Thank you! I have an Ashford, and I think I’ve got the 11.5″ shuttle. I also bought a 10-pack of extra bobbins. Hope that helps!
LikeLike
Love, love, love this! Thank you for creating this and posting instructions!
LikeLike
The scarf is beautiful. I am about to take a weaving class with a Cricket 15″ loom. Once I learn how and the terminology, would I be able to make this scarf on this type of loom? If so, I want to order theTFA yarn. Thanks for your help.
Lyn
LikeLike
Hi Lynn
You could definitely do something similar – my loom is 24″ wide, so that gave me the ability to make a wider scarf, but you could certainly make do with a 15″ loom. My advice is, if you really enjoy the class and you think you’ll make use of it, see if there is an option to purchase a wider loom, you won’t regret the extra flexibility it gives you :)
The second thing that might be different is your heddle size. Most looms come with 7.5 dent heddles. If you are a knitter, this is appropriate for working with DK and worsted weight yarns. Tanis’ mini skeins are sock yarn, and while I have totally done many successful sock yarn projects on my 7.5 dent heddle, you will get a looser weave than if you have access to a 10 or 12-dent. However, it’s not a deal breaker, I’ve had great results with sock yarn on the 7.5.
Lastly, you will want to count the number of slots in your heddle and divide it by the 12 colours in her set. My math works out if you have at least 120 slots available, but on a 15″ cricket this number will be smaller.
I’m sure your scarf will work, and it will be gorgeous! Keep the above points in mind and feel free to write me again if you have any questions.
Best,
Shireen
LikeLike
Thank you so much. Hopefully after the class I will understand more of what you said. (I think I will print out what you said and bring it to the class so the teacher can further explain) Thank you again!!!
Lyn
LikeLike
Sounds good – have fun at the class!
LikeLike
Hi Shireen
I came across your tutorial while researching rigid heddle looms and I have to say that it gave me that last push I needed to purchase my loom! I am still trying to decide between the Schacht flip (25″) and the Ashford Knitters loom (28″) but I can’t seem to find the 24″ you are referring to. In their page the have 12″ 20″ and 28″, I would really appreciate it if you could point me in the right direction here and if you have any comments on either that a new weaver should consider.
cheers,
Flor
LikeLike
Hi Flor! Congratulations on your loom buying decision! I may have made a typo – I think I’ve got a 20″ loom, which I find is plenty for scarves and wraps, though I’m sure if you decide to spend the extra money on the 28″ you won’t regret it.
I am not familiar with the Schacht loom, but I know that both brands have fairly comprehensive collections in terms of different heddles and accessories that you can purchase to expand on your capabilities. I have nothing but good things to say about my Ashford, but 25″ is a really nice size and if the price is right I’d say go for it :)
Do feel free, as you experiment with the loom, to write again with any questions, I’m always happy to help a fellow weaver!
LikeLike
Thank you! I will definetly take you up on that! Especially when I work my way up to this tutorial!
LikeLike
[…] Click here for the hemstitching tutorial I wrote while weaving this scarf. Click here for the original tutorial on how to make this scarf. […]
LikeLike
I love reading this post as I have a ashford heddle loom. I noticed that you said you bought two of the sock yarn sets and that each mini skein was 34 yards. But on the Tanis website it says they are each 60 yard skeins. Did you end up needing two sets?
LikeLike
Thank you, just what i was looking for!
LikeLike
[…] Pinterest umsehen musst. Schaut mal bitte was es für wunderschöne Möglichkeiten gibt: Hier eine knallbunte Version inklusive bebilderter Anleitung. Zwei ganz edle graphisch klare Versionen hier und hier. Oder der […]
LikeLike
I’m taking a 6 week course in table loom weaving so have been googling to find a project to make. After all the patterns I have seen this is by far the most beautiful and I can’t wait to give it a go!!
LikeLike