
Resin Tree Ornament Tutorial
By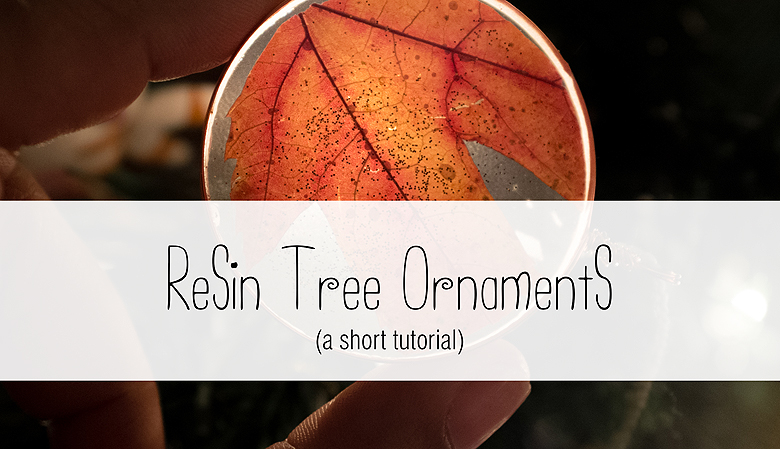
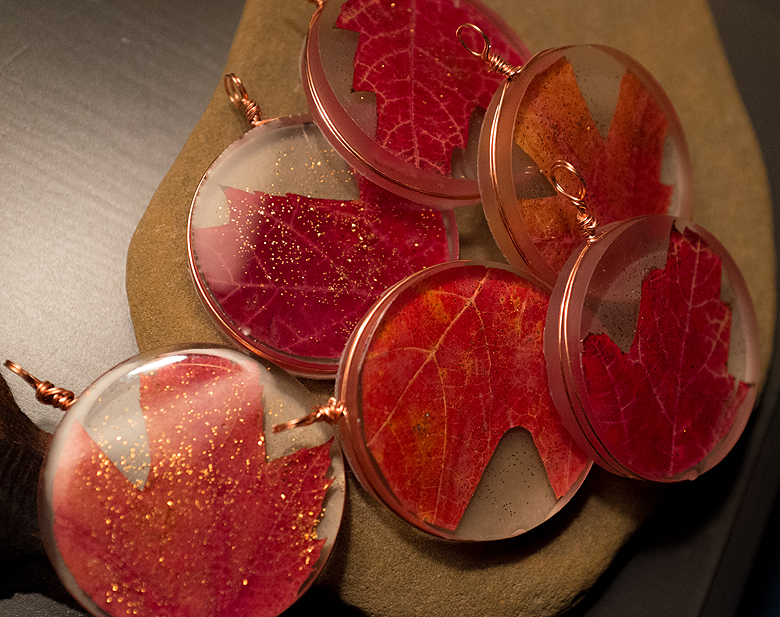
Of course, resin had to be an installment in my holiday-related crafting tutorials, and I honestly think they’re the prettiest ones yet (I’m biased though!). Tito and I made these for our vets, to thank them for the awesome care they have shown our diabetic kitty this year.
You will need:
- Contact (sticky) paper
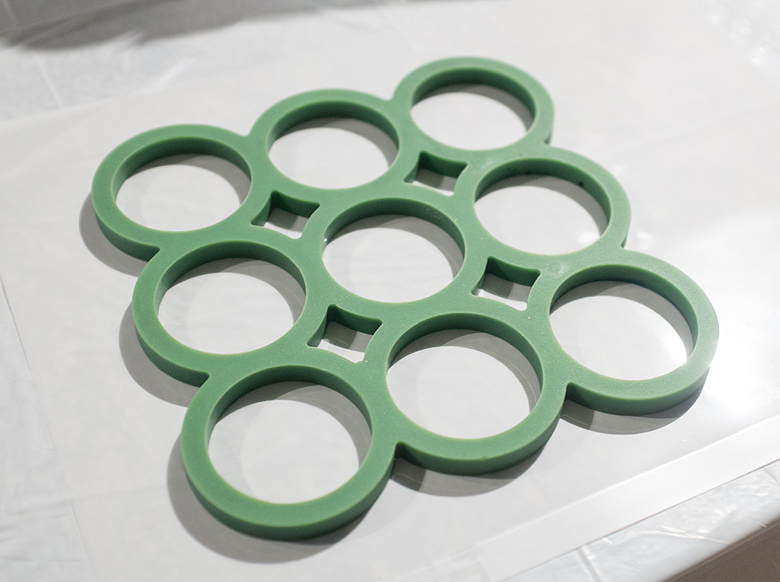
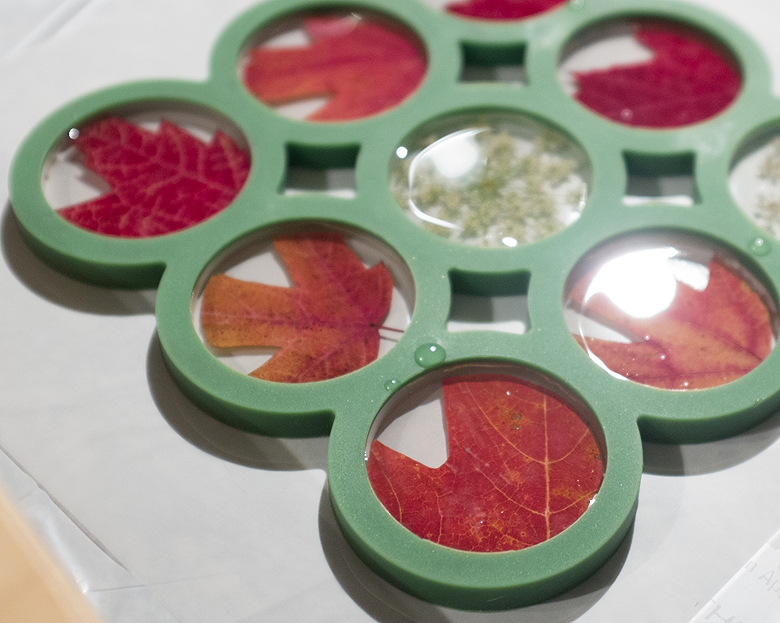
- A silicone trivet (Click here to buy the one I’m using online)
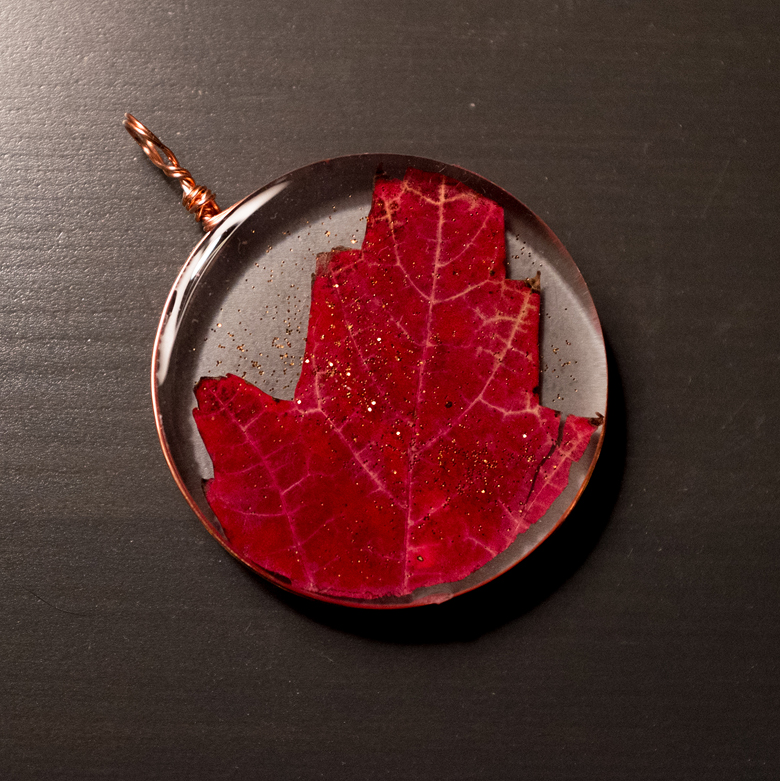
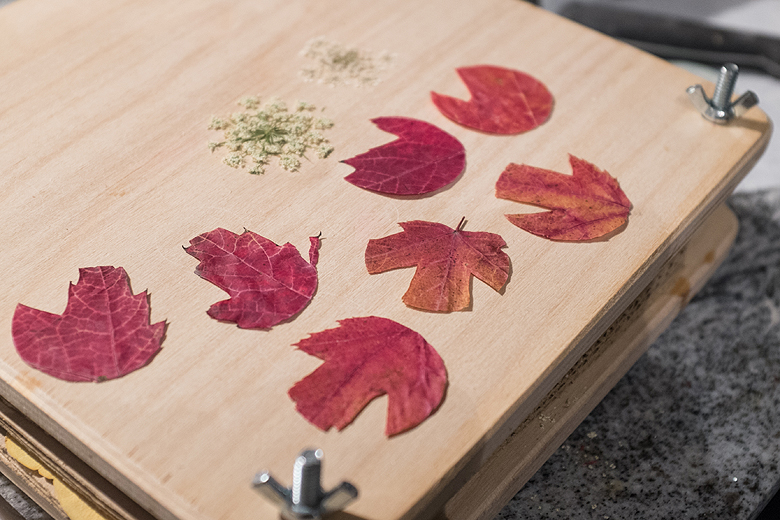
- Dried Autumn leaves
- Glitter
- Ice Resin
1. Peel the non-adhesive side off the contact paper and lay it down, sticky side up. Place the trivet down on the paper and press firmly to create a seal.
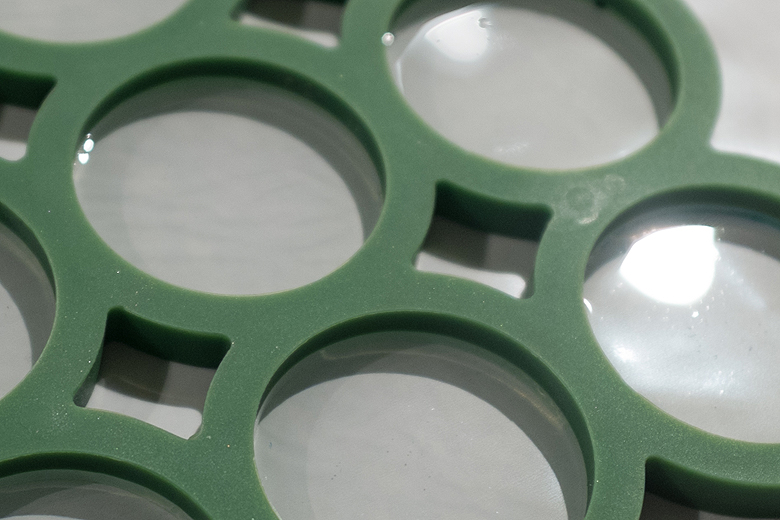
2. Mix your resin and pour a 2mm thick layer of resin into every circle.
3. While that layer is curing, cut out your autumn leaves into shapes that will fit into the trivet. To get the sizing right, I made a template out of paper by tracing the shape of the trivet and cutting it out.
4. When the first layer of resin is about 2-3 hours old, press the leaves gently down into each circle. Mix up another batch of resin and add another layer, just 1-2mm thick, to seal the leaves in place.
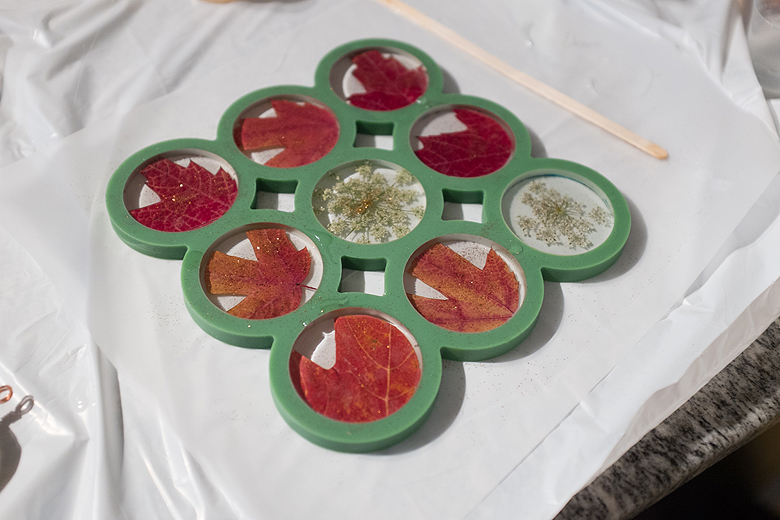
5. This is the stage where you can add some glitter if you want to dress it up more. I like to pinch a bit of glitter between my fingers and sprinkle it on like salt, so I can control the amount I end up with and avoid pouring too much by accident.

6. About 2-3 hours later I mixed up another fresh batch of resin and poured it into every circle, this time trying to get the resin level with the top of the trivet. I let this layer cure completely (72 hours).
7. Here is the fun part! Pull off the trivet.
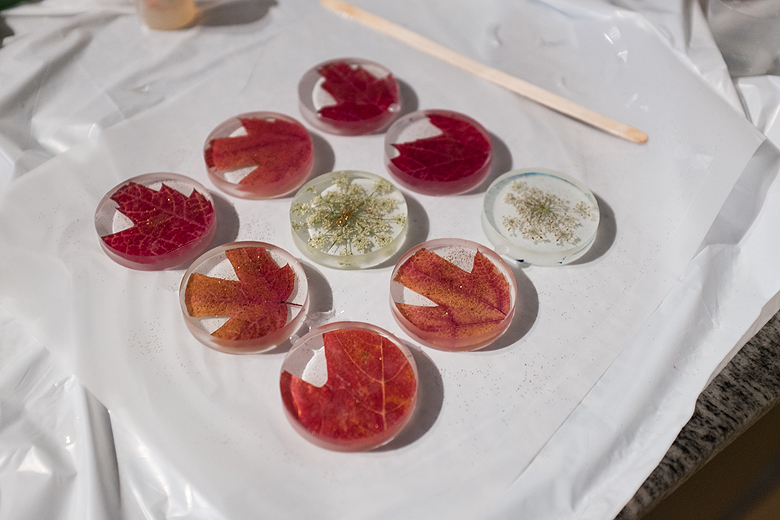
8. Gently peel the paper off each of your shiny new ornaments.
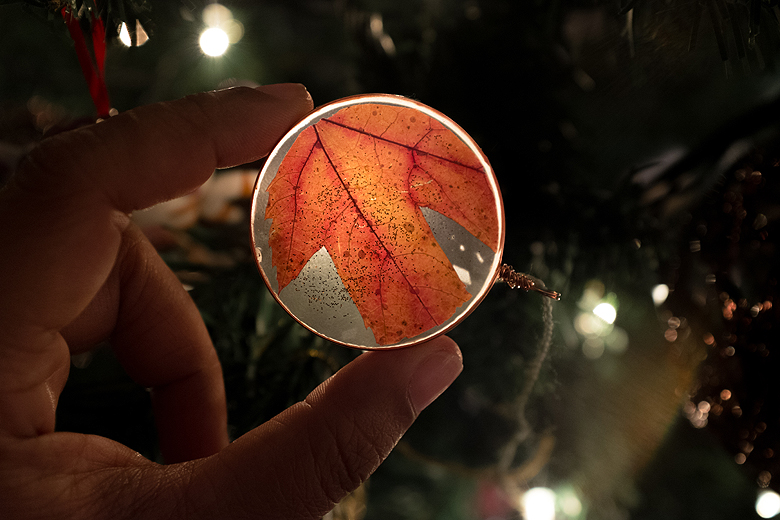
9. Use them however you like :) you can glue them onto gifts, wrap wire around them to hang, or drill holes in them to run string through. If you enjoyed this tutorial, and you’re curious about what can be done with resin, please check out my book, Resin Jewelry to learn more!

These ornaments are beautiful! :)
Keep up the great work!
XOXO,
Isabella
PS. I love your blog!!
LikeLike
I was a bit ‘meh’ about these (I prefer loads of glittery stuff over Christmas, rather than more natural things) until I saw the glitter, and then I did a ‘ooh, pretty’ :)
LikeLike
These are fabulous.
LikeLike
What a lovely idea–they turned out great! Thanks for the tutorial!
LikeLike
So very lovely… I’ve never worked with resin before, but have always loved the effects others have achieved. These make me very happy – thank you for the tutorial!
LikeLike
Thanks everyone ! I’m glad you enjoy them, and if you decide to give them a shot or you have any questions feel free to hit me up!
LikeLike
Beautiful tutorial. How do you make your resin? Do you buy the materials online? Sorry if you explained this somewhere on your blog, I haven’t read all posts. Thanks!
LikeLike
Hi Tammy – I am using a product called Ice Resin, which you can purchase in-store or online. Just google it :) Instructions on how to mix the resin are included with the kit :)
LikeLike
New to using resin- about how many ornaments will an 8oz bottle of Ice Resin make? Thanks!
LikeLike
Super tutorial guys! (no surprise there)!! Fabulous idea using the silicone mat! The Beading Gem just sent me here to have a look btw!! Nothing like sharing the joy of great artists with everyone! :0)
LikeLike
I never hearsd of a silicone trivet before. What a great idea!!
LikeLike
[…] image via The Blue Brick […]
LikeLike
[…] (Bron) […]
LikeLike
[…] ornaments Use resin to create permanent reminders of fall foliage. These glittering and gleaming leaf ornaments are versatile pieces; you can make jewelry using them, hang them on a wreath or tree, or use them […]
LikeLike
[…] this project, use this tutorial to create the resin leaves. In addition to making them ornaments, you can use superglue to attach […]
LikeLike