• Just a neat photo this morning :) It’s so cold in Toronto that Lake Ontario looked like it was steaming early this morning, at the horizon line the steam and the clouds were blending into each other. The inner harbour is completely frozen. It’s just lovely!

    ©Shireen Nadir 2013

  • This photo set is from our 2011 visit to Cathedral Grove, British Columbia. Cathedral grove, or MacMillan Provincial Park contains a 157 hectare stand of very old, very large Douglas-fir trees, including one that was over 300 years old when Christopher Columbus came to North America. It’s a very special place.

    The thing that amazed me most about my recent hyacinth project was that, sped up to my human hastiness, my plant seemed very much alive – and on a level that I don’t often think of. Imagine then, standing among these quiet giants that have stood and been silent witness to so much change.

    I wish I could communicate how we felt to the people in our government who control how Canada stewards our vast natural inheritance. I can’t imagine standing in a forest like this one and walking away with your heart unchanged.

    Cathedral Grove ©Shireen Nadir 2013

    Cathedral Grove ©Shireen Nadir 2013

    Cathedral Grove ©Shireen Nadir 2013

    Cathedral Grove ©Shireen Nadir 2013

    Cathedral Grove ©Shireen Nadir 2013

    Cathedral Grove ©Shireen Nadir 2013

    Cathedral Grove ©Shireen Nadir 2013

    Cathedral Grove ©Shireen Nadir 2013

    Cathedral Grove ©Shireen Nadir 2013

    Cathedral Grove ©Shireen Nadir 2013

    Cathedral Grove ©Shireen Nadir 2013

    Cathedral Grove ©Shireen Nadir 2013

  • Most photographers have heard about HDR (High Dynamic Range) Photography. There are lots of great sites that get into the technical nitty-gritty, but in a nutshell HDR photography is a way to even out the light in an image so you get something closer to what your eye perceived. Googling HDR photography will show you the range – from beautifully captured, realistic pieces to over-processed, over saturated, mind-numbingly terrible pieces.

    I’ve used Photomatix for a lot of my work, but increasingly I feel that even this delivers a result that looks too processed for me. So I present the Dummy Method of HDR – if you’ve got a copy of Photoshop (or even Photoshop Elements) you’re good to go.

    Here’s what you do: bracket your exposure, but rather than bracket them by the traditional 2-stops under, 2-stops over and 1 mid-range, examine your image and break it into different areas based on light. You can see an example below:

    HDR ©Shireen Nadir 2013

    Take your photos, as many as you need, based on your analysis of the shot. My shot analysis looked like this:

    • 1 shot for the great sky colour
    • 1 shot for the detail in the foreground sand and the rock
    • 1 shot for the reflection in the water by the rock

    Then (here is the dummy part) load them all up into Photoshop as separate layers in one document, grab yourself a big, soft eraser tool, set it to 30%-40% opacity and erase away the bits of every shot that you don’t need, building up the effect as you go (If you’re familiar with Photoshop you can use layer masks to non-destructively accomplish this bit instead). Here’s my result:

    HDR ©Shireen Nadir 2013

    And here are a few more:

    HDR ©Shireen Nadir 2013

    HDR ©Shireen Nadir 2013

    You can even do this in Photoshop Elements, it’s got layers and an eraser and that’s really all you need :) I’ve been shooting HDR for about 7 years, and I honestly believe that, simple as it is, this gives me the best, most consistent results and the greatest control over the final product.


  • Inglenook Fibers is a hand dyed fiber studio located just outside of Boston, and it’s one of the many ways that the Sisters of the Holy Nativity Convent are totally self supporting through craft. A few weeks ago one of my pen pals there, Mother Macrina, wrote to me and asked if she could use this photo of the aurora Tito and I shot last fall as the inspiration for dying a bat of roving:

    Aurora Roving ©Shireen Nadir 2013

    And just after Christmas, this lovely thing arrived in the mail.

    Aurora Roving ©Shireen Nadir 2013

    I am blown away – the colours, the transitions, they’re perfect! It’s like I’m standing there all over again staring at the sky, working the camera and screaming “I’ve got it!” to Tito as we admired the light show.

    Aurora Roving ©Shireen Nadir 2013

    This bat is destined to become something lovely. I’ve asked my spinning instructor to help me spin it up, or possibly just to spin it for me so it doesn’t suffer from my junior spinning skills. I’m going to try and keep the colours and transitions intact just as they are and knit an aurora scarf. Then, when I finally make it to the arctic, I will WEAR that lovely scarf as I’m shooting. It will be perfect!

    Aurora Roving ©Shireen Nadir 2013

    You can check out the Etsy site for Inglenook Fibers here :)

    Aurora Roving ©Shireen Nadir 2013

  • I’ve got the time lapse bug again, and last weekend I spotted the perfect thing for my next experiment – a potted hyacinth. Apparently store bought plants are ‘forced’ to bloom by freezing and then thawing the bulb before sending it to the store. It sounds mean, if you think about it, but it made this fast blooming plant the perfect subject for a timelapse.

    I placed the plant in a lightbox with flanking lights to try and ensure consistent lighting throughout the shooting process (just about 36 hours were recorded). As you can see, the results were lovely, but imperfect lighting-wise, and I’ll probably shoot in the dark next time so I can control the light completely. I thought about it… but didn’t want to deny the plant sunlight. Here is the set up:

    IMG_2125

    The lightbox, the camera and the fill lamps…

    IMG_2131

    …And the enormous number of things I clustered around the tripod to keep my kitties from rubbing against it. **Note to self** – When Tito pointed out that all I had done was make the tripod a far more appealing thing to explore than it would have been if I’d left it alone… he was right.

    Room for improvement – but definitely on the right track. BBC, here I come! =D


  • Angus and Cleo © Shireen Nadir 2013

    I apologize for the image heavy post – and remember I’m a complete rookie at this, so I’m sure there are lots of things I could have done better – but here we go!

    ©Shireen Nadir 2013

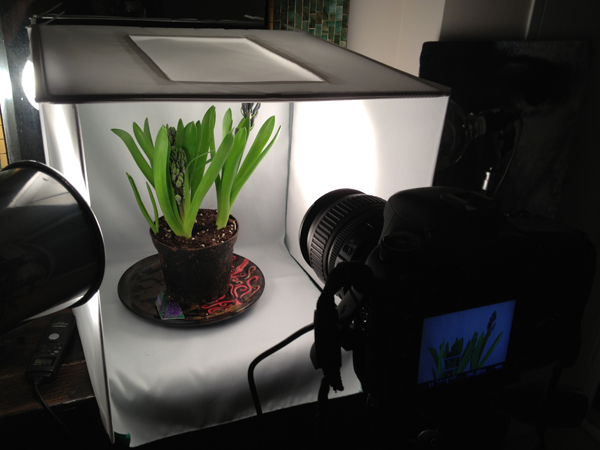
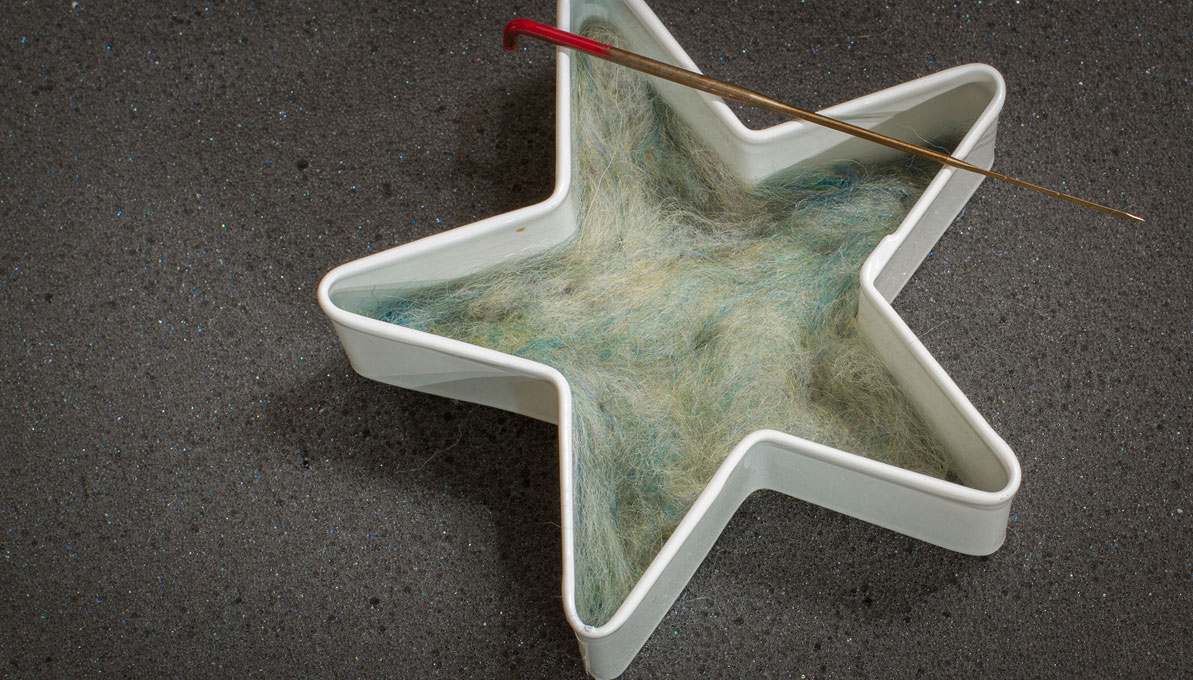
    I got my colours together (obvious, right?) a foam felting board and all my needles.

    ©Shireen Nadir 2013

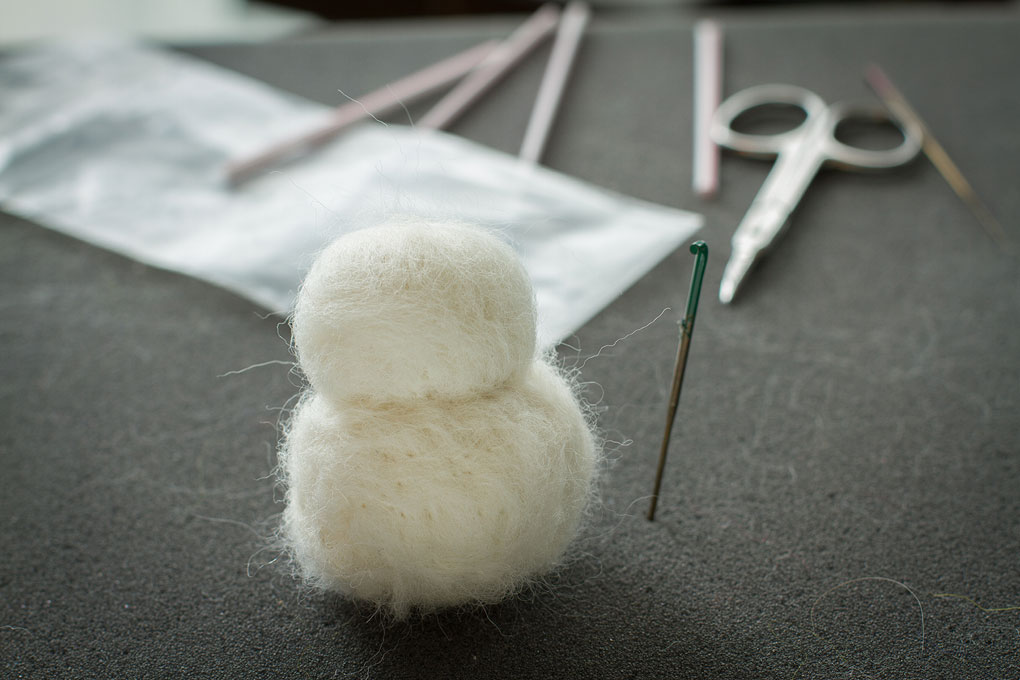
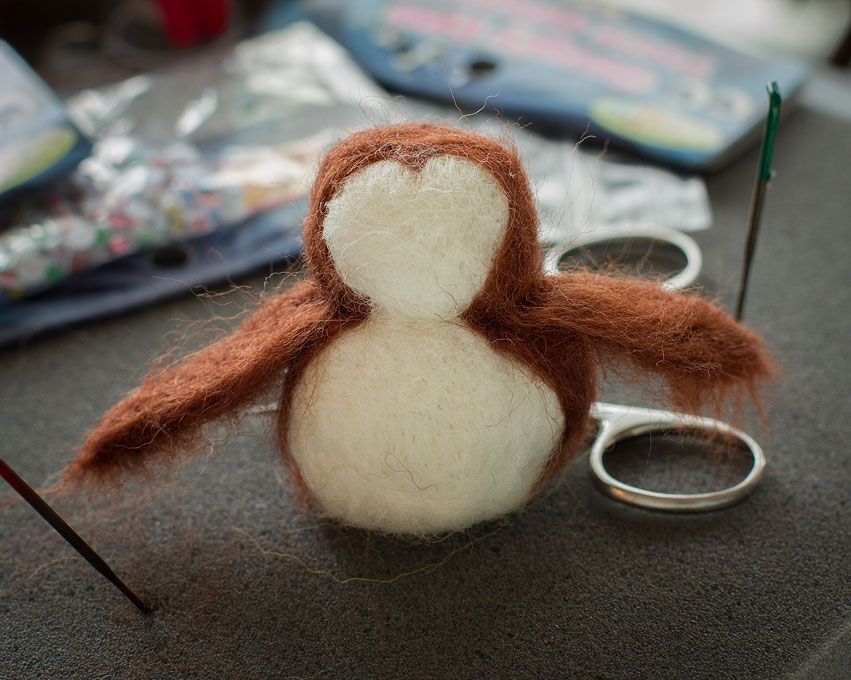
    I rolled up the roving very tightly, folding in the sides as I went to make a ball. Every little while I’d stop and felt the ball for a while, to get it nice and stuck before rolling more. I made the body first.

    ©Shireen Nadir 2013

    I made a smaller ball using the same method for the head, and felted the two together by poking the largest gauge needle at the neck joint.

    ©Shireen Nadir 2013

    Then I grabbed a chunk of roving, and spread it out nice and fluffy. I positioned this over the body and started felting it over top, to smooth and strengthen the join between head and body.

    ©Shireen Nadir 2013

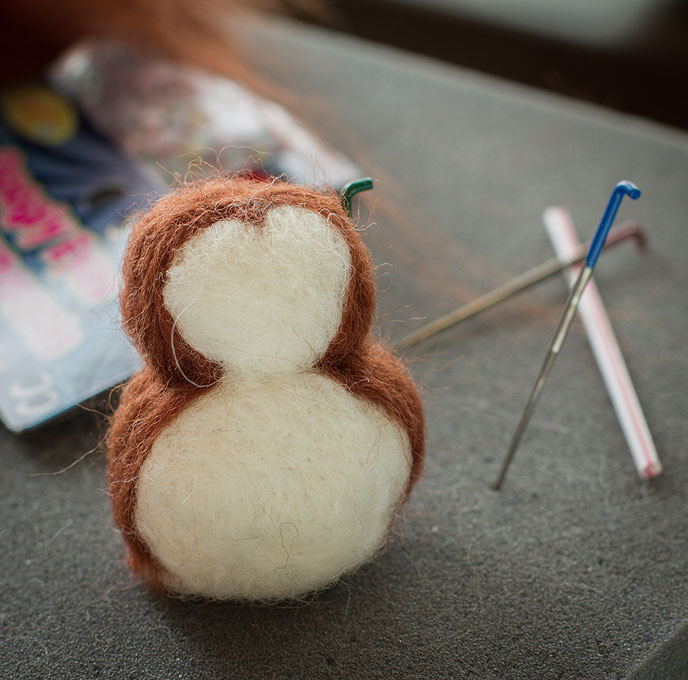
    I used smaller strips of brown felting over the body to start adding detail. Felting is so intuitive – I just kept adding it wherever I thought I needed more until I had a brown back and a little heart-shaped face.

    ©Shireen Nadir 2013

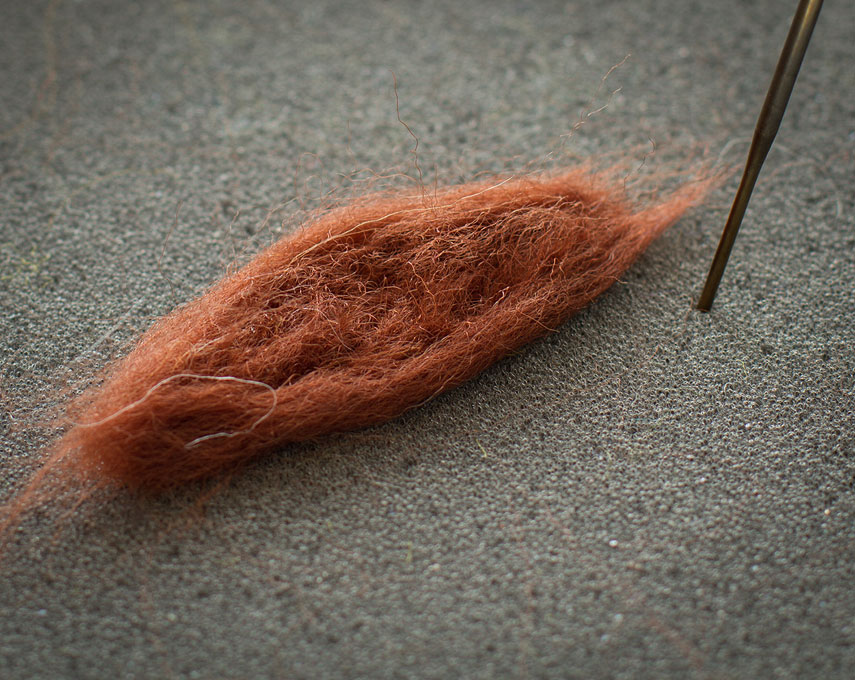
    I cut off two small pieces of roving and felted it against the foam board into the shape of wings. I had to flip them once in a while to make sure they didn’t stick to the board. I misted them occasionally – just to help the roving hold it’s shape until it was felted into place. I didn’t get too picky about their shape at this stage.

    ©Shireen Nadir 2013

    Then I felted the wings onto the sides – sticking straight out like a penguin because I thought it was funny ;) I could easily have felted them down to the side as well. I kept at them until they were nice and dense, occasionally holding them against the felting board to provide support. When I liked the shape I did the final clean up by trimming off the excess.

    ©Shireen Nadir 2013

    ©Shireen Nadir 2013

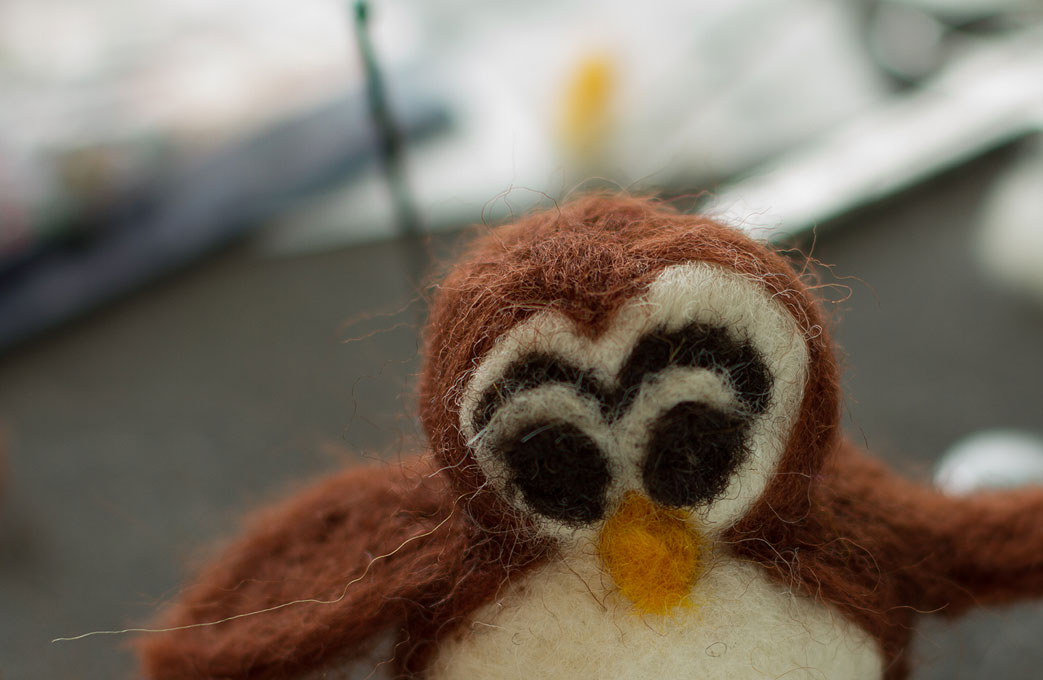
    To make eyes I made two little black balls by rolling the roving in my hand like play doh, then I felted them on. Then I used the same method, but with white balls and I positioned them a bit lower, to make eyebrows. I made the beak the same way I made the wings – on the felting board first, then adding finer detail once it was on her face and trimming away the excess.

    ©Shireen Nadir 2013

    ©Shireen Nadir 2013

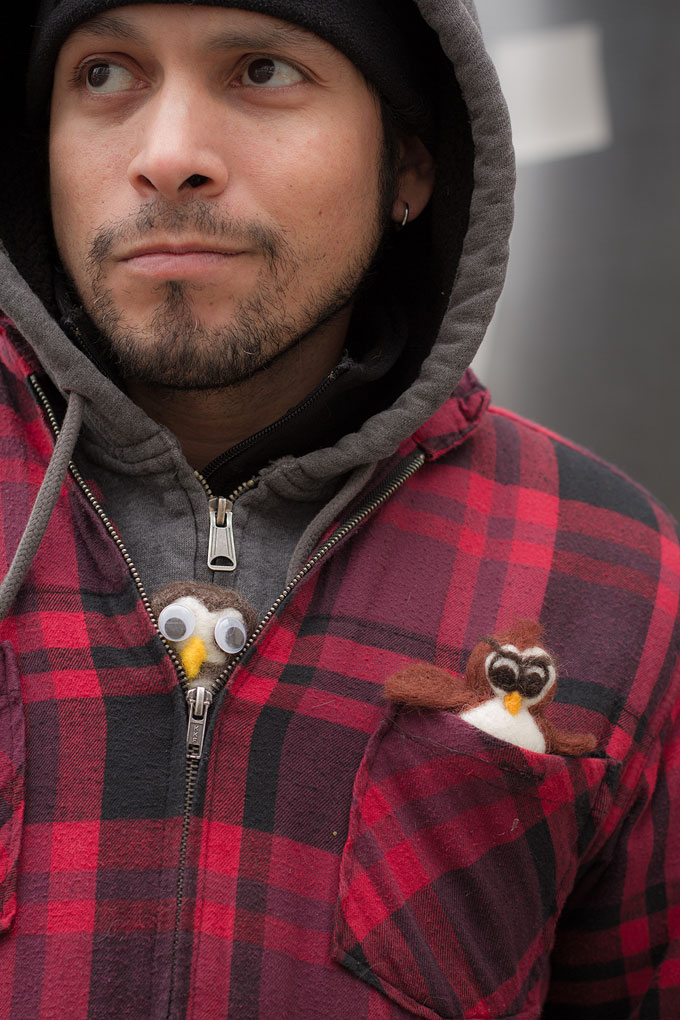
    This is how Cleo gets that intelligent expression ;)

    ©Shireen Nadir 2013

    A little tuft of roving was cut out and felted, just at the base, to give her a little ‘faux hawk’.

    ©Shireen Nadir 2013

    ©Shireen Nadir 2013

    To polish off the eyes I rolled a little cylinder of roving (again, think play doh) and felted it into a circle around each eye, allowing the excess to stick out to the sides like bushy little eyebrows.

    ©Shireen Nadir 2013

    ©Shireen Nadir 2013

    Voila! One ugly, yet endearing  little barn owl :)

  • Angus and Cleo ©Shireen Nadir 2013

    I went to sleep on Saturday night and when I woke up these two buggers had snuck into the living room and set up camp. They’re ugly, but they’re my first fluff-babies so I’ve let them stay. We went for a walk in the music garden, and I got to know their deep and complex personalities. Yes, needle felting is definitely my next big obsession.

    Angus is a little spectacle owl with a huge personality. He’s camera shy but loves to cuddle given half a chance.

    Angus and Cleo © Shireen Nadir 2013

    He lives in fear of someone discovering out that he never returns his library books because he likes to chew them into little balls of paper that he hides under his bed.

    Angus and Cleo © Shireen Nadir 2013

    He likes sleeping with his feet out of the covers to stay cool and eating his bacon with maple syrup.

    Angus and Cleo © Shireen Nadir 2013

    Cleo is a little barn owl, but lacking in any of the grace that normally comes with being a barn owl.

    Angus and Cleo © Shireen Nadir 2013

    She’s especially clumsy with crazy glue and saran wrap and once caused a traumatic incident that involved both.

    Angus and Cleo © Shireen Nadir 2013

    She’s fond of Paul Simon and lemon flavoured deserts and eating the middle of Oreo cookies before putting the end bits back in the box.

    Angus and Cleo © Shireen Nadir 2013

    Together, they form sort of an awkward couple, but they both love exploring so that’s their common ground.

    Angus and Cleo © Shireen Nadir 2013

    Big animals make them nervous.

    Angus and Cleo © Shireen Nadir 2013

    So they hide…

    Angus and Cleo ©Shireen Nadir 2013

    Or try to escape in the post.

    Angus and Cleo © Shireen Nadir 2013

    On the whole though, they’re pretty easy going.

    Angus and Cleo © Shireen Nadir 2013

    Yes, I made little toys and spent the afternoon walking around with them and taking pictures. Luckily Tito is on board:

    Angus and Cleo © Shireen Nadir 2013

    The next post will contain the step-by-step photos of how I made Cleo, for anyone who wants to take a crack at my no-doubt-ass-backward method ;)

  • Is there any end to the things you can do with fibre? This weekend I picked up my first needle felting kit at the Purple Purl and decided to try this tutorial – except just as a patch instead of onto a sweater.

    Felting ©Shireen Nadir 2012
    This is so easy, I can’t believe I’ve never tried it before. I took a cookie cutter and filled it with wool roving (not superwash!) I started with the largest gauge needle. All you do is basically poke at it until the fibres start to condense and stick to themselves.

    Felting ©Shireen Nadir 2012

    Felting ©Shireen Nadir 2012

    Every so often you have to turn it over. Here is the first time I pulled it off the foam – I was not impressed. I should mention – when the package says the needles are extremely sharp believe it or not they’re not lying. I found out, repeatedly, the hard way. I recommend always working on foam to be safe – this is not for very small people!

    Felting ©Shireen Nadir 2012

    But then…. after a surprisingly short time I had a star that even my incredibly picky self could feel good about. I kept at it for about half an hour, gradually changing down to the smallest needle size for better detail.

    Felting ©Shireen Nadir 2012

    I’m not sure if this is kosher, but I occasionally sprayed the star with a little water to hold the fibres where I wanted them while I felted. There seem to be no adverse results from this.

    Felting ©Shireen Nadir 2012

    Afterwards I sewed it onto a grey hoodie – it’s crooked, but I love it :) Next up – my adventures making 3D things!

    Felting ©Shireen Nadir 2012

  • Custom Stitch Markers ©Shireen Nadir 2012

    Who doesn’t love custom stitch markers? They make knitting just a little more cheerful – and they’re super easy to make. I can’t take credit for this brilliant idea for snag-free markers, I got it from the fiber flux blog and I haven’t purchased stitch markers from the store since.

    Custom Stitch Markers ©Shireen Nadir 2012

    The genius part is that, instead of making your own wire loops, or using key rings or jump rings, or any other treacherous thing just waiting to snag your yarn, this person used the round part of a toggle clasp – one of these guys:

    toggle-clasp

    I still haven’t figured out anything cool to do with straight part, but they’re super cheap (like, $1 for 10) so I don’t feel awful about wasting half of what’s in the package. Now just get some headpins in the same finish, a pair of pliers and some pretty beads, and off you go.

    Custom Stitch Markers ©Shireen Nadir 2012

    They were so cheap and easy I made a bunch for all my common needle sizes.

    Custom Stitch Markers ©Shireen Nadir 2012

    I also lose stitch markers like no one’s business – making them cute and pretty is added incentive to keep them organized ;)

    Custom Stitch Markers ©Shireen Nadir 2012

  • Happy New Year :) I wish you all a happy healthy 2013!

    A few months ago I received this email:

    Dear Shireen,

    I’ve seen your magnificent blog and fell in love with Newfoundland. We are redecorating our house and had been searching for a living room wall poster for a long time.

    When we saw below picture we loved it so much. Is it possible for you to send a high resolution of this photo so we can have it print out in a 3mx2m wall poster. I can send you a picture of the room after :)

    thank you very much,

    (Name) from İstanbul-Turkey

    Below it was this photo – of St. John’s Newfoundland, that I took of a neighbourhood known as the Battery.

    The Battery ©Shireen Nadir 2013

    I was blown away; normally I don’t release large format digital files – but how could I say no? Someone had written from Turkey with the humbling notion that they loved a photo of mine so much they’d like to cover a wall with it. I sent a link, they sent their thanks, and a kind note inviting me to stay with them if I’m ever in Istanbul and then I mostly forgot about it.

    Last night, the most amazing New Years surprise arrived in my inbox:

    The Battery ©Shireen Nadir 2013

    They really did it – they used the photo of St John’s Newfoundland as a wallpaper. What a beautiful family – I am so honoured and humbled that I had to pass my phone around the party last night just so everyone could see these lovely people. What a connection! I hope one day to meet them in person.

    I’ve spent some time, as you might expect, thinking of New Years Resolutions. I’m taking up horseback riding, violin lessons and needle felting. I’ve recently become a partner in the firm I work for, so building a company is going to form a big part of my goals. I’ve got financial goals, travel goals, and fitness goals.

    But late last night I spent time reflecting – these were all well and good for ‘outside’ things that I’d like to be/have/do. What about the inside? What’s the most important thing there? It’s the people in my life that make it the beautiful journey that it is. I value the connections I share with others – be it over the internet or in person. I love the fact that I’ve connected with so many amazing people through this blog. I value my friends and family and, above everything else, I want to spend more time being with them and never losing an opportunity to let them know what they mean to me.

    Thank you, friends in Turkey, for a New Years Eve treat, and a reminder of what’s really important in my world – you helped me start my 2013 off on the right foot!