This morning I uploaded my final (fingers crossed) manuscript to be printed, and I couldn’t be happier. So much work, thought, creativity and time has gone into this puppy, and I feel that it shows. My editors and proof readers have been amazing, the response from folks who’ve seen it has been really positive, and I enjoyed stretching my skills in the writing department to come up with something that I really feel looks professional. I should have a copy in my hands by early September, and if all is good, it shall be available for purchase shortly thereafter!
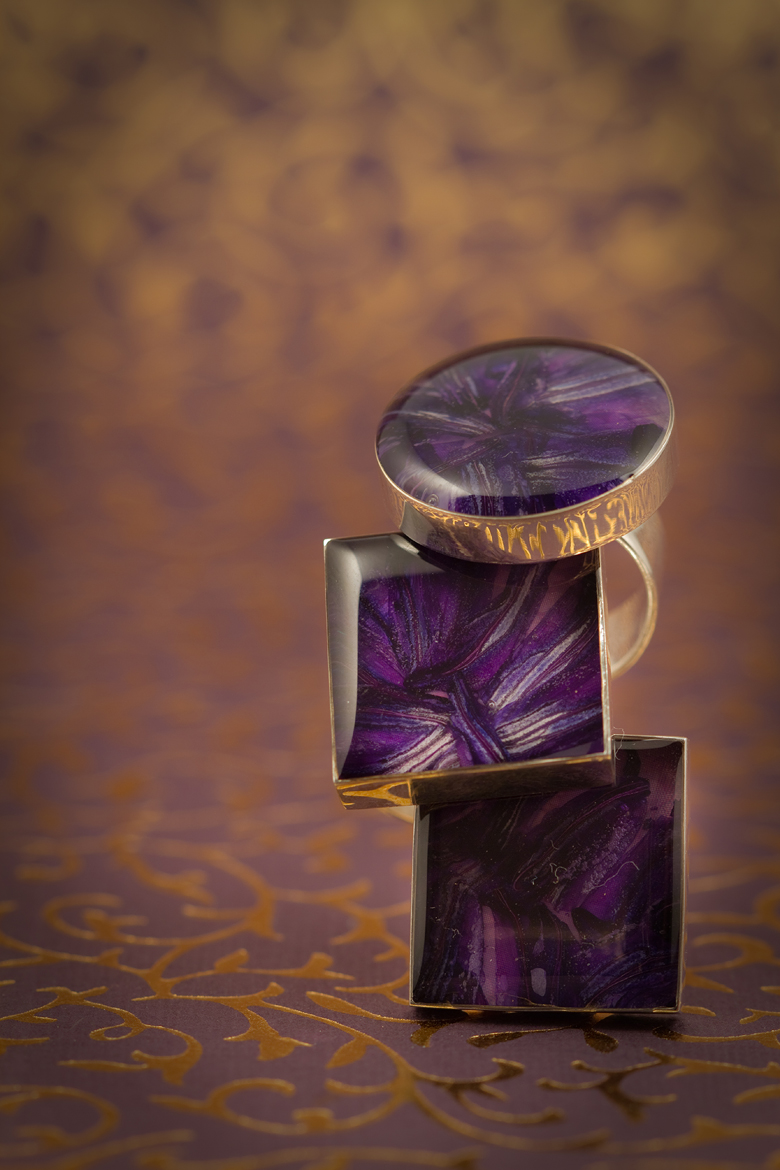
In the meantime, I’ve made a lot of resin. Enough that I’m putting up 10 items on my Etsy shop, to help me raise the funds for a run of these books. Here are some of the pretties you will find:
My prices are based on the value of the materials, the size of the piece, the time it took to preserve the material in the resin and the amount of time/pours the finished piece required. Hopefully you find something you love!
Of course, if you love the work but would rather make your own, in a few weeks you’ll be able to learn just that!
Last Sunday, myself and my favourite likeminded nerdy girls held the much-anticipated ‘dying party’ at our (subsequently trashed) condo.
Rayna and Leslie came over bearing bearing armfuls of fibre and edibles, (Tito retreated to the bedroom with the computer and headphones), and we did our best to make the apartment look like a herd of unicorns had thrown a rambunctious party, drank to excess, and thrown up all over it.
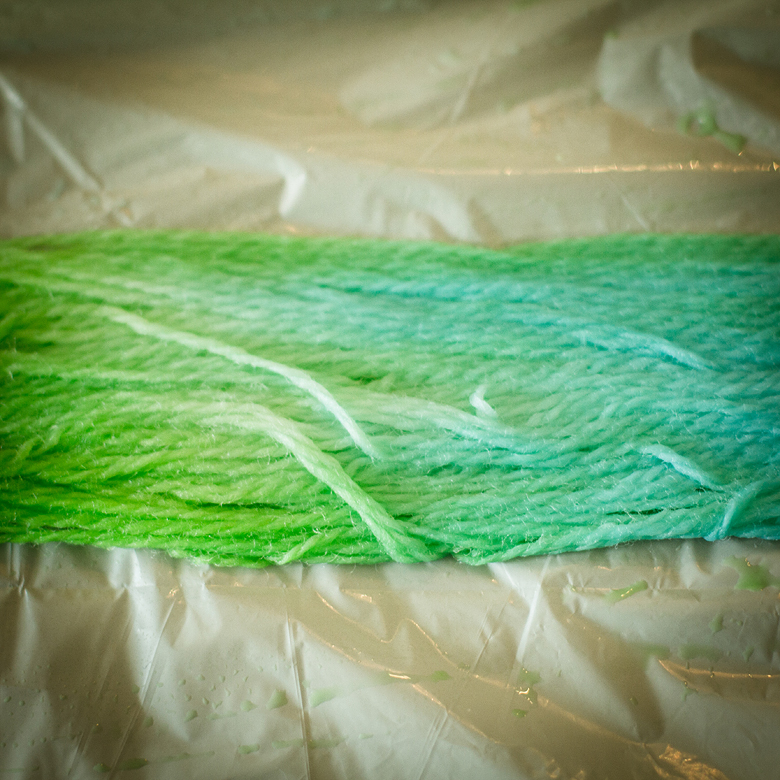
We had 3 skeins of yarn each to play with – the Cascade 220 sport was only 164 yards, and we used it to get our feet wet by hand painting with Kool-aid.
Our technique, for those interested, was very basic:
Lay down plastic
Lay pre-soaked yarn on top of plastic
Mix different colours of Kool-aid with about 1/3 cup of water each
Pour/paint/smear Kool-aid on top of yarn
Wrap plastic around yarn
Punch holes in the plastic so it doesn’t explode (I forgot this bit once; it was messy)
Put the entire plastic package in a microwaveable bowl, to catch drippy dye
Microwave it a minute at a time (letting it rest between for about a minute) up to 5 minutes or until all the Kool-aid has been absorbed.
Carefully remove it, let it cool, remove the plastic and wash it gently in the sink.
Parade yarn around the living room like a boss
Here are our Kool-aid creations:
Leslie’s colourway “Hematoma”
Rayna’s as-yet-unnamed colourway
My colourway, which Tito named “Wow, this looks just like all your other s!@t.”
You’d think I was predictable….
Next up was the worsted. I purchased huge skeins (271 yards) of wool worsted weight for the RIT dying experiment. The technique was the same as the above, but sub out Kool Aid for RIT and soak the yarn in water with vinegar before starting. The RIT bleeds like heck, so washing it up took a bit longer, but the results are lovely.
Leslie’s colourway, which was given a name so rude I cannot repeat it here.
Rayna’s colourway, which also was given a name so rude I cannot repeat it here.
My skein, (of which I was very proud) – was intended to give the impression of the lovely colours of an autumn forest… but apparently only succeeded in being evocative of mozzarella and tomato sauce because Tito named this one “There are three women in my kitchen and I have to order pizza.“.
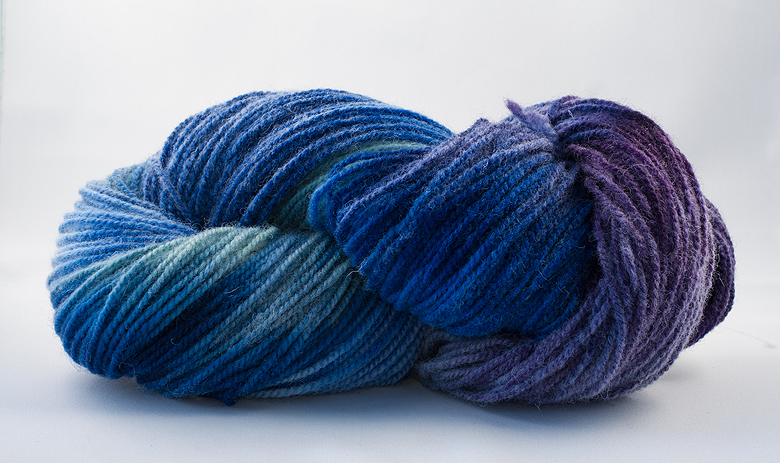
Finally we moved on to the lace-weight merino, which we had been saving for last. Rayna opted to continue with the RIT, resulting in this most impressive skein:
Leslie and I opted to dive into an herbal dye kit that I picked up at the KW fair a few years ago. It’s a bit more of a process, requiring that the yarn be mordanted before dyeing. We both opted for immersion dyeing in this case. Leslie produced this lovely thing:
And I produced what certainly became my favourite skein of the day:
After the girls joked about absconding with it I chose the name “Theft is the greatest form of flattery“.
In between yarns, we dyed some of our inexhaustible supply of fibre, mostly as experiments to learn how a dye behaved before trying it out on the yarn.
There were lots of jokes about how ‘This is how Tanis and Indigodragonfly got started!’ and even a name for our fantasy dye company: ‘I don’t want to dye alone’. We certainly all felt daunted though, by the idea of trying to come up with a sweaters worth of a consistent colour way. Even so, we loved it enough that we’re already planning another dye party, with acid dyes this time, and nicer yarn bases!
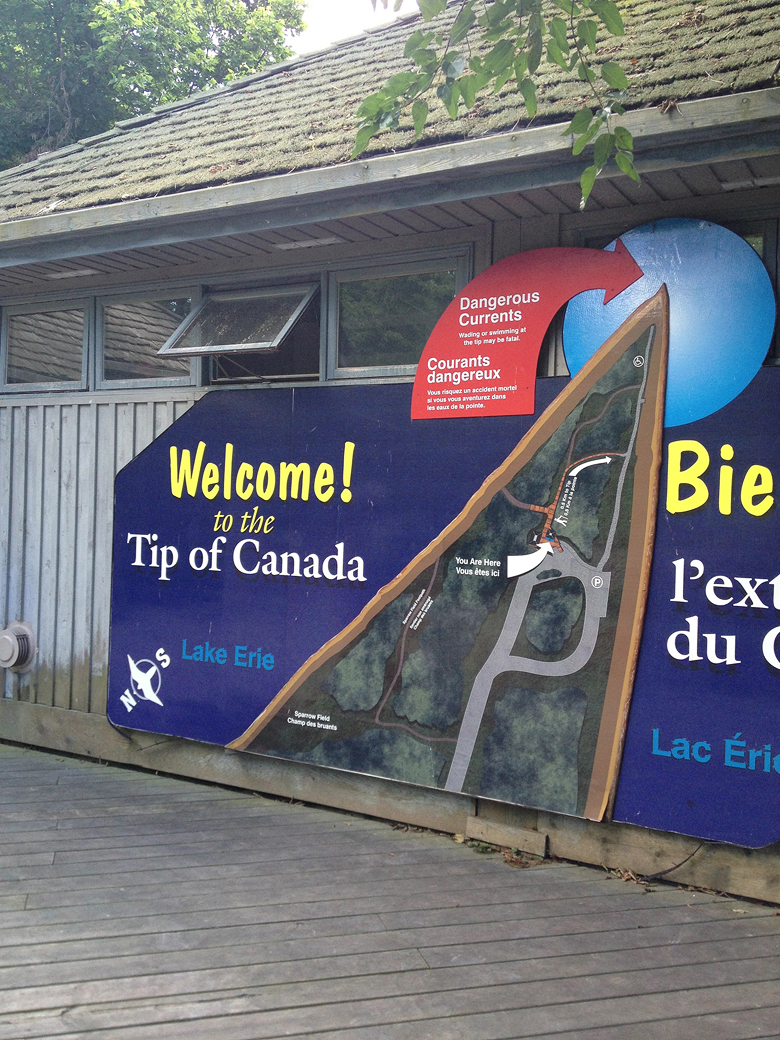
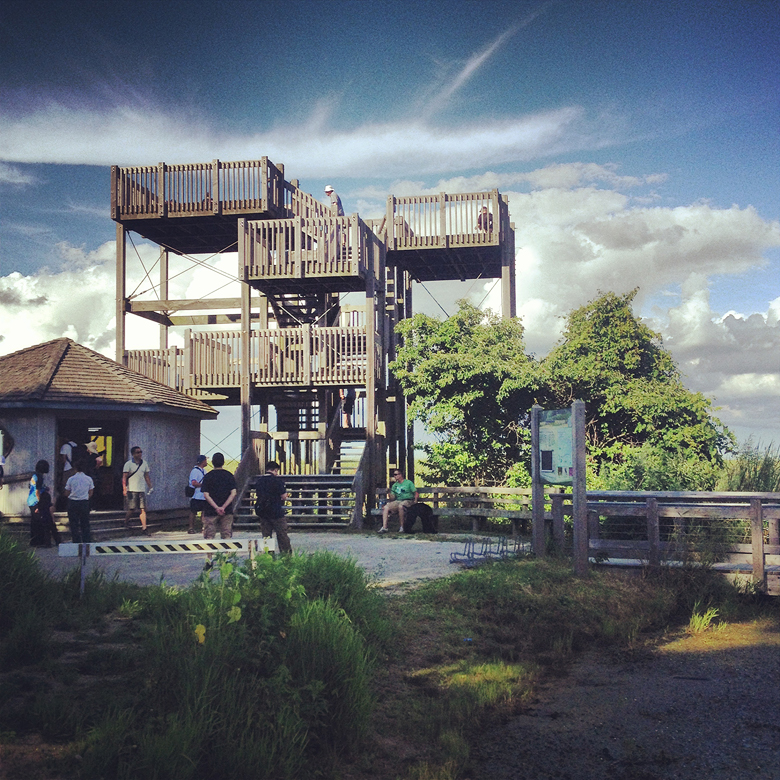
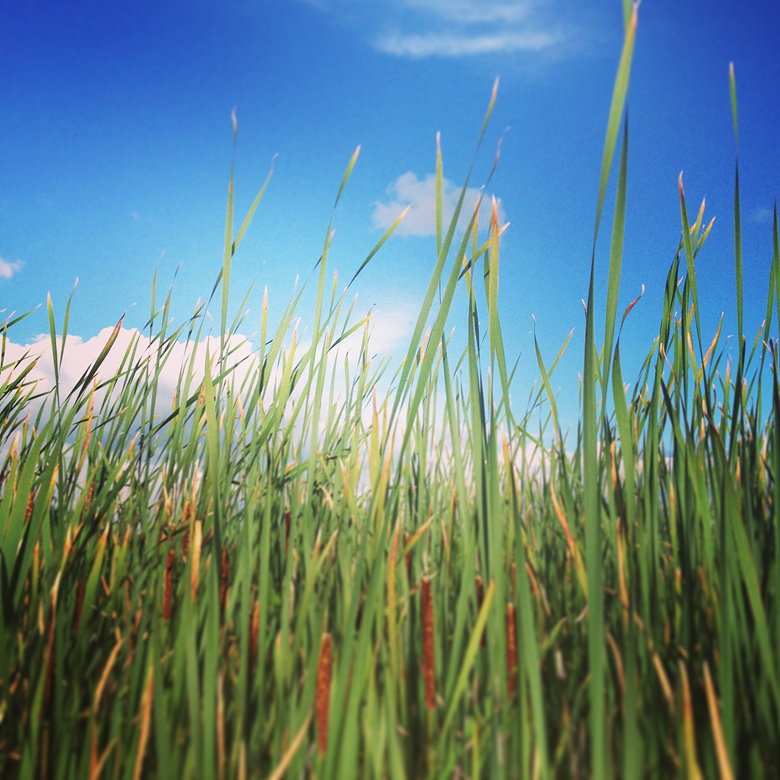
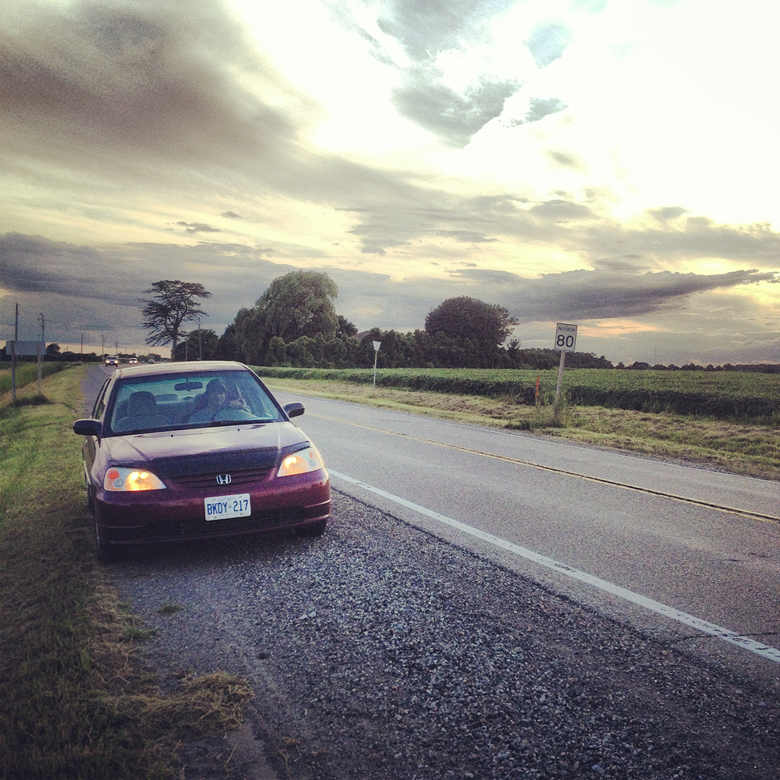
The Hike in at Point PeleeWelcome! (Danger!)It really is a tip.Here we are at the southernmost point, getting our sneakers soaked in Lake Erie.The lonely beachThe conference
Staying put long enough for a phone pic!We were there. The new and butchered meaning of the inukshuk.The viewing platform at the marsh.Marsh boardwalk.It’s at least 6 feet high.
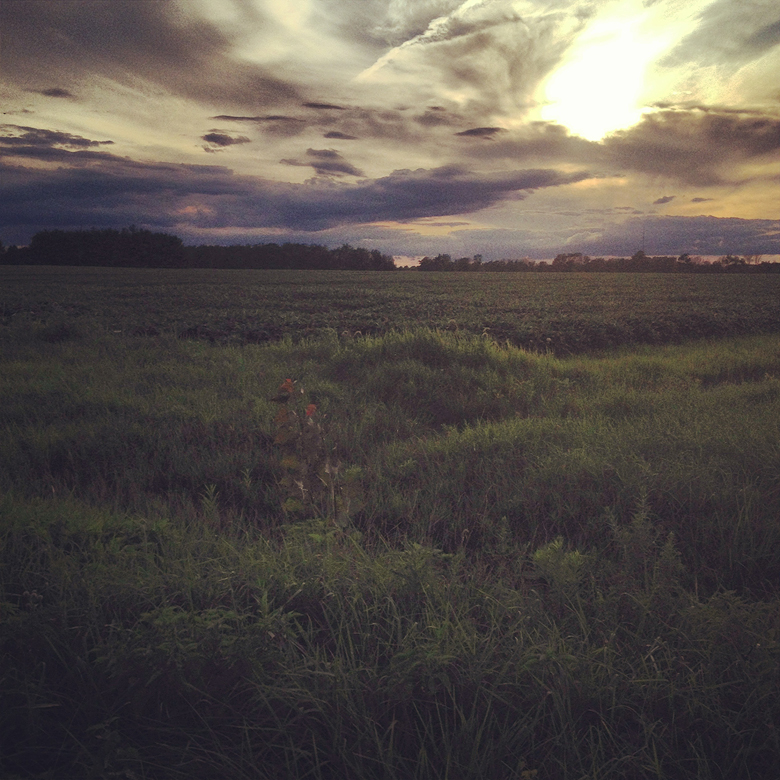
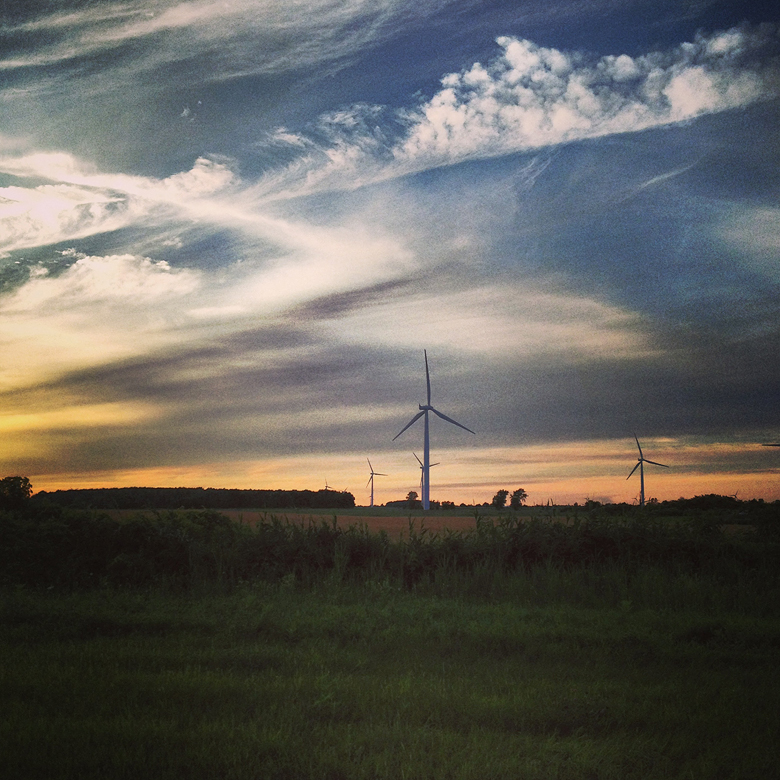
Ok… maybe 5 feet.TitoI didn’t realize we had oil in Ontario.SunsetThe Underground Railroad trailLa TuncaWindfarm
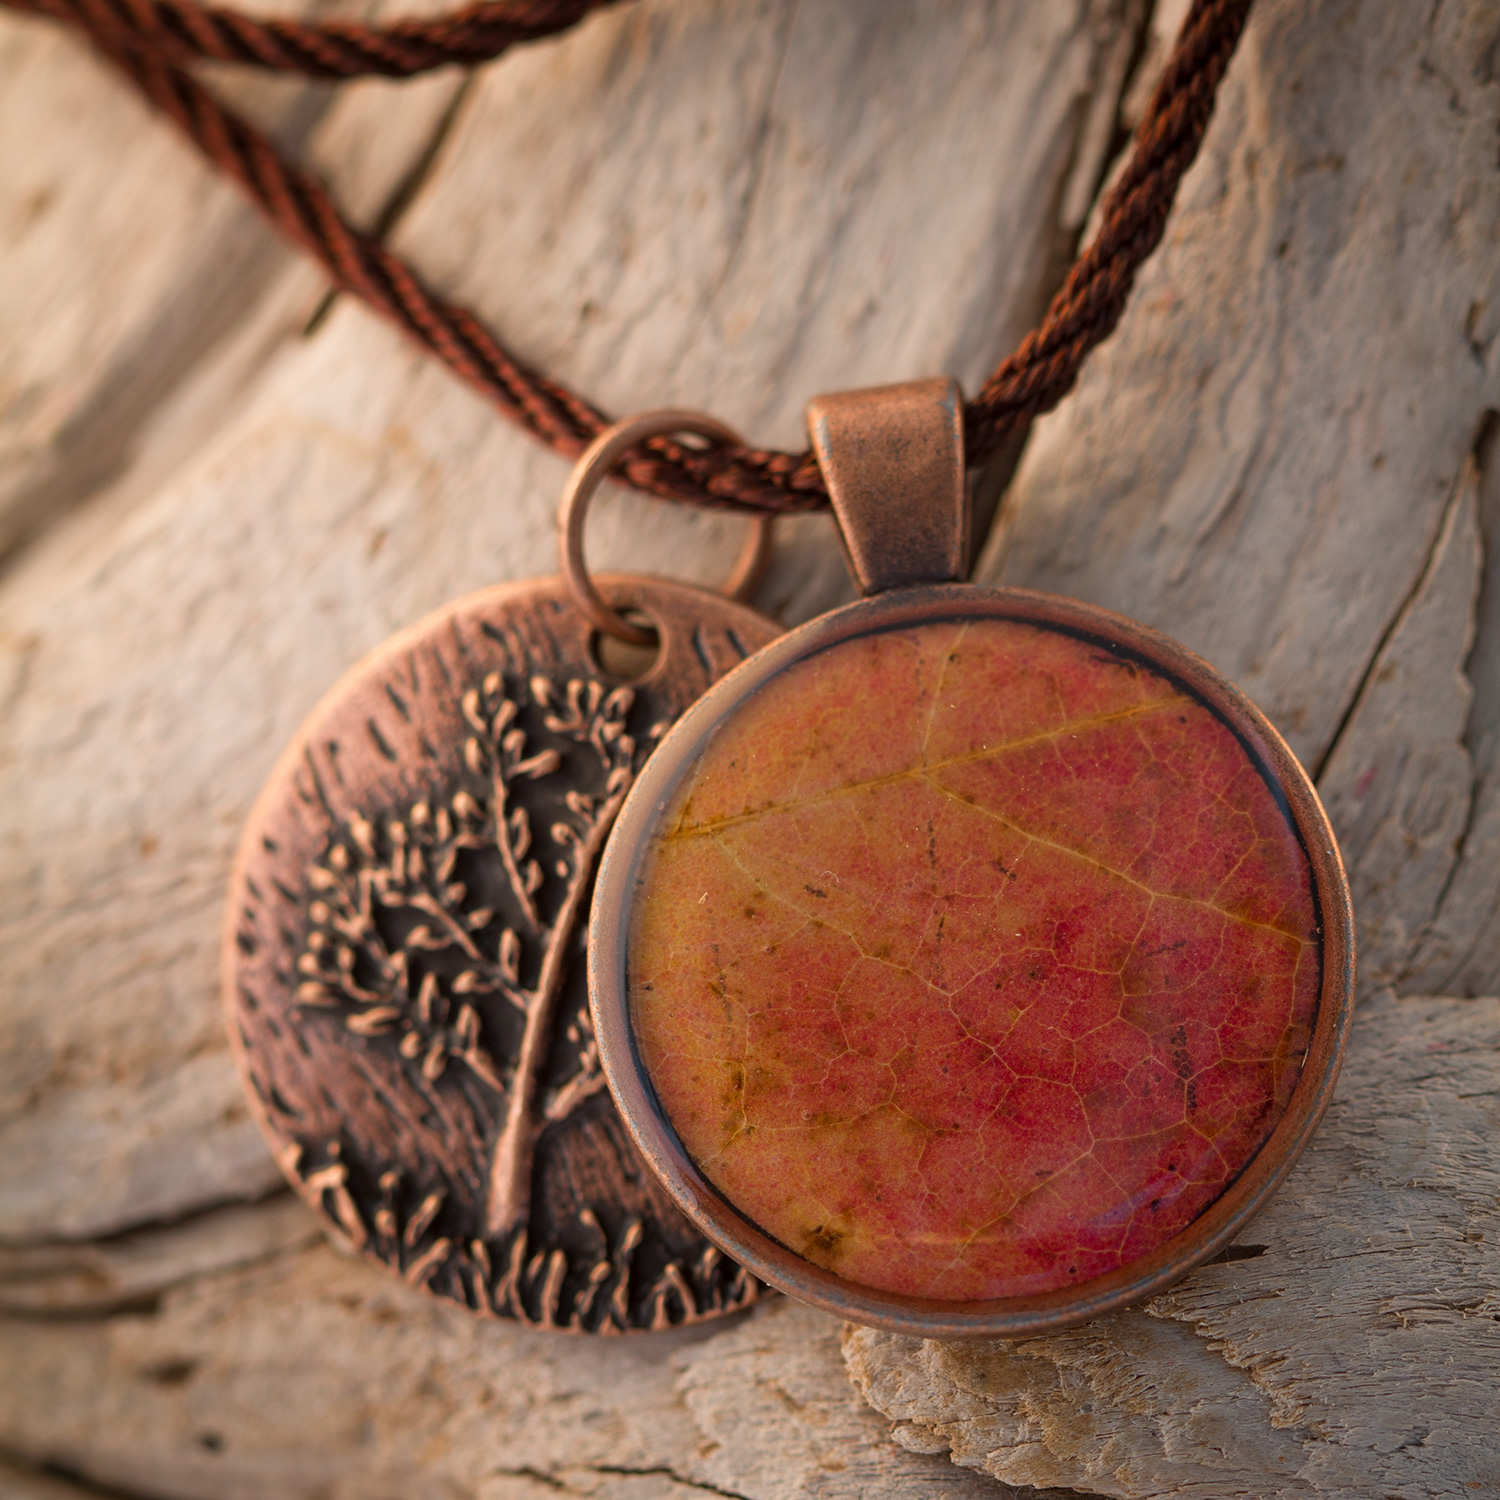
I have been working with resin for 6 years, and in that time I’ve made some beautiful things, but also had some tragic failures. I’ve been inspired by the beautiful things to keep going, and learned from the failures until I got to a point where I could get predictable results. Over time I’ve specialized in an area that I enjoy very much – preserving natural materials such as flowers and leaves to create lasting, unique jewelery.
This guide is the sum of my experience in resin to date – do’s and don’ts, tips, tricks and methodology all distilled from my learning process these past few years. I hope others can use this as a foundation guide to create and share beautiful things of their own.
I cover the gamut, from how to select and preserve flowers and leave, to using multiple stage pours to get a perfect finish. Open-backed bezels, layering techniques and techniques for preserving non-organic material such as Japanese Washi are covered. At the end are 4 projects, of increasing complexity, to guide you through growing your skills until you can produce any of the items in my inspiration gallery.
All of it is laid out in beautiful, clear spreads with tons of step-by-step photography, tips on how to get better results and clear, written directions.
Over the years I’ve received a lot of questions on my technique for getting the colours and textures of natural materials to come through in the jewellery – here it is, all in one place. I’m aiming for a release date of late summer – in time for folks to be able to try their skills with this years autumn leaves :)
I’m so excited to be doing this – with my amazing editor Leslie and my patient photography assistant (AKA boyfriend) this has been a great learning experience for me. Right now the plan is to produce both beautifully bound print copies (likely in the $20 zone) and e-reader copies. I can’t wait to actually hold the finished book in my hands, and I hope it will inspire lots of people to create their own beautiful things!
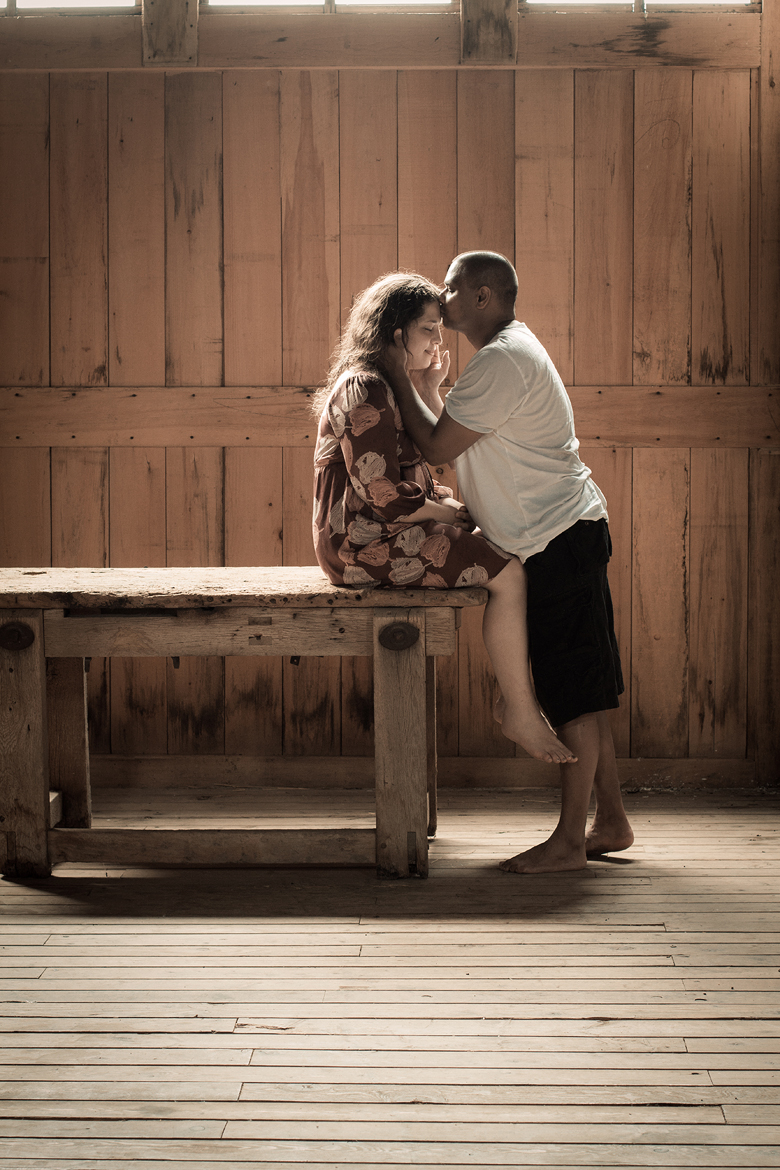
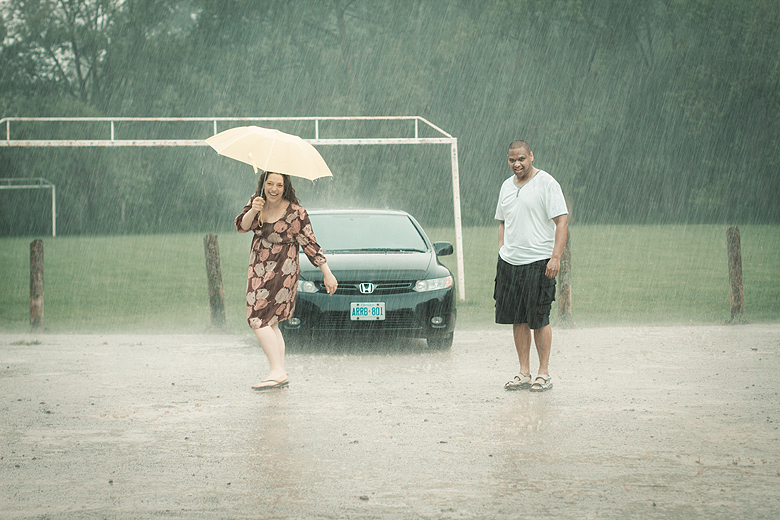
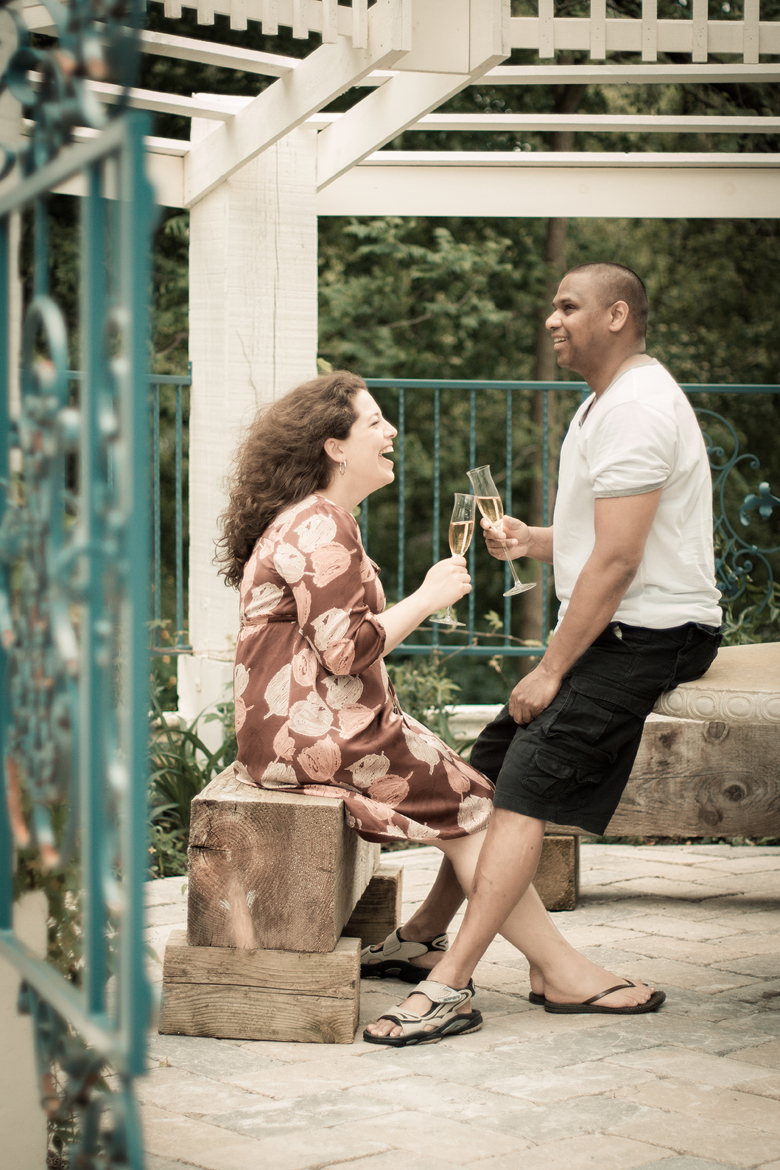
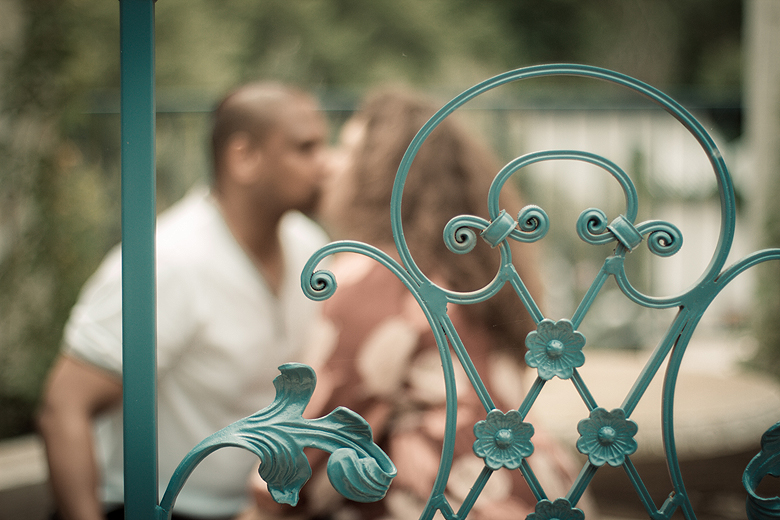
A few weeks ago we had the pleasure of taking engagement photos for my cousin and his financée. They picked a perfect spot – a small town just east of Toronto called Whitevale.
We did part of the shoot in Julie’s family’s barn – the light was perfect!
They wanted rain…. we got it all, rain, sun and in-between. Julie got the umbrella ;)
A request they made, in reference I believe to ‘how I met your mother’.
The adorable signs my cousin made up for the day. Bon Jovi!!
They’re so adorable and in love… this was a fun, easy shoot.
Can’t wait for the wedding! We wish Anil and Julie many many years of happiness together. <3
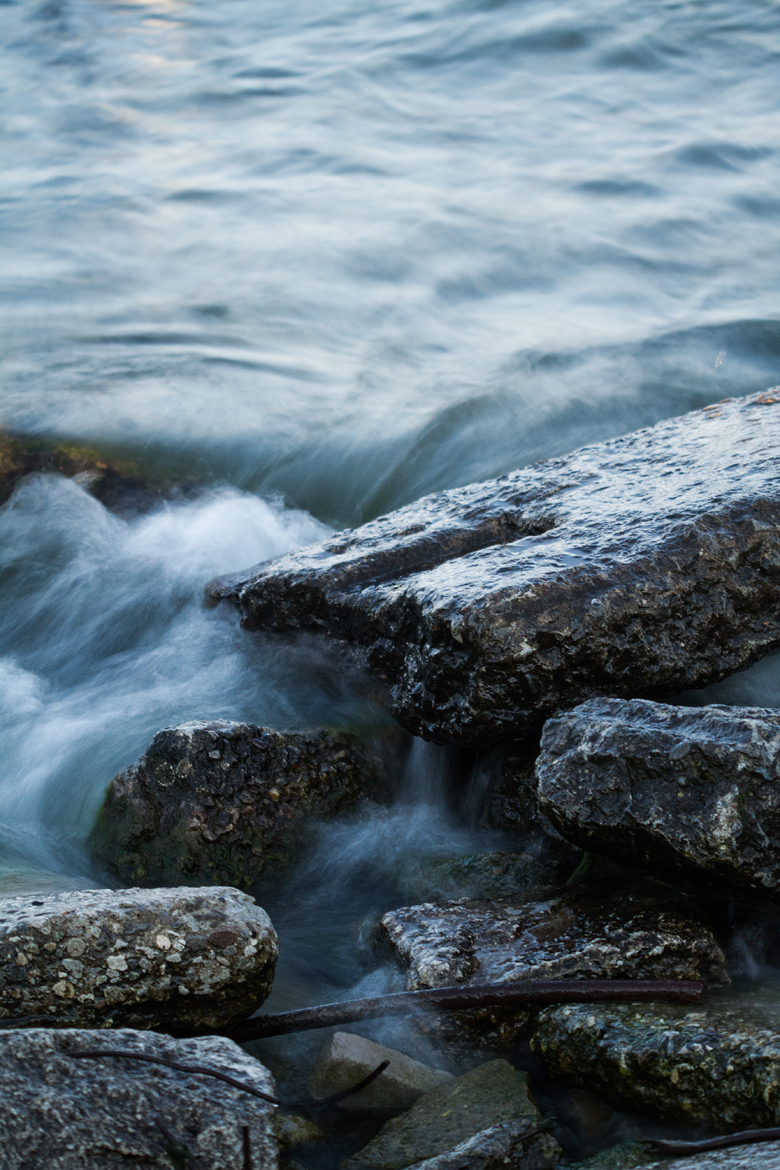
I’ve been dying to take the Lee Filter Big Stopper to the Leslie Street Spit since I got it – finally managed it last weekend! Here are some of my favourites :)
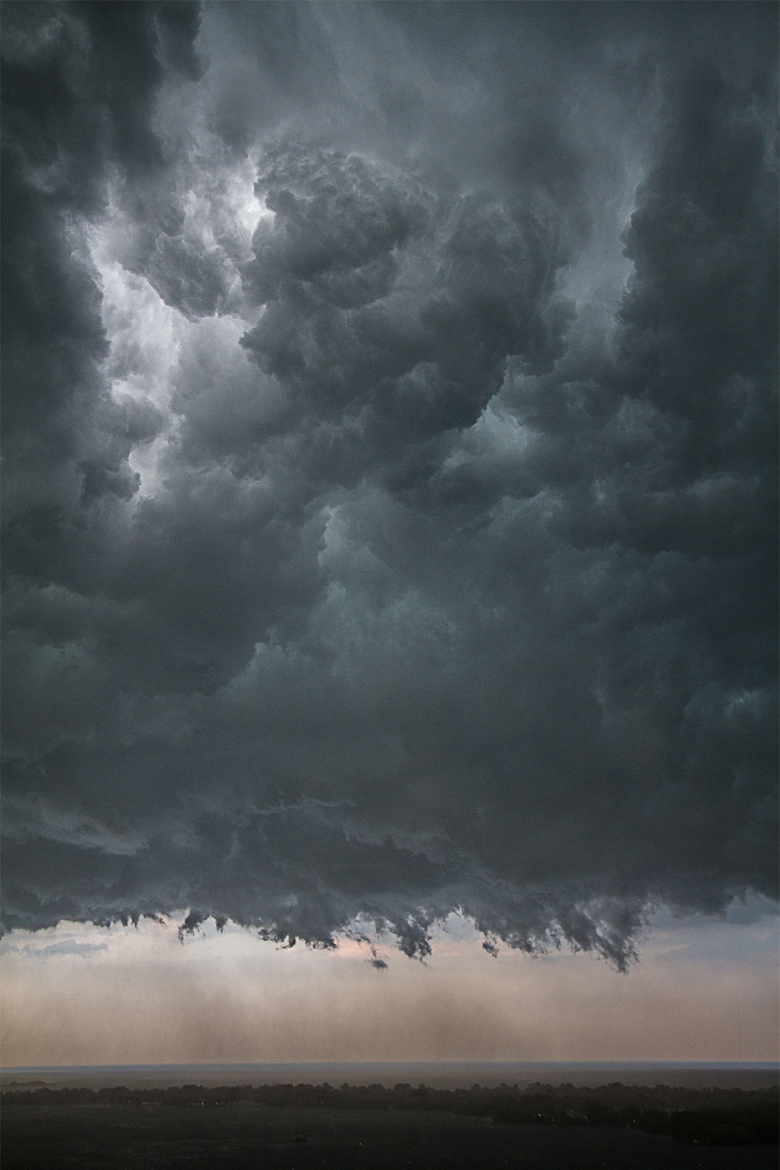
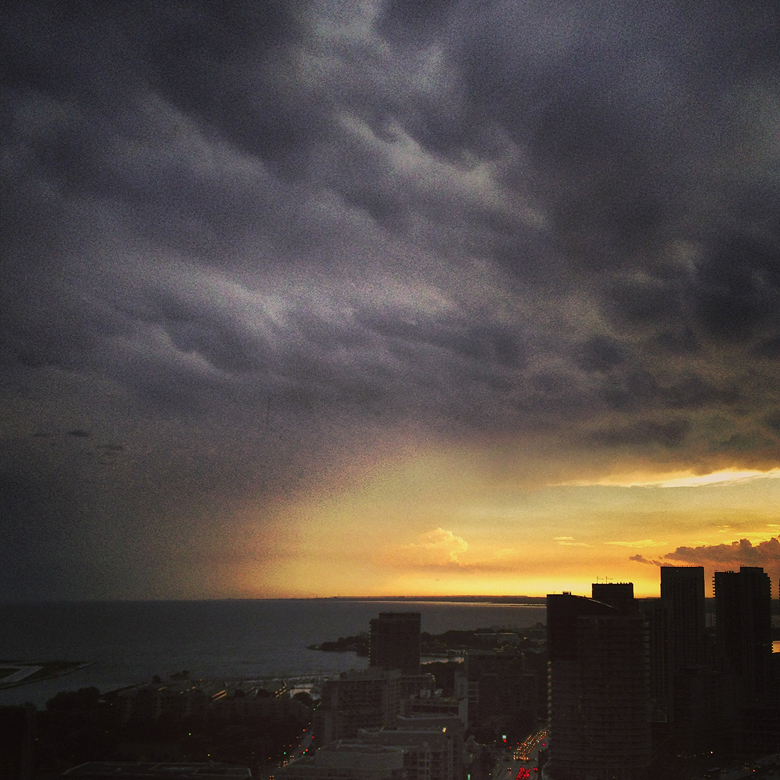
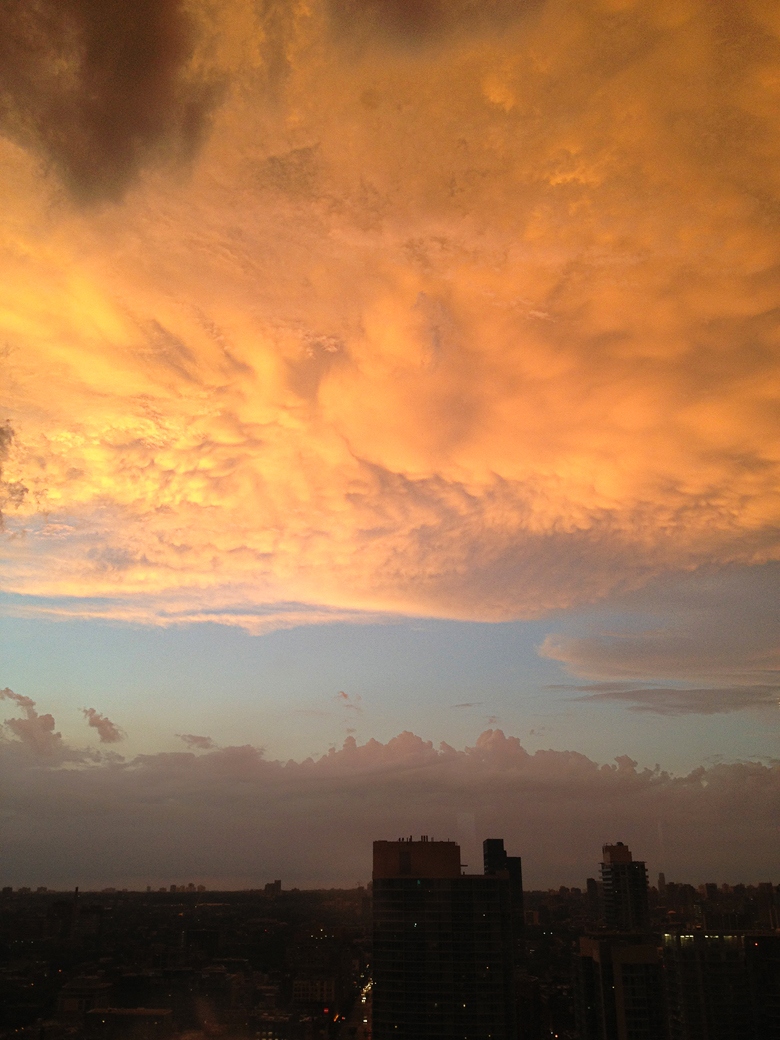
I just learned a little more about the strange clouds I photographed on Monday night after the thunderstorm in Toronto. Here’s what wikipedia has to say:
Mammatus, also known as mammatocumulus (meaning “mammary cloud” or “breast cloud”),[1][2] is a meteorological term applied to a cellular pattern of pouches hanging underneath the base of a cloud. The name mammatus is derived from the Latin mamma (meaning “udder” or “breast”).
True to their ominous appearance, mammatus clouds are often harbingers of a coming storm or other extreme weather system. Typically composed primarily of ice, they can extend for hundreds of miles in each direction and individual formations can remain visibly static for ten to fifteen minutes at a time. While they may appear foreboding they are merely the messengers – appearing around, before or even after severe weather.
Named for their resemblance to a cow’s underbelly, mammatus clouds sometimes appear at the end of severe thunderstorms when the thundercloud is breaking up. Researchers have called them an “intriguing enigma,” because no one knows exactly how and why they form. The clouds are fairly common but often go unnoticed because potential observers have been chased indoors by the rain. If you are one of them, go back outside when the downpour stops; you could witness a beautiful mystery in the sky.
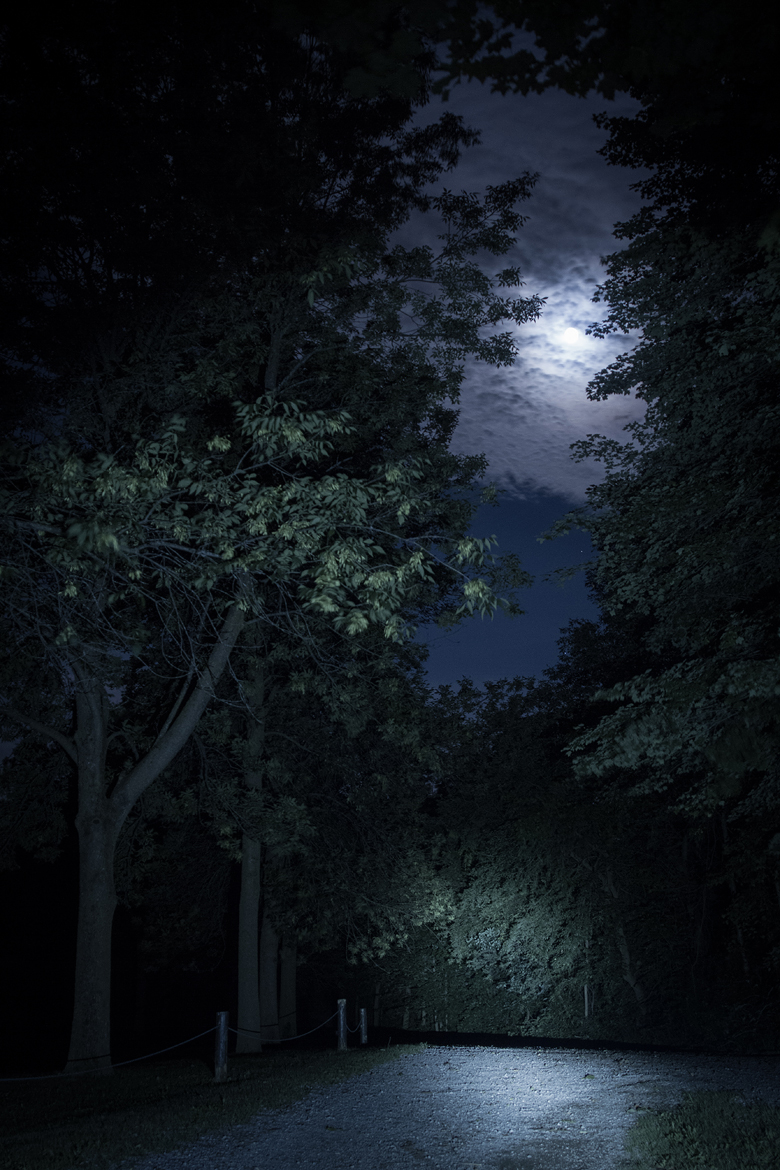
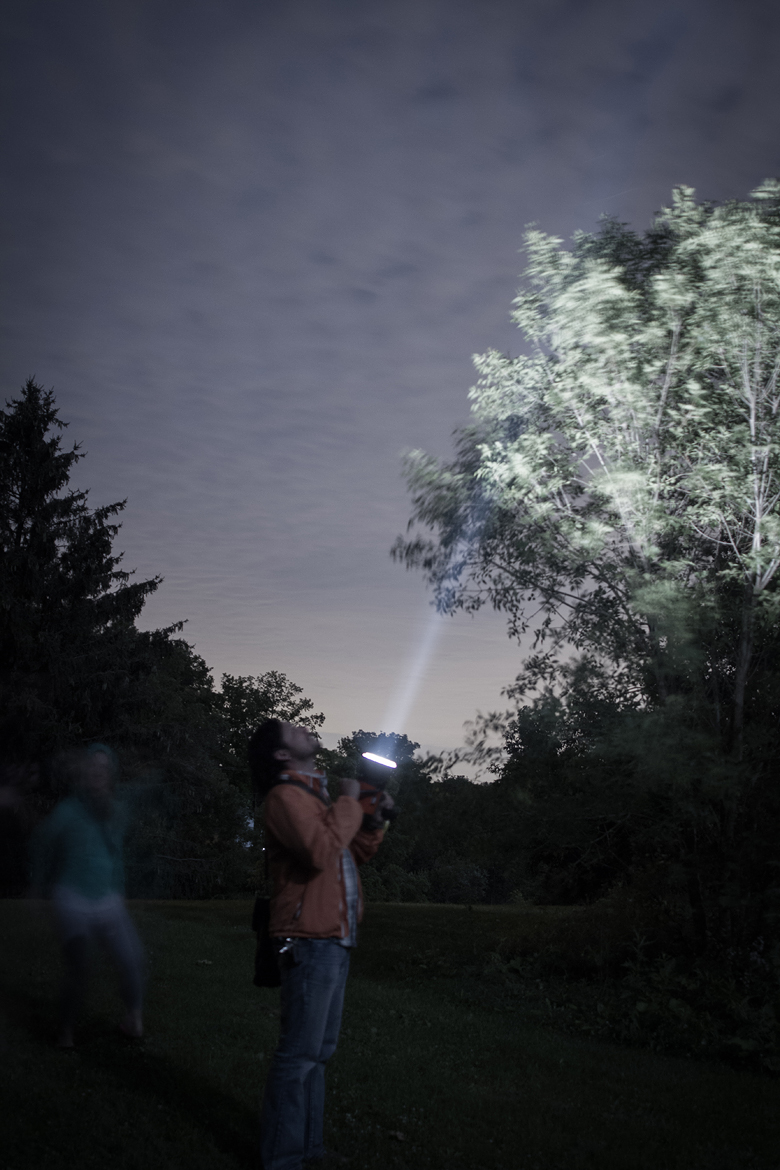
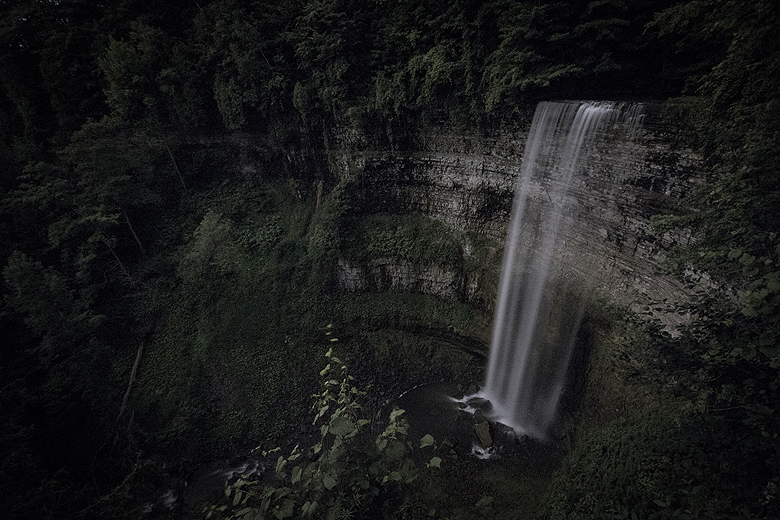
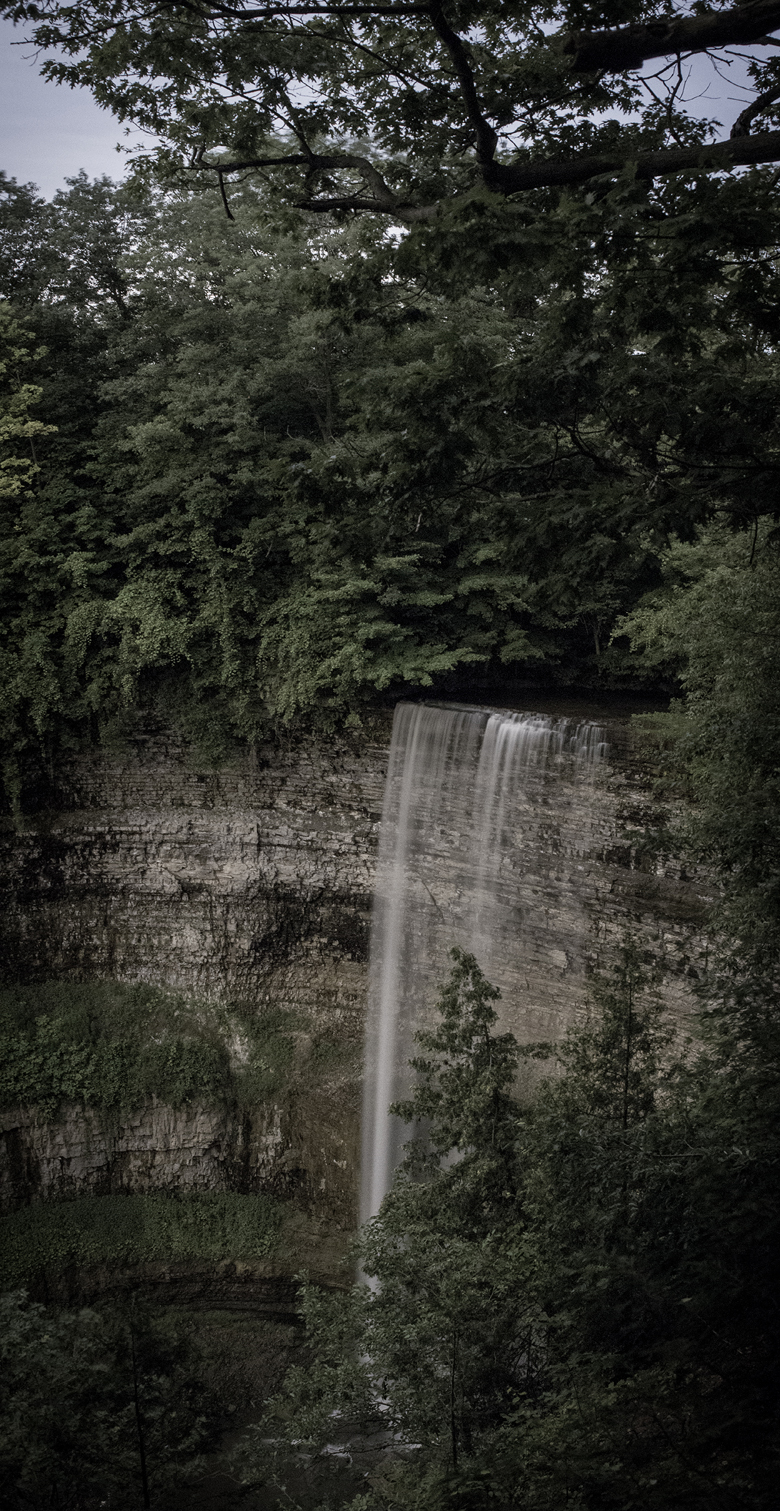
Last Saturday night we met up with our friends Johnathan and Beverly. What do people do on a warm Saturday, with an almost full moon, at midnight? We load up on camera gear, flashlights and Dairy Queen, and go stomping about in the woods looking for waterfalls, that’s what.
This is the entryway to Tews falls, Hamilton. We did some creepy long exposures here, but I’ll keep em to myself because they’re, well, creepy.
Tito, with our ultra-powerful flashlight – so bright that we could see it on the clouds!
Tews falls. Initially I had the guys shine the flashlights around to get my images, but the full moon was so lovely, I decided to go for long exposures shot entirely with moonlight.
I love that silvery, desaturated look!
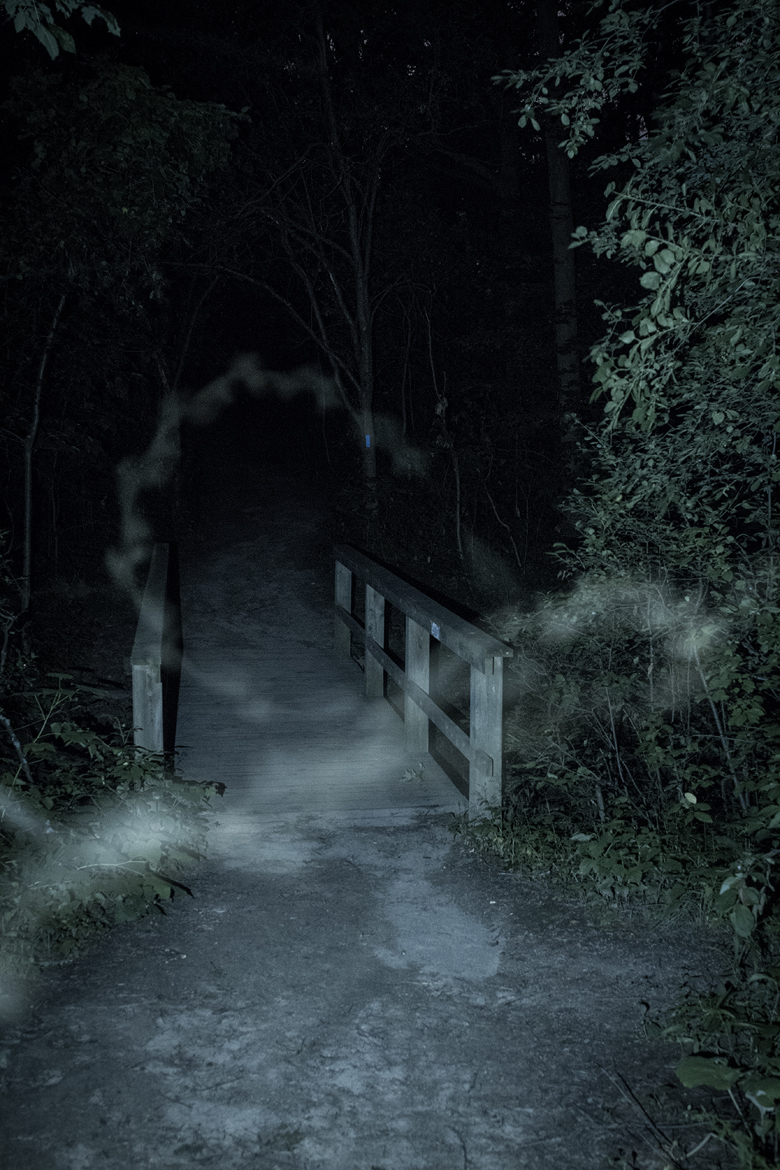
We went hiking for a while afterwards, and I took this shot of a bridge in the woods. It was so dark that I had to use the light on my iPhone to give the camera something to work with – and a moth that was attracted to the light got caught in my long exposure. I totally debated trying to convince people that I’d caught a ghost.
Lastly, we ended the night at Great Falls, Waterdown. The falls themselves were too close to the viewpoint for me to get a great photo, but here is the stream below, flowing away in the silvery moonlight.
What an awesome night…I’ll take this over TV any day <3
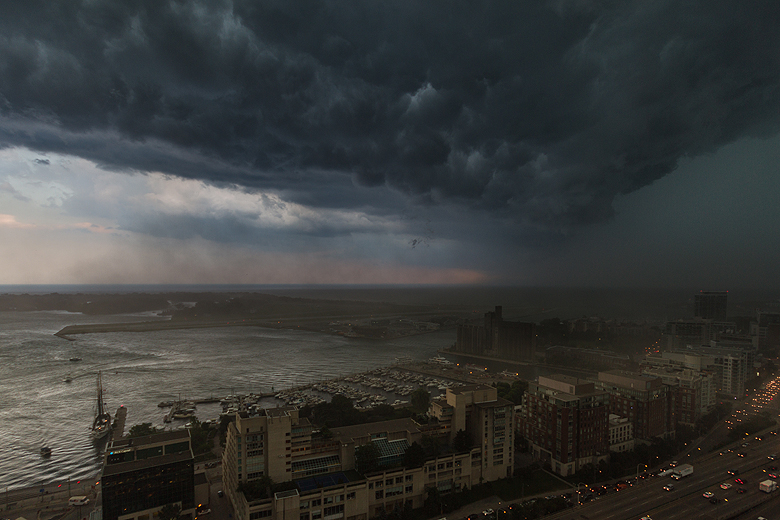
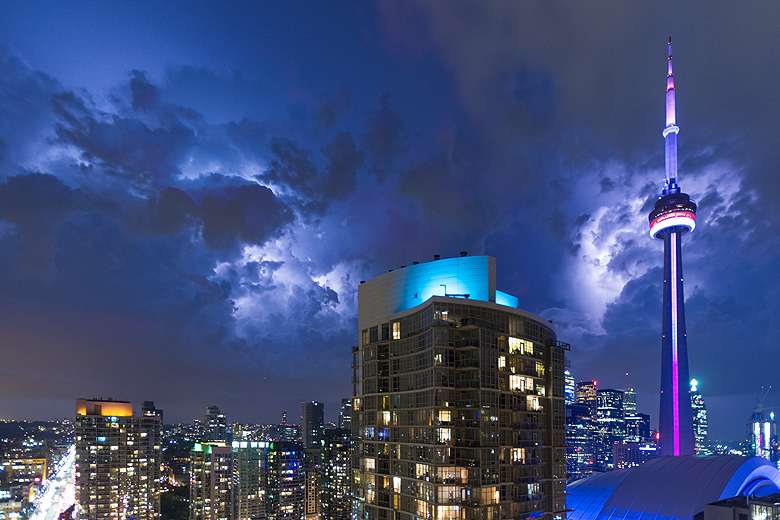
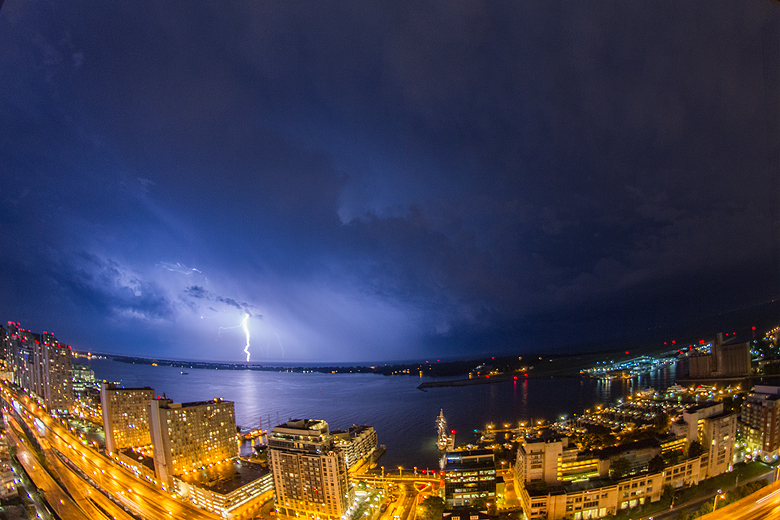
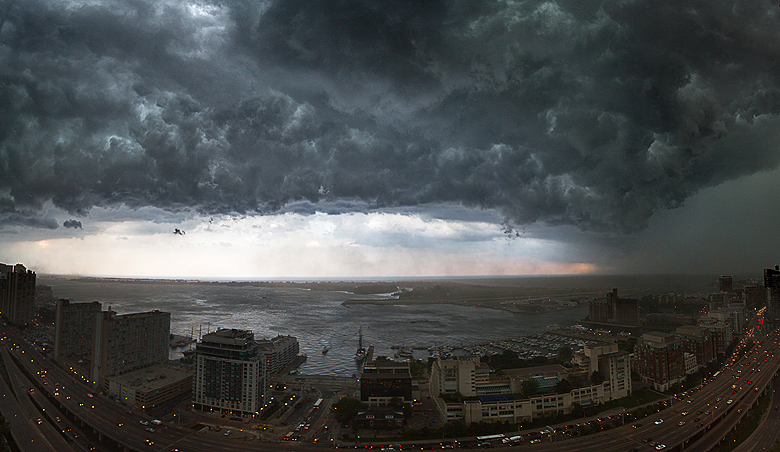
We had a crazy storm and gorgeous skies in Toronto tonight. Here are my favourites… more to come :) (And, in case you’re wondering, no, I didn’t photoshop the heck out of these images… in fact three of them are from my phone and just came out that way!)
Why, now, blow and, swell billow, and swim bark! The storm is up, and all is on the hazard.
William Shakespeare
But then…
“The storm had now definitely abated, and what thunder there was now grumbled over more distant hills, like a man saying “And another thing…” twenty minutes after admitting he’s lost the argument.”