• ©Shireen Nadir 2014

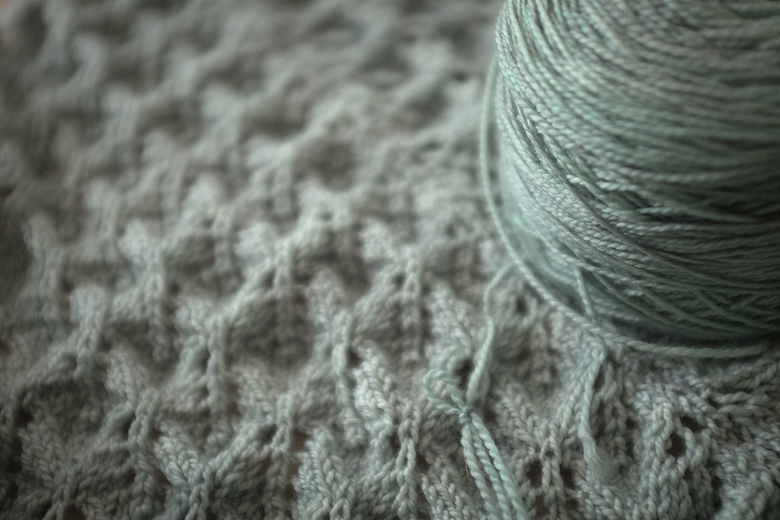
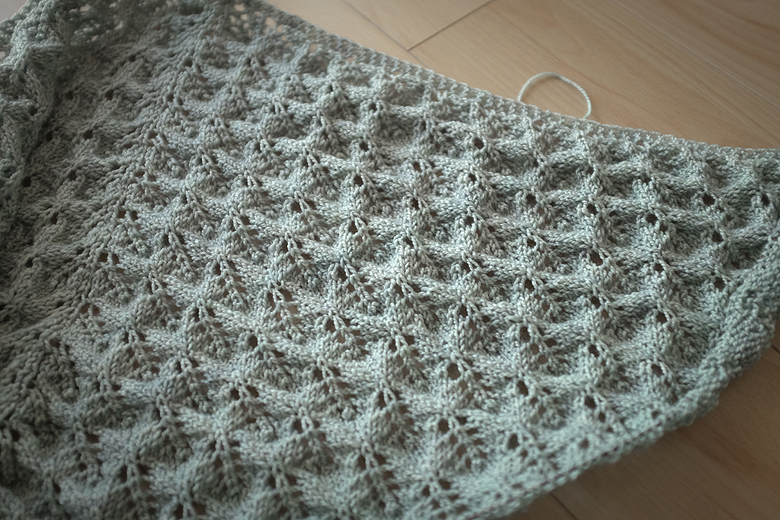
    I’m still taking my shaky steps in polymer clay. Sometimes I like it, sometimes I loathe it, but I always learn something. I was talking to some artist friends about being a process vs product artist. I vary; when it comes to knitting for example, I’m both. I want a product at the end of it, but I enjoy the process of knitting enough for a project to take forever, and for that to be ok.

    Polymer clay on the other hand… I try and I try to be process oriented. To enjoy playing with the clay and learning new techniques. However, I’ve got to fess up. If I’m going to spend a night setting up my clay workspace and spending hours with sticky hands, well, I want something to show for it. Last night I had an idea, and spent the evening giving it a shot. I’m not 100% thrilled with the final product, but I did learn a lot and I photographed every step, so for anyone who wants to give something similar a try, here they are.

    For my own work – I see potential in the technique, now it’s just practice.

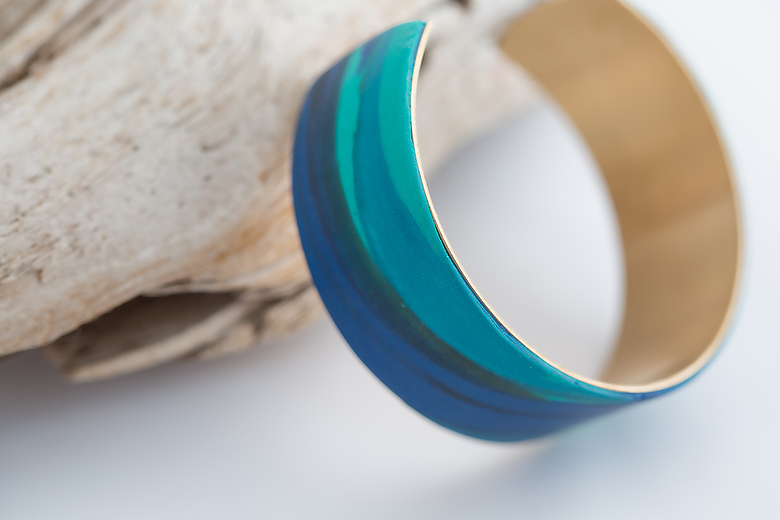
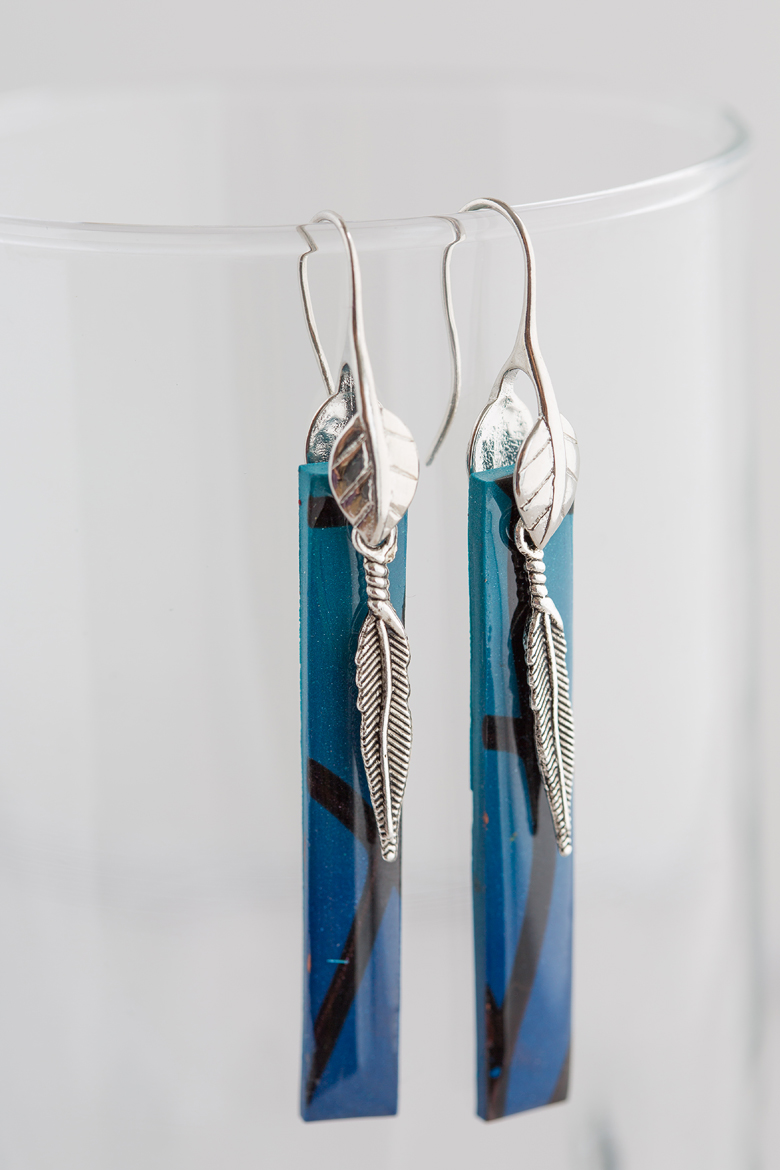
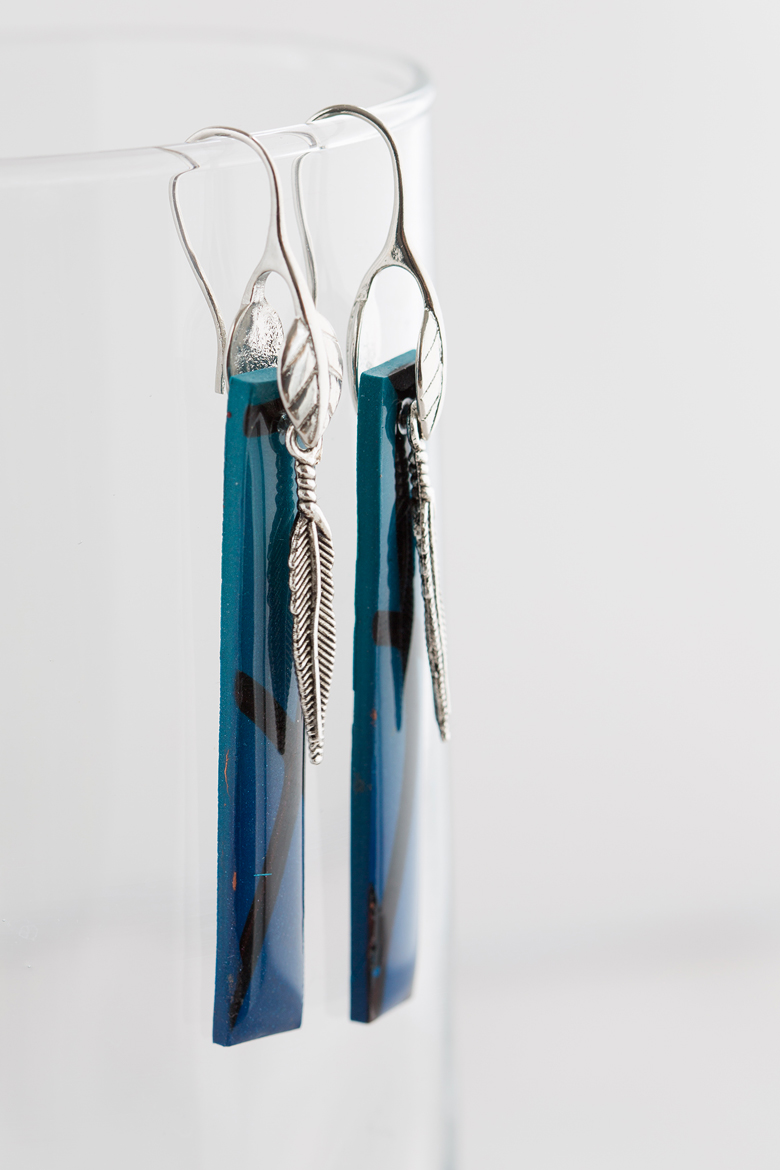
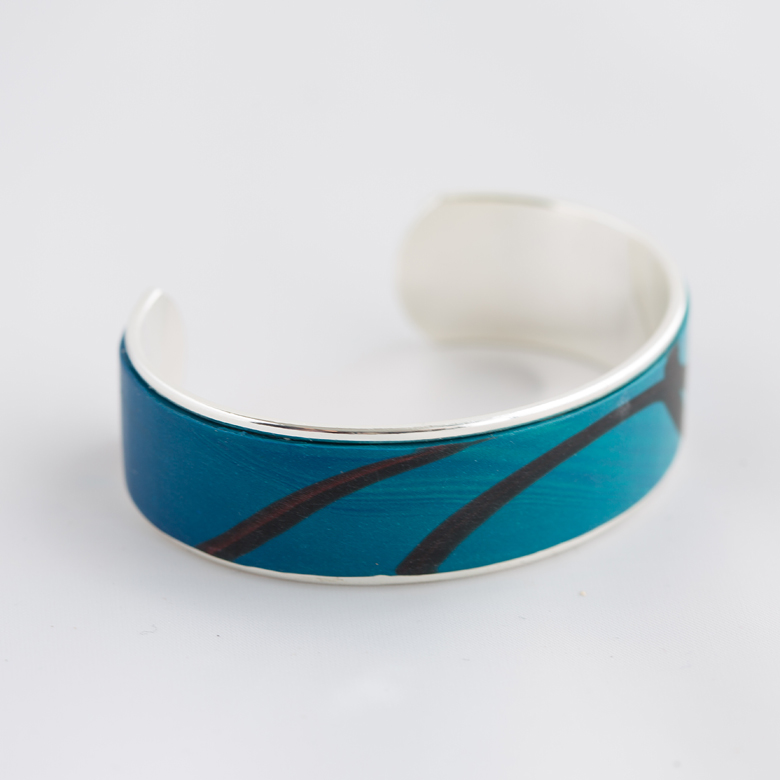
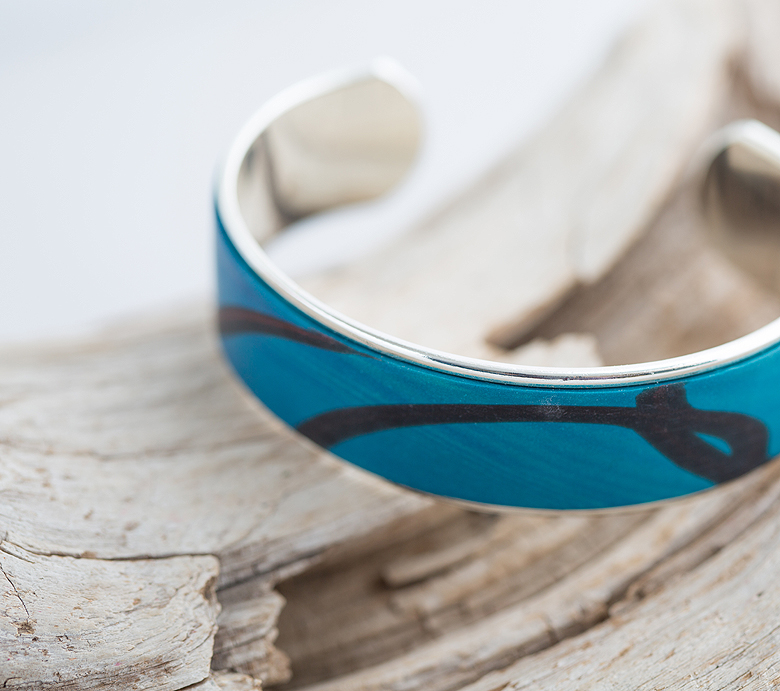
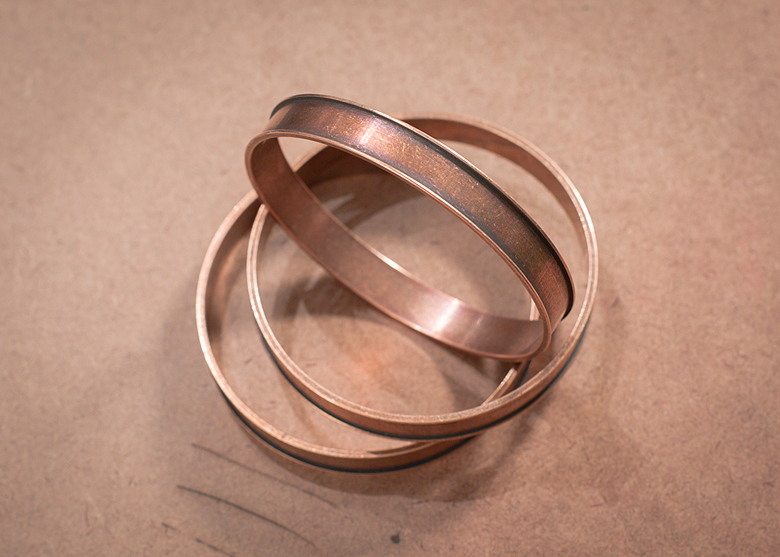
    Step 1 – Get some channel bangles. I got mine from artbeads.com

    ©Shireen Nadir 2014

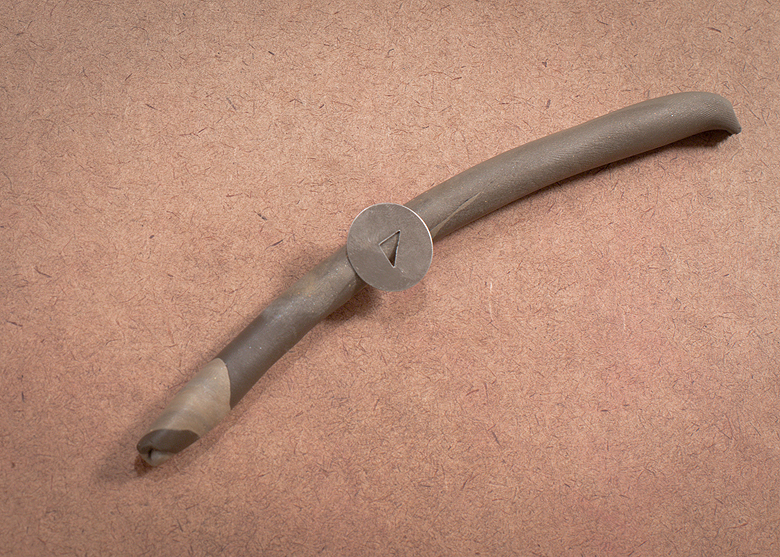
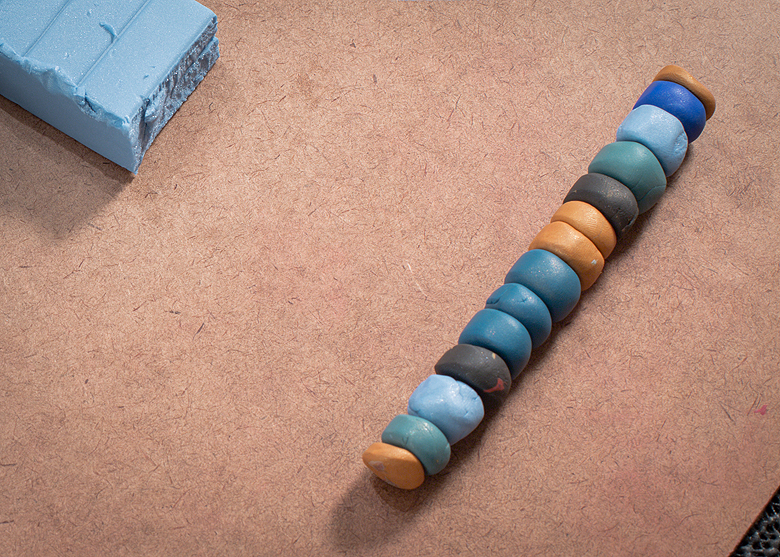
    Step 2 – I got some old, muddy-coloured clay and ran it through my extruder with the triangular shaped hole. I ran enough to cover the bracelet twice over.

    ©Shireen Nadir 2014

    Step 3- I covered the bangle with the first round of the extruded clay. I put my hand through the bangle, and applying a very light pressure, rolled the bangle along my board to flatten out the first layer and make sure it fills the channel completely.

    ©Shireen Nadir 2014

    Step 4 – I took the second half of my extruded clay and carefully applied it on top of my first layer. This layer I did not flatten, I just smoothed it over with my fingers to make sure it was joined.

    ©Shireen Nadir 2014

    Step 5 – I took a flat tool and ran it along the edges, to make sure no clay was overlaying the edge of the channel, and also to seal the join between layers 1 and 2.

    ©Shireen Nadir 2014

    Step 6 – I created this colour array to fit into my extruder. This time I used the smallest possible circle.

    ©Shireen Nadir 2014

    Step 7 – I didn’t extrude all of it at once, just gave myself a yard or so to work with.

    ©Shireen Nadir 2014

    Step 8 – I took a length that was about 1.5 times the circumference of the bangle, and doubled it.

    ©Shireen Nadir 2014

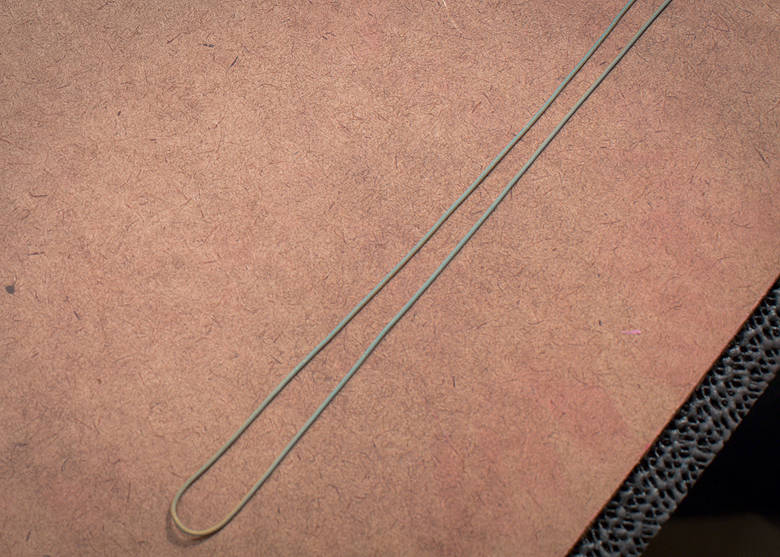
    Step 9 – I twisted it, clockwise. I’m just a rookie at this, but I did my best to make sure the twist was evenly distributed.

    ©Shireen Nadir 2014

    Step 10 – I carefully wrapped this twist around my bangle. I made another twist, but my second one was twisted counter-clockwise. I added this twist to the bracelet as well. I kept building it up in this way, slowly covering all the brown clay with ‘faux knitting’ by alternating clockwise and counter-clockwise twisted ropes of clay. I made sure that all my strands started and ended in the same spot so I could keep the messy looking part of the bangle localized.

    ©Shireen Nadir 2014

    ©Shireen Nadir 2014

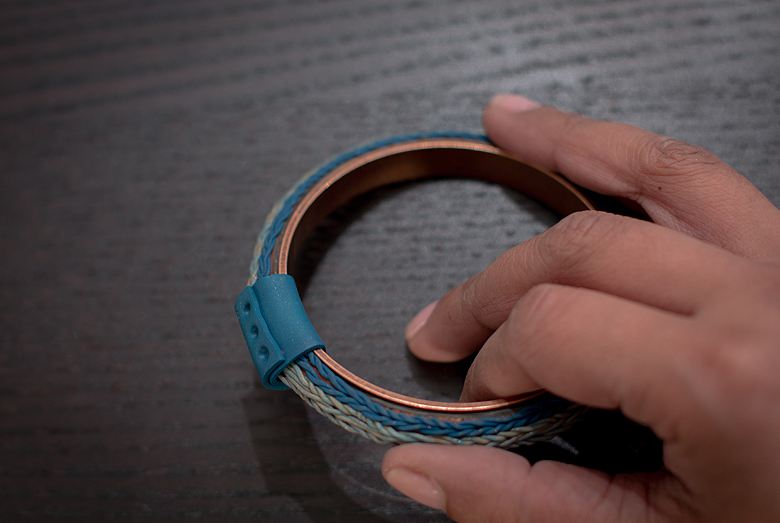
    Step 11 – When it was totally covered I wrapped a piece of clay around the area where the joins were. I covered up the joins and then used a small ball-head tool to push in 3 dents to seal that connection.

    ©Shireen Nadir 2014

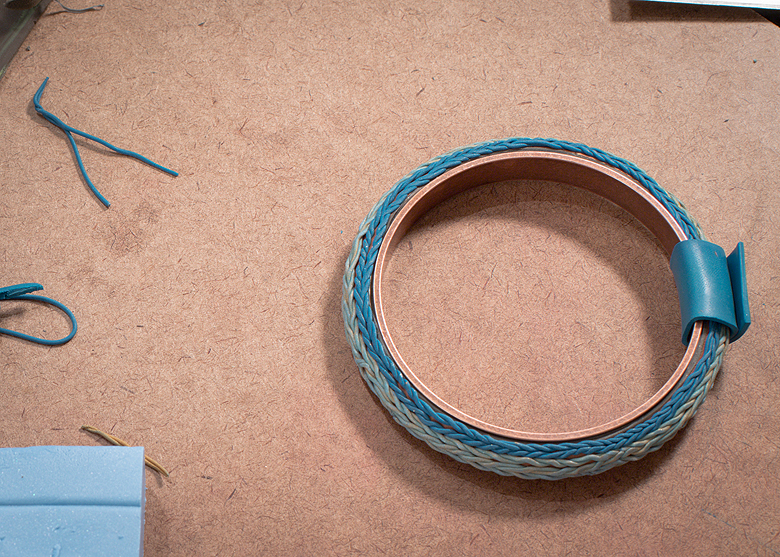
    And that’s it! Other than baking of course – there’s my first go at turning a thin channel bangle into a 3 dimensional knitted bangle. It’s definitely got potential, and I’ll be making more!

    ©Shireen Nadir 2014

    ©Shireen Nadir 2014

  • ©Shireen Nadir 2014

    I apologize for the dearth of posts lately, between poor Happy and my day job things have been hella busy. That doesn’t mean there is no great creative going on though :)

    ©Shireen Nadir 2014

    In a few weeks I’m leaving on a cruise with Tito and my parents for a week. It will be a much-needed unwinding sort of vacation. My mother has specifically asked that I bring at least one really nice dress (which I read as ‘you’re normally a bit schleppy, can you try to dress up a little?) so to make her happy I’ve chosen out a really pretty minty blue/green floor-length dress.

    ©Shireen Nadir 2014

    I decided that I would knit myself something fabulous to wear with it, and I wanted to use up 2 skeins of Mad Tosh sock in a colour called ‘cerulean’ that I bought from Eweknit at last years frolic. The problem was that the dye lots didn’t quite match. They did match the dress beautifully though, and I was determined to use them.

    ©Shireen Nadir 2014

    I decided that striping with a lace shawl would make me crazy, so I chose to knit a giant Haruni. I’m using the lighter of the 2 skeins for the body and the darker one for the lace at the bottom. The pattern suggests that you reserve about half your yarn for the lace edging, so the second skein should do nicely. This baby will hopefully max out at about 800 yards of yarn, so it should be huge. 

    ©Shireen Nadir 2014

    I’m finally finished with my body repeats – I went to 16 stems instead of 12 (I believe 2 extra full start repeats) and I’m super pumped to attach the darker yarn and get going on the lace! I promise to take FO shots on the cruise, with the dress ;)

    ©Shireen Nadir 2014

  • I’m sorry to say that our little dog Happy will be put to sleep today Happy came to us as a rescue from a puppy mill – something that I cannot possibly speak out strongly enough against as a cruel, senseless, inhumane and inhuman concept. She came to us as an old doggy, with a huge list of health problems, culminating in the kidney failure that was diagnosed today.

    We gave her what I believe was the happiest year of her life. We brought back her bark, her sense of mischief, her ability to play and to love and to trust. Happy was proof of the transformative power of love and the rewarding, if tragic, experience of rescuing an older, or sick animal. We had you for just over a year, Happy. We loved you for all you were worth. We renamed you ‘Happy at Last’. Go in peace, sweet baby.

    Happy

  • Here is another polymer clay cuff, this time inspired by that great goal of mine, the Northern Lights. Not the aurora as I’ve always seen them–as a diffuse glow coming up from the horizon line,  but the full and bright overhead aurora that you can get in Fairbanks, or Tromsø. Someday I’ll get there!

    Taken by Rune Engebø on September 1, 2014 @ Tennevika, Troms, Norway
    Taken by Rune Engebø on September 1, 2014 @ Tennevika, Troms, Norway

    3V8A34303V8A34313V8A34333V8A34353V8A3436

  • My new pattern for a simple, quick, uber manly fingerless glove is almost done – and I was just trying to get some FO shots of the first pair.

    DSCF1930

    But cold has addled the brains here at the office and we ended up doing this instead.

    DSCF1951 DSCF1947 DSCF1946

  • Heading into another cold one tonight… -42 with the wind chill. But it’s so, so pretty…

    ©Shireen Nadir 2014 ©Shireen Nadir 2014

  • This is what Lake Ontario has looked like these past few days. The entire inner harbour is frozen, to the point where only the marine fire unit and the Porter ferry are cutting through. In other words… it’s been cold. Like -40 cold.

    Lake Ontario ©Shireen Nadir 2014

    Mind you, I heard that Winnipeg was the same temperature as the arctic a few days ago, so I’ve no right to complain ;) I’ve also found ways to kill the time indoors (not because even I have limits… but because my camera does) and I’ve been playing with polymer clay.  Here is another channel bracelet cuff with a pair of matched earrings that were coated in resin to bring out the colour. Every time, just a little bit better :)

    Polymer Clay Cuff ©Shireen Nadir 2014 Polymer Clay Cuff ©Shireen Nadir 2014 Polymer Clay Cuff ©Shireen Nadir 2014 Polymer Clay Cuff ©Shireen Nadir 2014 Polymer Clay Cuff ©Shireen Nadir 2014 Polymer Clay Cuff ©Shireen Nadir 2014

  • Bum Cosy ©Shireen Nadir 2013

    My New Years was spent taking FO shots of my new pattern – perfect for skating, more serviceable than you’d believe, adorable as all get out… my new pattern is the Bum Cosy. And yes, these are the most photos of my bum that you can ever expect to have to endure on this blog ;)

    Bum Cosy ©Shireen Nadir 2013

    I’m pretty proud of this one. The knitting is mindless enough that it makes a perfect car, TV or socializing project. The cables keep things from getting too dull. I knit mine in 3 days just by carrying it everywhere I went!

    Bum Cosy ©Shireen Nadir 2013

    The Bum Cosy is just what it sounds like; a cute and sexy little hip hugger that’s meant to be worn over jeggings or tights to keep your bum warm and stylish in this chilly weather. The Bum Cosy has simple, stretchy cabled ribs to give it form while keeping the elasticity. It’s accented by 2 chain link cables that run fetchingly down the side of the hips. If you fancy a skirt length, instructions are given for making it longer. The waistband is reinforced with a crochet chain or knited i-cord that you will weave through the ribbing to tighten the piece as needed. A straightforward, seamless, top-down knit, it’s easy enough for those starting out, and mindless enough for seasoned pros to whip off in a few days.

    Bum Cosy ©Shireen Nadir 2013

    Because it’s built to allow for a lot of stretch, it’s knitted with 2 inches of negative ease and instructions are given on how to choose the right size. Hip sizes for 28”, 30”, 32”, 34”, 36”, 38”, 40”, 42” and 44” have been provided. Each one has been designed as a separate chart, so there is no need to keep track of which size you’re knitting. Just pick the chart that’s right for you and knit on!

    The pattern uses 400-600 yards of worsted weight yarn, and the sample was knit in Sweet Georgia Superwash Worsted, in the colour ‘Cayenne’.

    Ravelry link here:

    Etsy link here:

    Craftsy link here:

  • 1507068_10153625098240234_2001769938_n

    It’s a lovely evening, even if it is -18 with the wind chill. I’m cleaning and baking and preparing to have a few close friends over to ring in the new year.

    2013 was good :) It was my first year as an owner in my agency. I took up yoga, became an author, made lots of stuff and learned a ton along the way about resin and polymer clay. I started sewing and made half a quilt. We went to El Salvador, drove to Winnipeg and I went to Italy. I had a lot of opportunity to teach in Karate, and brought my self defence course to more women. Most importantly I met lots of great people, and became closer to a few beautiful friends that we will see in our lives for decades to come.

    Here’s to ending the year right, with people we love and good food. From our family, 2&4 legged, we wish you a beautiful, healthy, prosperous 2014!

  • In the past few days, Toronto has been under a layer of ice that began with a storm last weekend, and was kept up by the fact that we went on to have a truly white Christmas.

    Ice Storm ©Shireen Nadir 2013

    On one hand, it’s caused massive amounts of downed trees, power outages, damaged property and folks who went without power for almost a week, in freezing temperatures. On the other hand, it really brought people together. Neighbours, family and friends with power opened their doors, the city pulled together, and in a touching gesture of solidarity 42 hydro workers from all over Manitoba gave up their own Christmas to fly in and help.

    Ice Storm ©Shireen Nadir 2013

    Thanks to the power outage, there was a lot less shopping, and a lot more socializing and helping. You could argue that the ice storm brought out a little more Christmas in everyone ;)

    Ice Storm ©Shireen Nadir 2013

    That’s not to say there was _no_ shopping. We were lucky – our home and my parents home had power all the way through. We had a lovely Christmas morning, and Santa was very very good to me – so not only did I get to wander around in the incredibly damaged and eerily beautiful Don Valley yesterday, but I was doing it while test-driving my new 17mm-40mm Canon lens ;)

    Ice Storm ©Shireen Nadir 2013 Ice Storm ©Shireen Nadir 2013 Ice Storm ©Shireen Nadir 2013 Ice Storm ©Shireen Nadir 2013 Ice Storm ©Shireen Nadir 2013 Ice Storm ©Shireen Nadir 2013 Ice Storm ©Shireen Nadir 2013 Ice Storm ©Shireen Nadir 2013 Ice Storm ©Shireen Nadir 2013 Ice Storm ©Shireen Nadir 2013 Ice Storm ©Shireen Nadir 2013 Ice Storm ©Shireen Nadir 2013 Ice Storm ©Shireen Nadir 2013 Ice Storm ©Shireen Nadir 2013 Ice Storm ©Shireen Nadir 2013 Ice Storm ©Shireen Nadir 2013 Ice Storm ©Shireen Nadir 2013