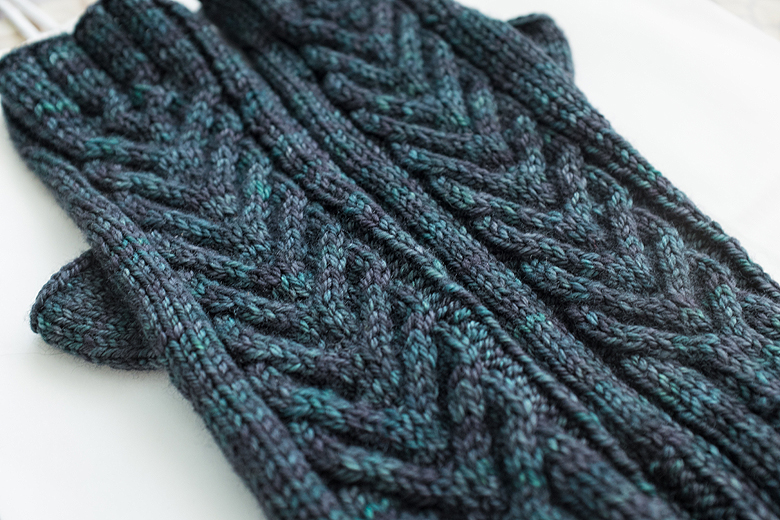
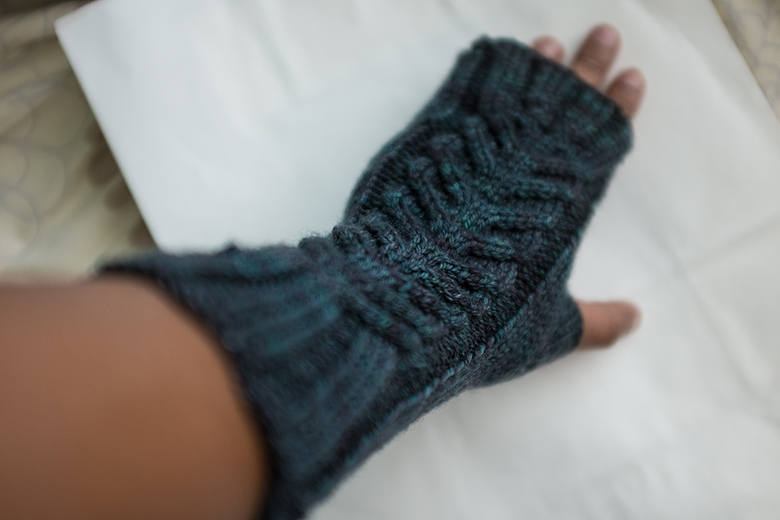
‘Well and good’ (some of you have no doubt been saying) but what is she knitting?
These came off the needles a few weeks ago, they’re a gift for a friend (my own Los Guantes De Claudia pattern) and it seems the weather is just chilly enough that she’ll still get a chance to wear them!
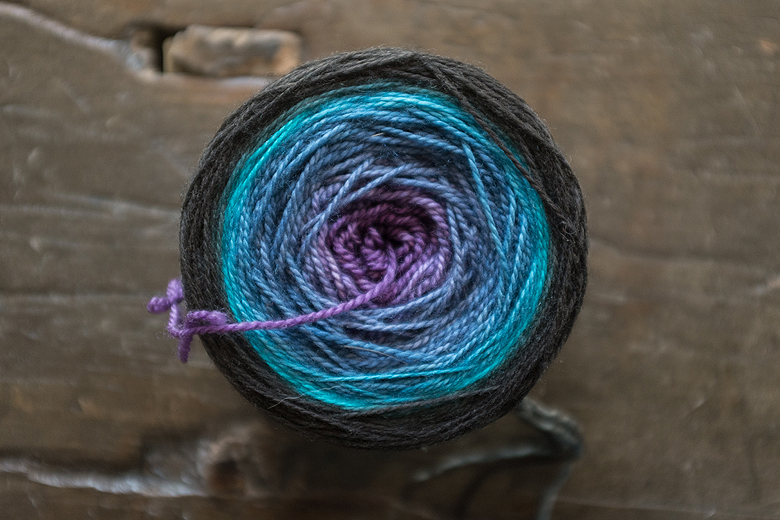
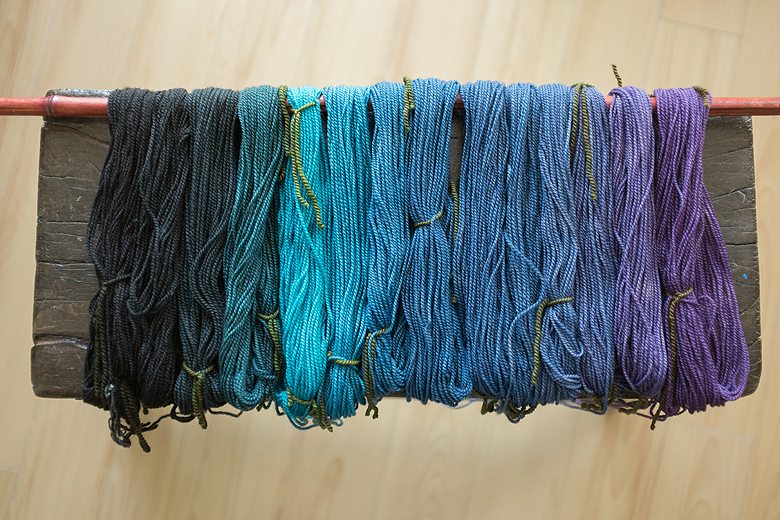
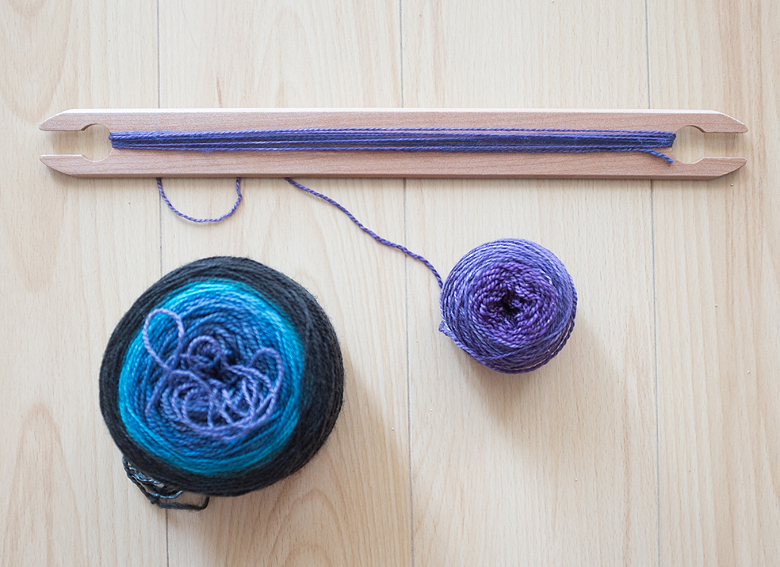
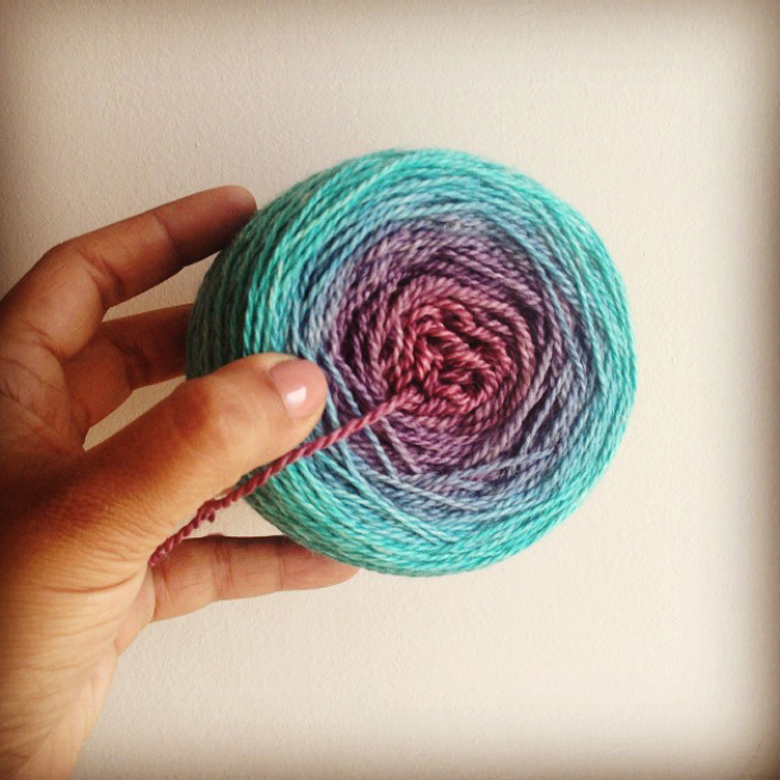
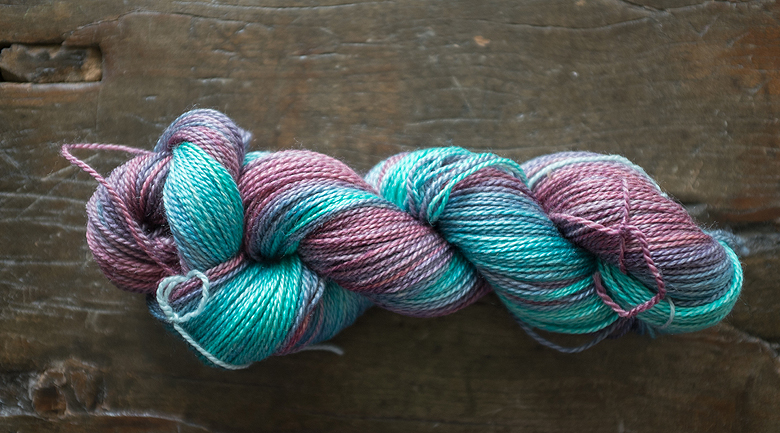
I have finally started a project with one of my Ombré dyed yarns. Here’s the one I’ve chosen:
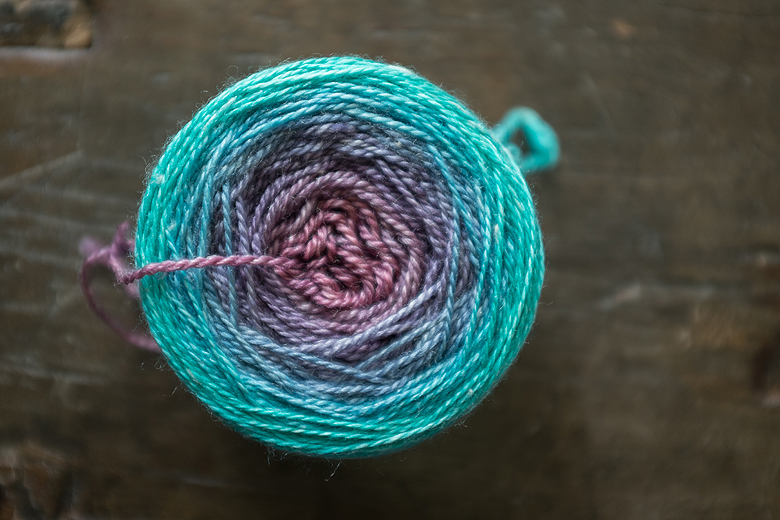
Which, before I wound it up, looked like this:
For the full tutorial on how I dye these skeins, click here!
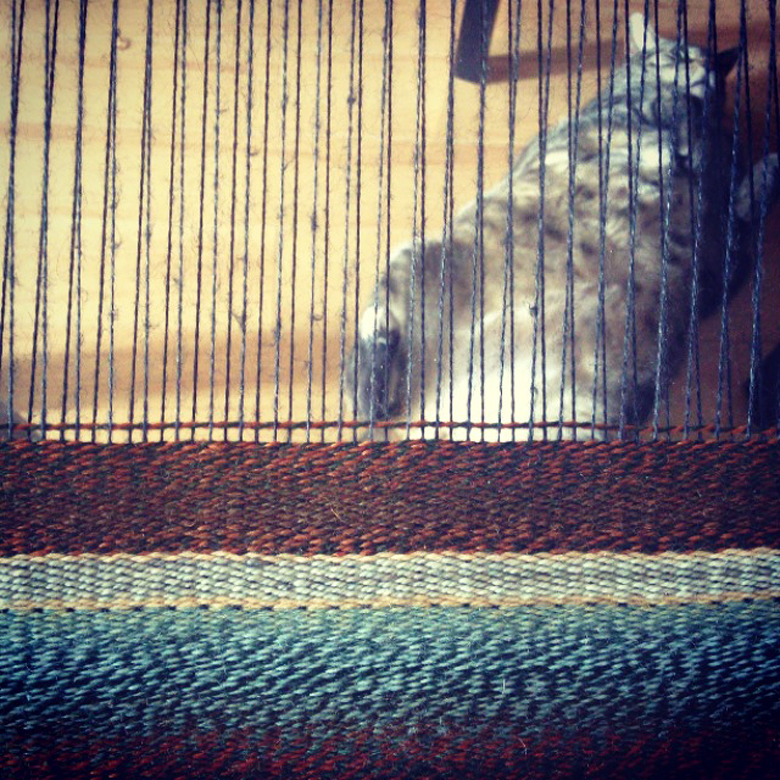
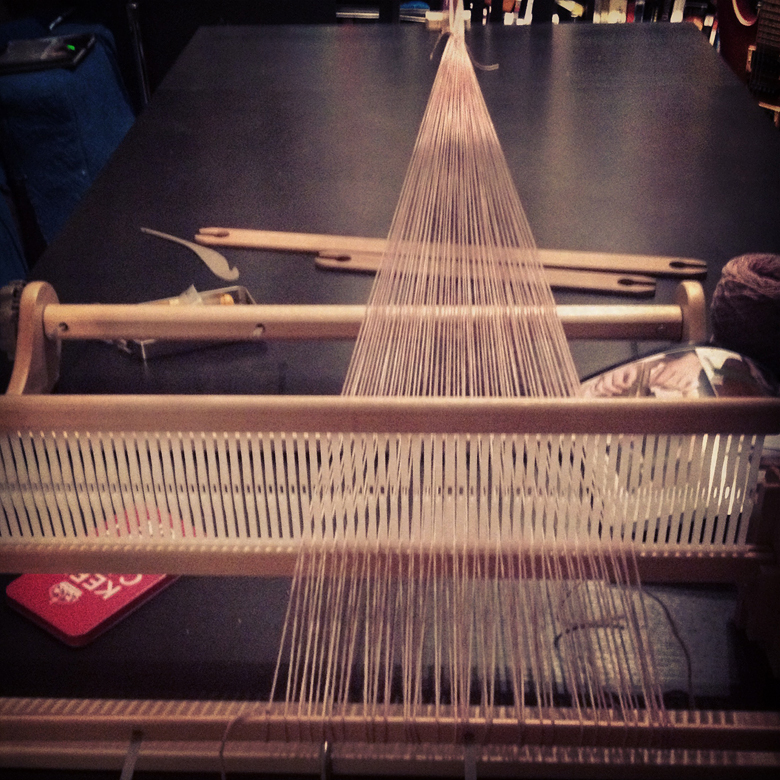
This time I am warping with alternating strands of Indigodragonfly MCS worsted, in a colour called ‘Unemployed in Greenland’ with strands of Indigodragonfly merino sock in a colour called ‘Is The Money Ok? Did They Hurt The Money? (I know, awesome, right?).
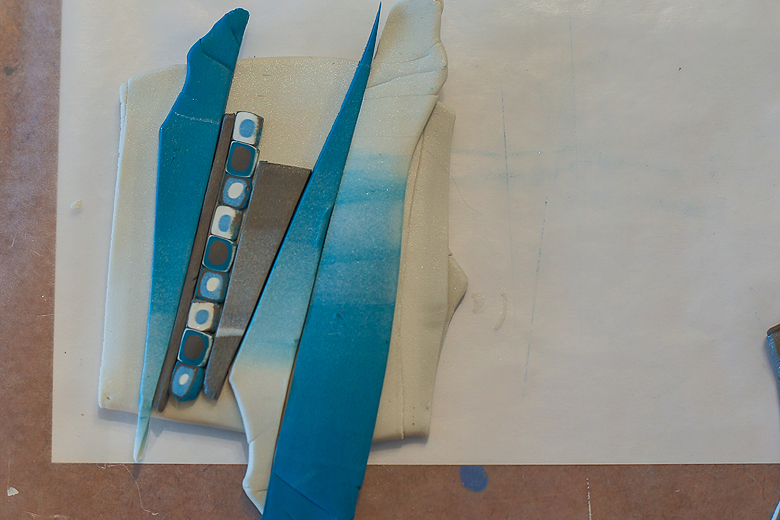
I am trying a few new things this time around:
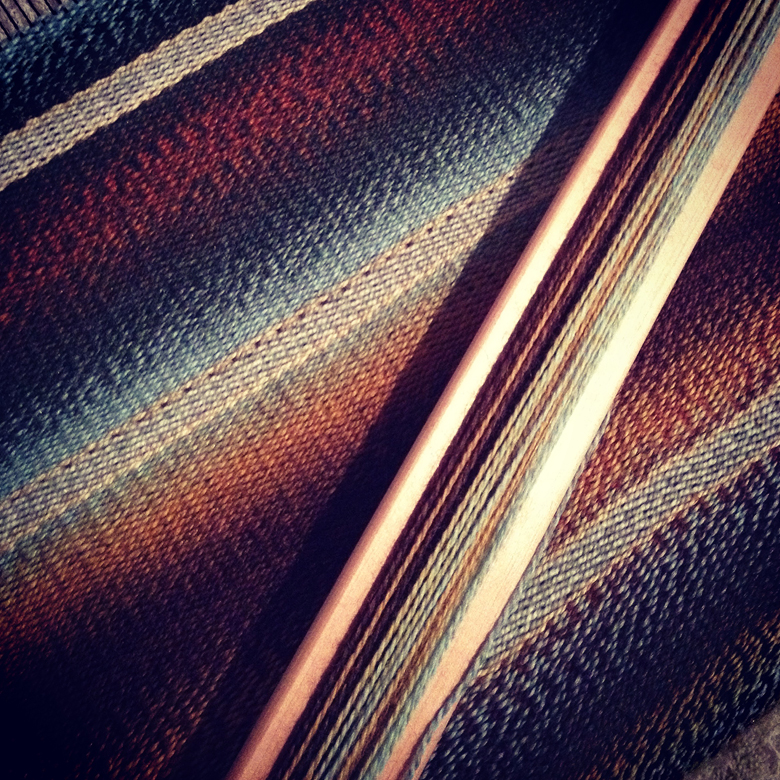
I am using a pick-up stick technique to create warp floats on my piece. I’ve learned this from a combination of this pattern and The Weavers Idea Book by Jane Patrick. So far so good.
I decided to hem-stitch the bottom before beginning the work, so I don’t have to do it at the end when it’s all floppy and harder to work with. I got this gem from the pattern instructions.
I am alternating worsted and sock yarn to vary up my texture, in addition to the pick-up technique. In addition to giving me some texture, I’m hoping that the warp floats will soften up any remaining differences in how my colour transitions come out, so it looks as much like a gradient as possible.
I figured out a way to make sure the colour transitions in my ombré yarn stay intact (see below)
The problem I was having was this: when you wind yarn onto your shuttle, the beginning of the yarn ends up being the last bit of yarn to come off the shuttle. This makes working with gradated yarns tough. To fix this, I use my ball winder to make a mini ball. Then I start winding on my yarn from the outside of that ball. By the time I get to the inside of that ball, I’m at the beginning of my colour gradient and ready to start weaving. When I run out of yarn I repeat the process to make sure that my colours are coming up in the right order. Sounds simple, but it really stumped me for a bit!
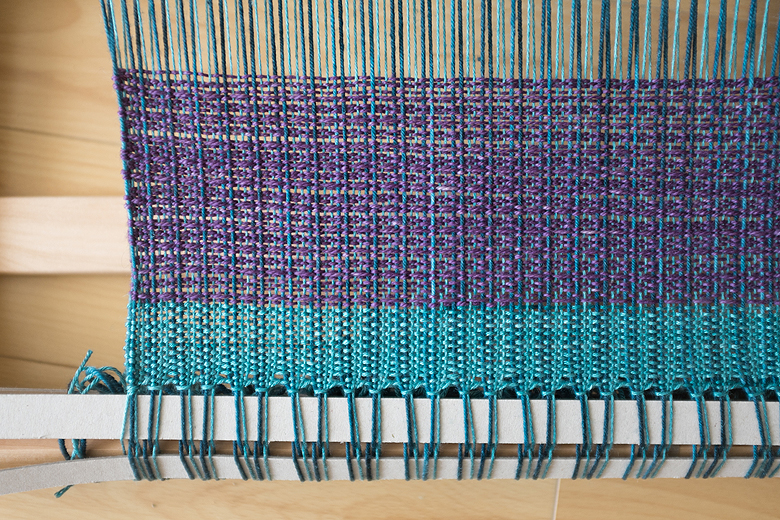
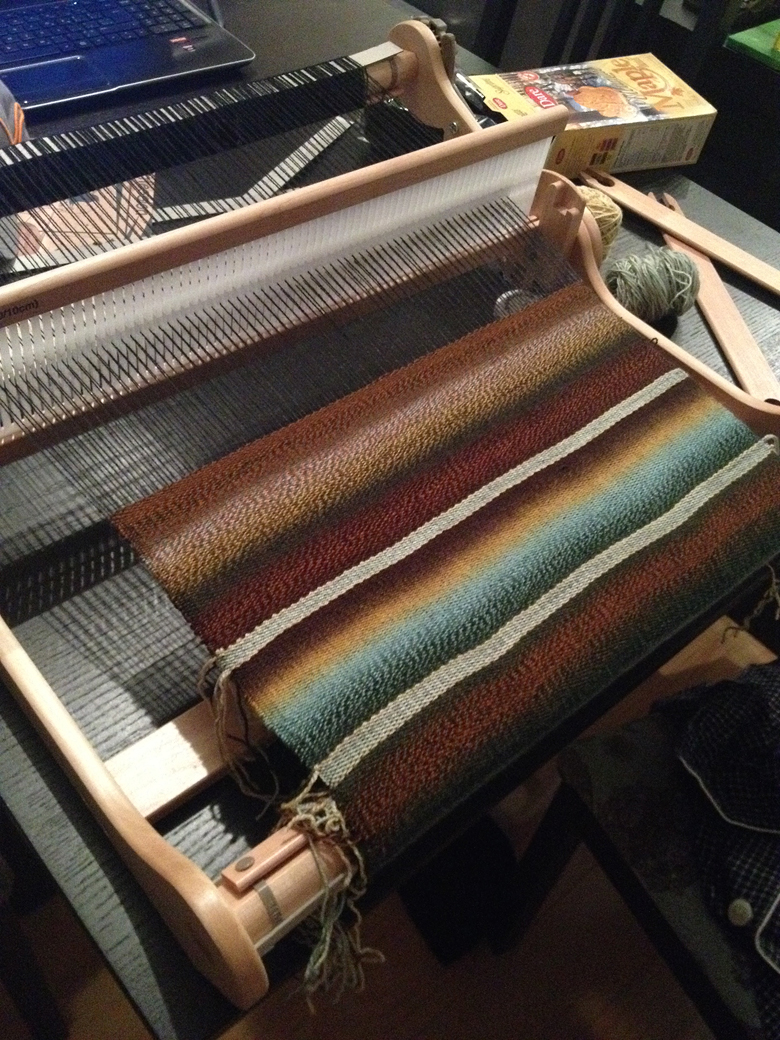
And here is the work so far. I’m weaving something that will hopefully be wide enough to be a wrap, and also hopefully have more drape than my all-worsted- pieces did.
I hope I have enough yarn! This is only my 5th project, so I have no idea in my head yet of how much yarn these things take. I can’t wait to see how the colour transitions come out!
Against all the advice I’d ever read, or been given, or even inferred through common sense, I decided to warp the loom on Friday night with what amounted to lace weight, single ply, handspun. This way lies madness.
Tito only made it about 15 minutes before declaring a moratorium on Noro Taiyo lace weight. The stuff is a little rough, with the hallmarks of handspun, including thinner bits and slubby bits. It sticks to itself like velcro if you let it twist together by accident, but you can’t pull too hard to untwist it because it may just pull apart.
We ended up losing one warp thread right at the beginning, and another one about halfway through the scarf, though through some really awesome luck they both happened to be at the selvage.
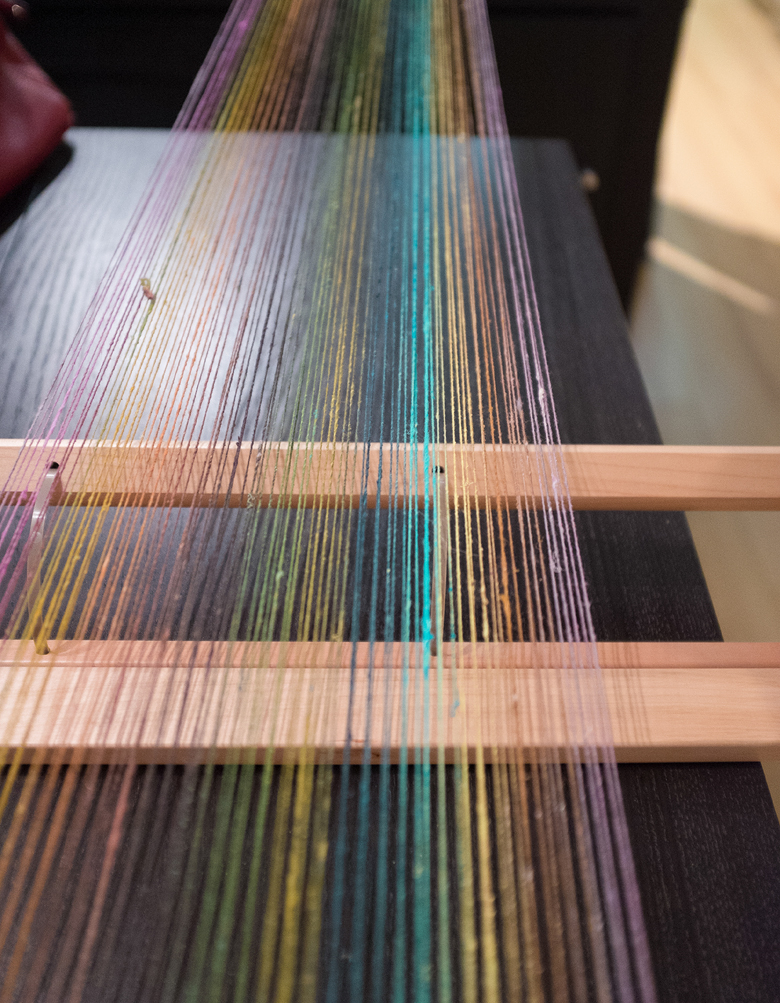
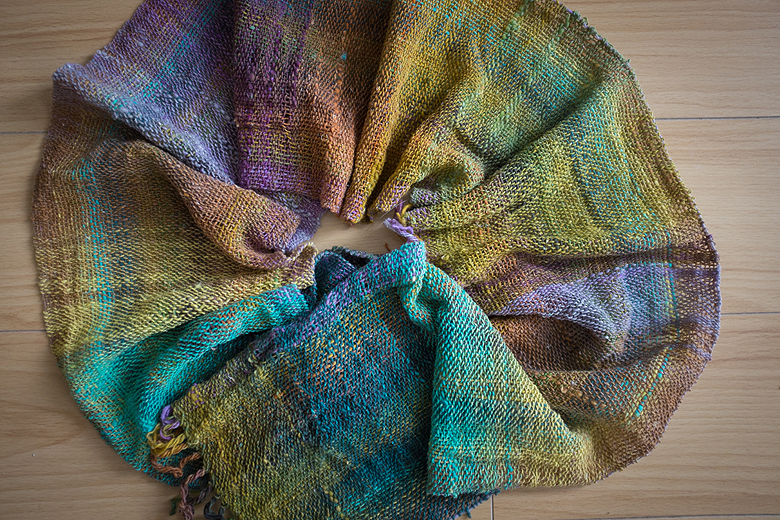
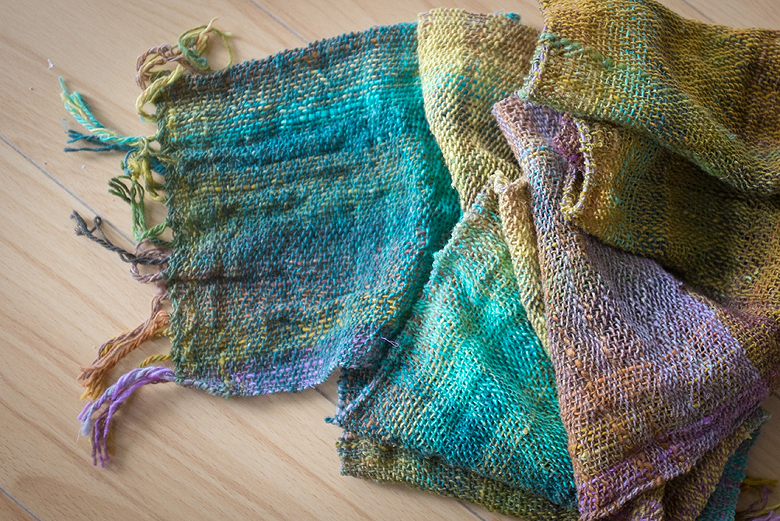
The colours look nuts. They look like they could never work out, even in the ball. When you warp it, it looks like a carnival.
But then I started to weave… and oh my it’s lovely.
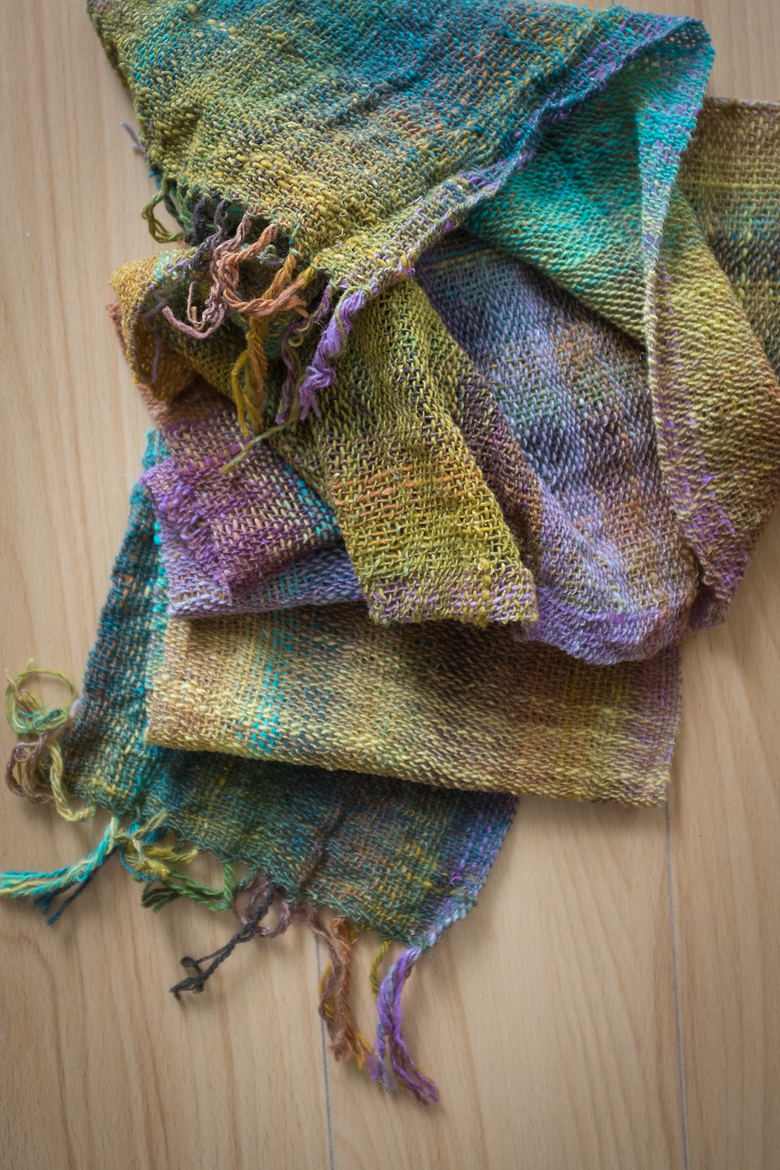
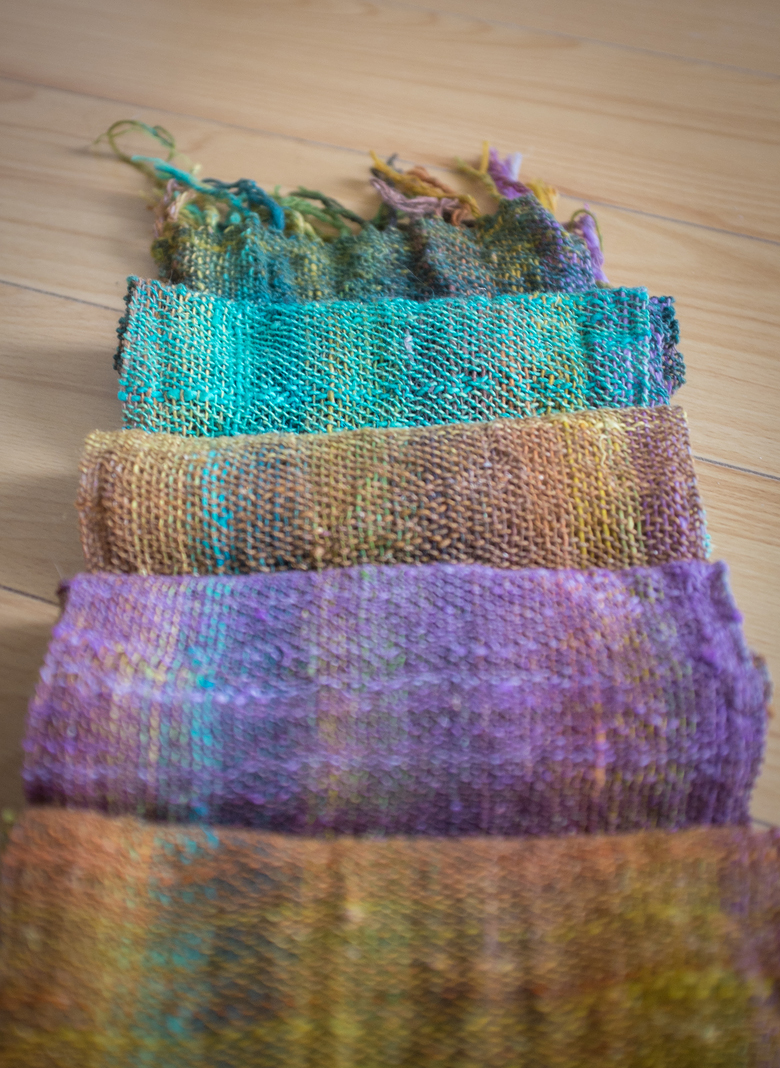
Every 20 minutes it looked like a completely different colour way. It would look like this for a while….
… and then like this for a while.
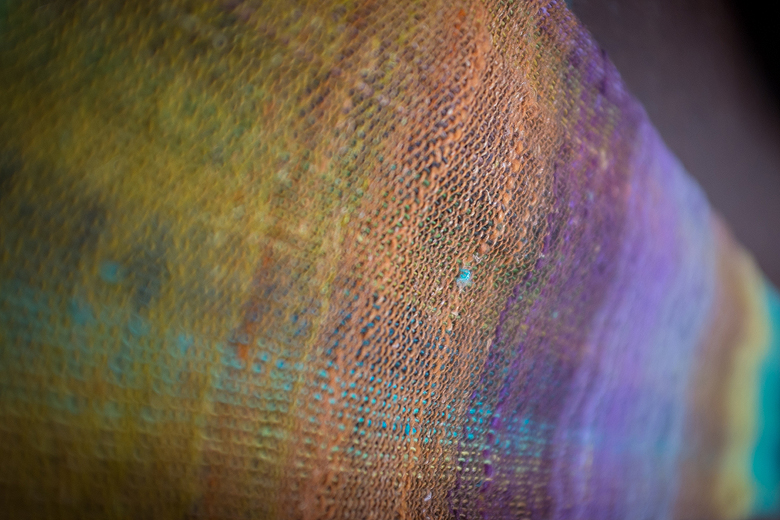
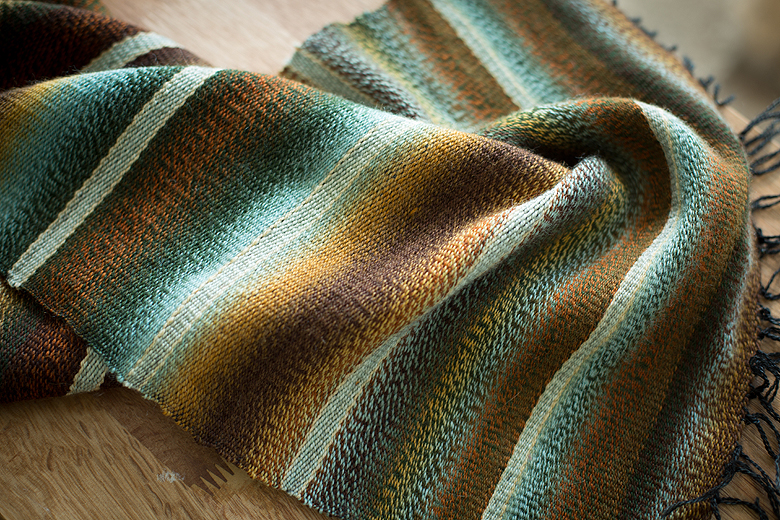
And then it came off the loom and looked like this.
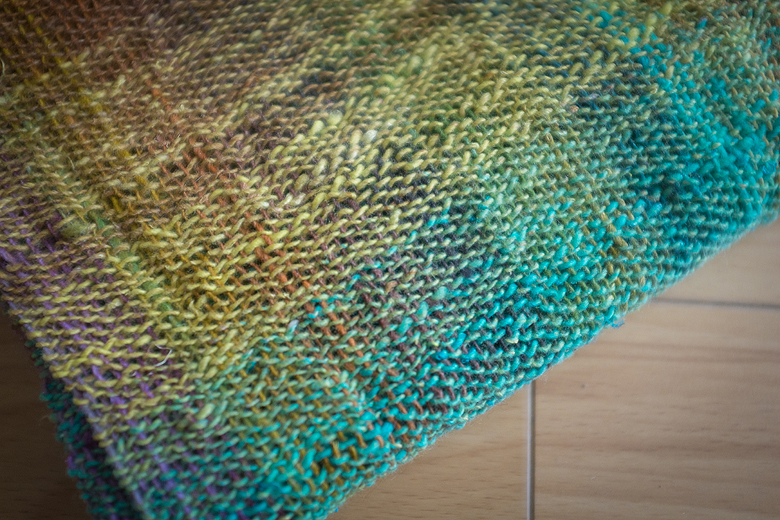
I wove very loosely, because it was so delicate, and also because I wanted the warp threads to show. The moratorium has been declared off – because I absolutely need to do this again.
Here are the changes I’ll be making though – I’m going to work with Taiyo sock instead of Taiyo lace, (100g/462 yards versus 100g/918 yards) so I have something a little more robust, and I’ll be changing to a 10 or 12 dent reed (in knitter speak this means I’ll be working it to the correct gauge instead of what I did, which was the equivalent of knitting lace on worsted weight needles).
I expect I’ll get a more tightly woven, robust piece from it, while still being light and drapey. This piece is very delicate, I’ve already managed to snag it on something with disastrous results.
It’s undoubtedly stunning though. I’m in love, I want another. I used to joke with friends that tequila was like that abusive lover that you stupidly kept going back to. Now it’s Noro. Noro and tequila.
I love the idea of ombre yarns, and since I got weaving I’ve been dreaming of a beautiful ombre scarf, plain weave, with a neutral warp, transitioning over the course of a long, fine fabric.
Laurie from The Black Lamb had given me 2 skeins of a beautiful, natural merino silk sock yarn when I bought the loom, so last night I decided to experiment with my own ombre dye job. Here are the details of how I did it, and I’ll definitely be trying to do it again (with better photos) in the near future!
*Before you start – I’m using a silk merino superwash blend. If you’re not using a superwash, then be super gentle, because this process can be hard on your yarn and you don’t want it to felt!
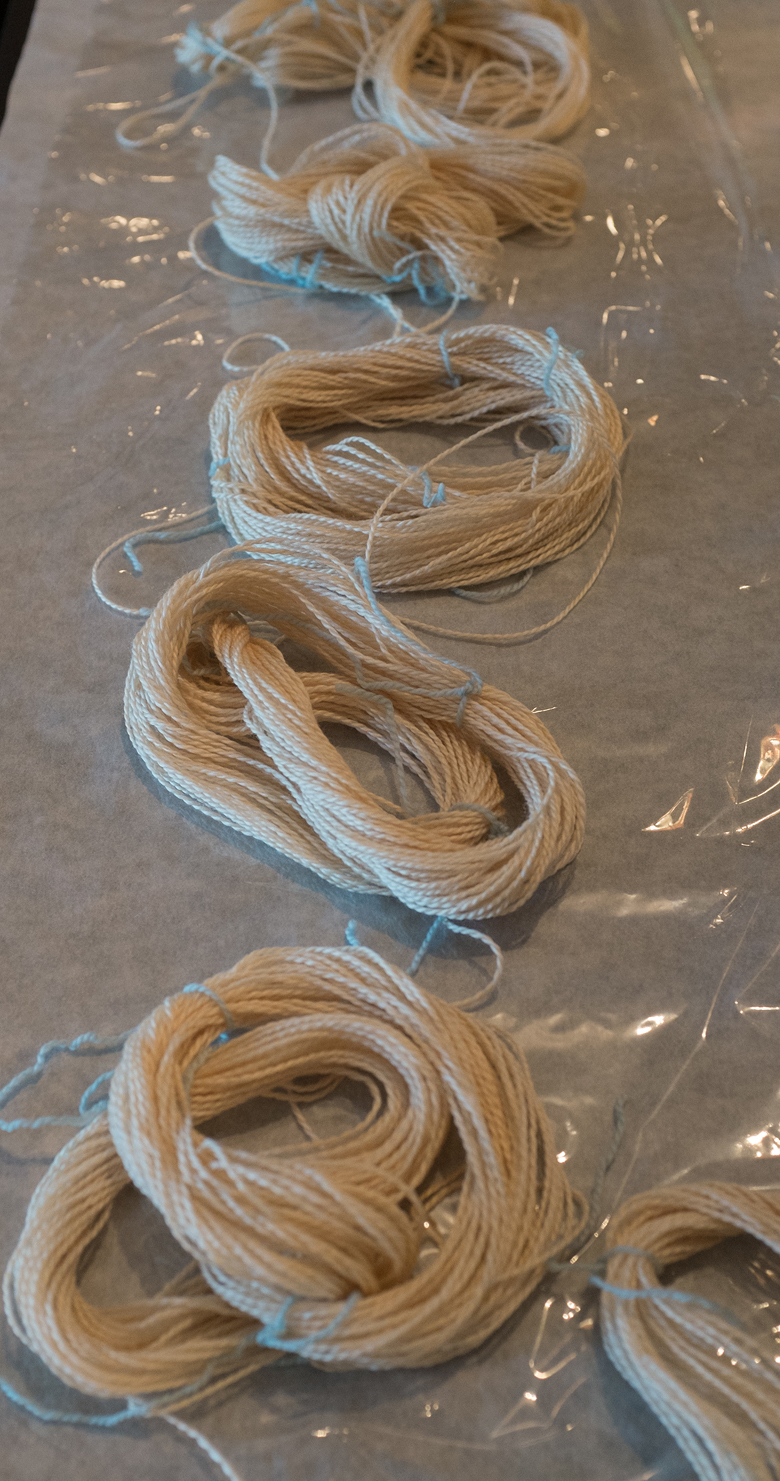
Divide your yarn into mini-skeins. There is no real easy or fast way to do this–I recommend putting the skein on a swift if you’ve got one, and unwinding it onto a niddy noddy, chair, or even your arm. I was not very scientific about mine – I wrapped it around my arm 40 times, tied off my mini skein and then, without cutting the yarn, began another 40 wrap skein. This gave me 10, more or less equal mini-skeins that were all still attached to each other by a length of yarn.
Fill a bowl with a water-vinegar mix. I’m using 3 parts water to one part vinegar. I found that 6 cups of water and 2 cups of vinegar were enough, in my case, to cover my yarn completely. I put my 10 mini-skeins in the mix and let it soak for about 30 minutes.
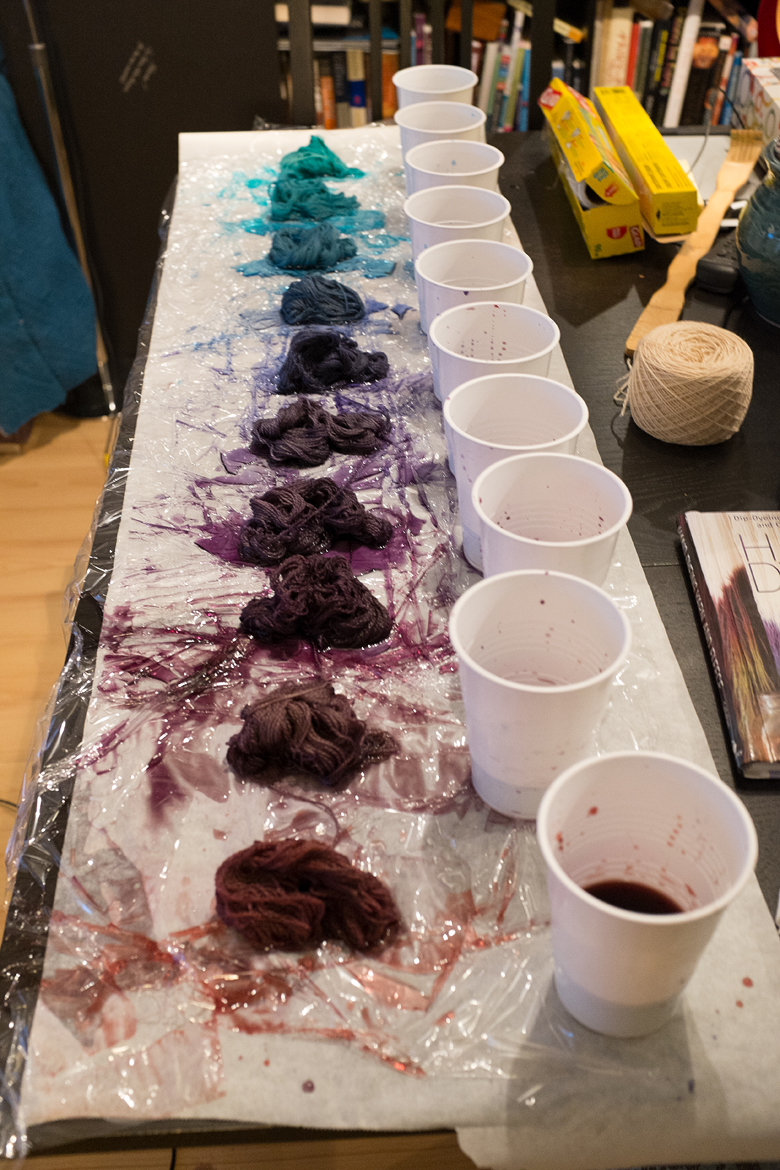
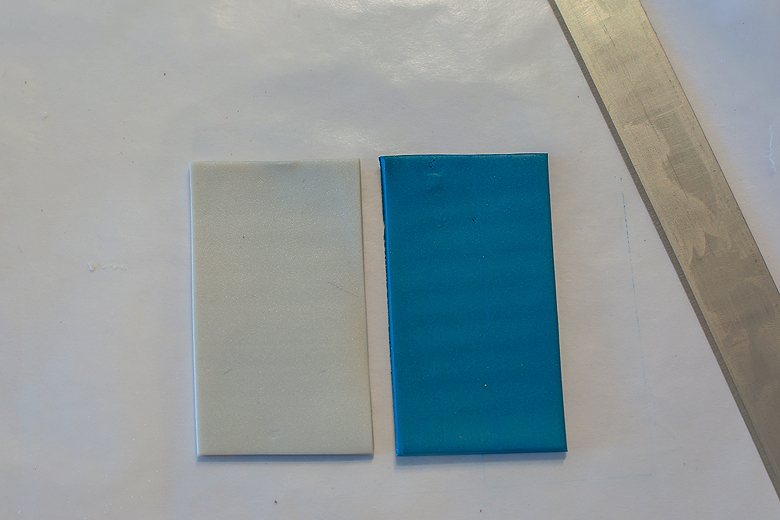
On my dining table I laid out a few strips of wax paper (to protect my table) and then covered it in plastic cling-wrap.
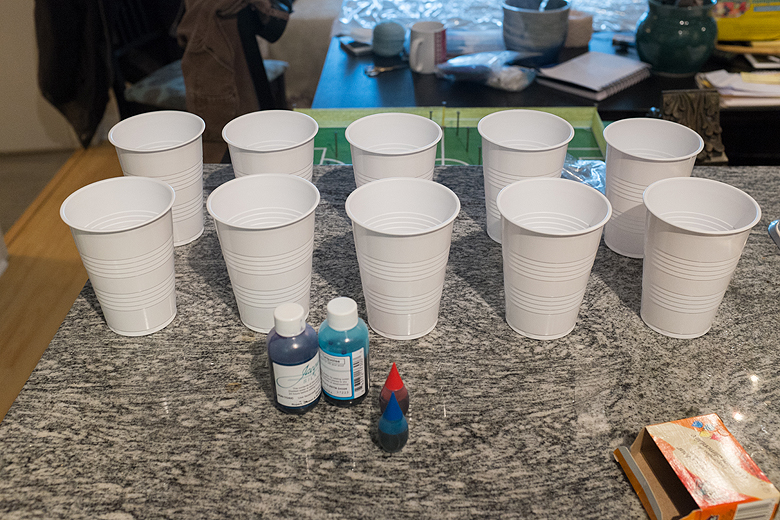
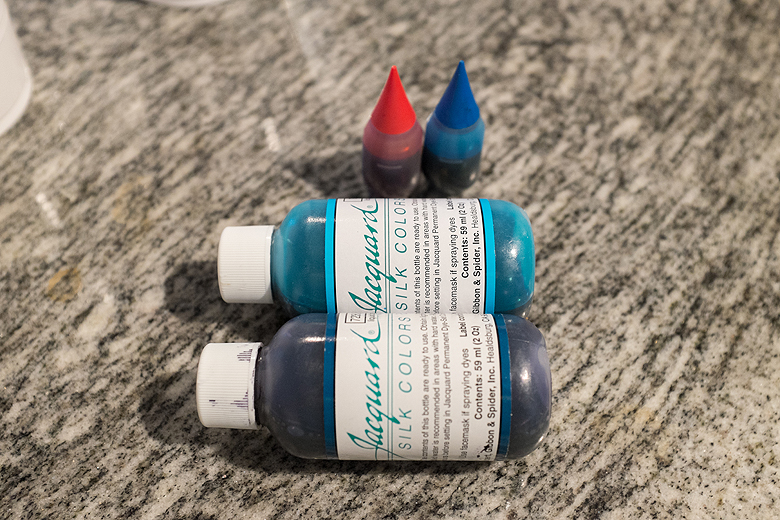
While the yarn was soaking, I prepared my dyes. I set up 10 plastic cups (because I’ve got 10 mini-skeins, you might need a different number) and put about 1/3 cup of water into each one. I’m using a combination of food dye and Jaquard Acid dye to create my colours.
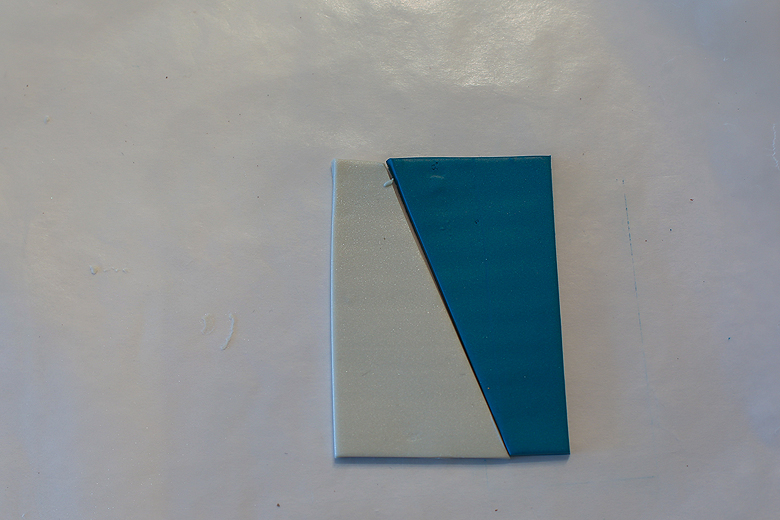
To graduate the colours, here’s what I did:
Cup 1: 3 parts Jaquard Turquoise
Cup 2: 2 parts Jaquard Turquoise to 1 part Jaquard Blue
Cup 3: 1 part Jaquard Turquoise to 2 parts Jaquard Blue
Cup 4: 3 parts Jaquard Blue
Cup 5: 3 parts Jaquard Blue with 1 drop of red food colouring
Cup 6: 3 parts Jaquard Blue with 2 drops of red food colouring
Cup 7: 2 parts Jaquard Blue with 3 drop of red food colouring
Cup 8: 1 part Jaquard Blue with 4 drop of red food colouring
Cup 9: 1 part Jaquard Blue with 5 drop of red food colouring
Cup 10: 1 part Jaquard Blue with 6 drop of red food colouring
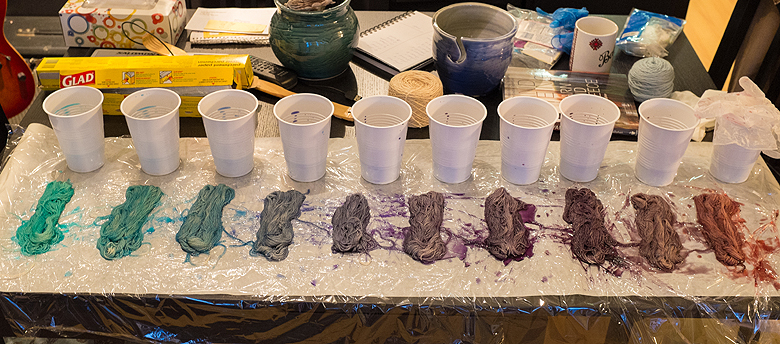
The practical upshot of this is that you change your colour mix gradually over however many cups you’ve got. You can control the degree of change and the number of steps as needed to get the colour shift you’re looking for. To test whether my colours were shifting the way I wanted them to, I dipped a small piece of paper towel in each cup and laid the paper towels out in a row to see how the colour change looked. This is a good time to tweak your colour mixes if you need to.
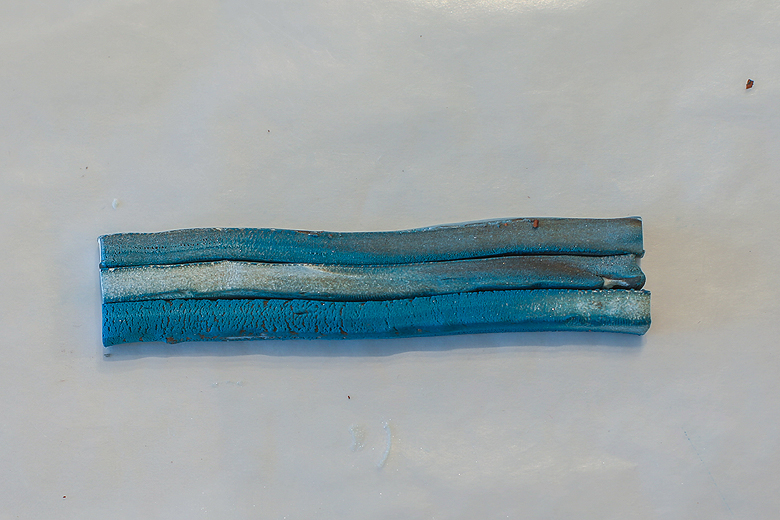
After the requisite 30 minutes, I took my yarn out of the vinegar bath and laid it out on the plastic wrap, gently separating the mini skeins from one another.
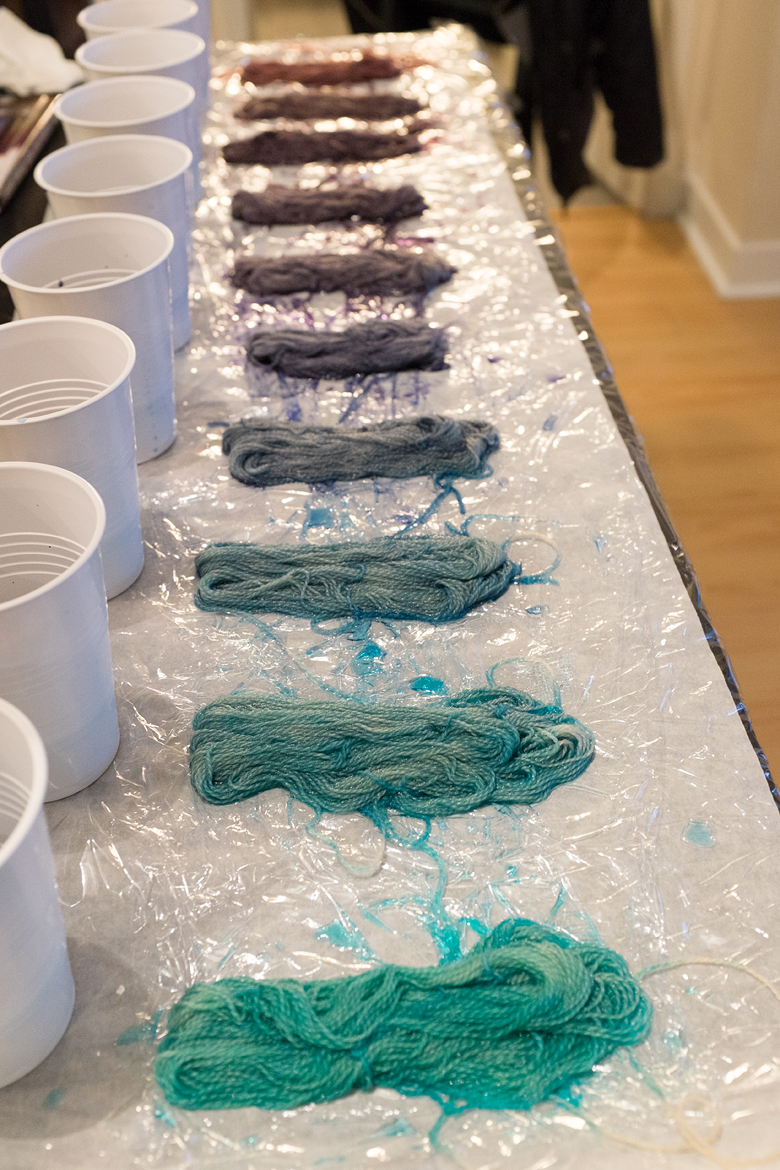
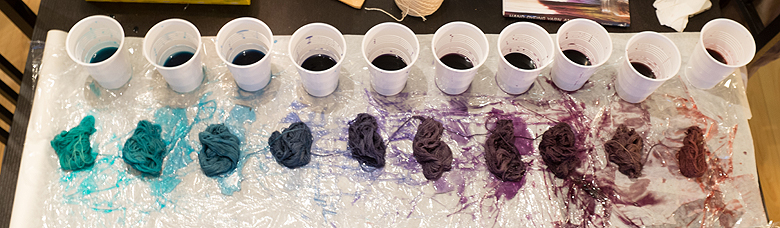
I placed a cup in front of every skein, and put on rubber gloves to protect my hands. Very gently, and starting with a very small amount, I poured the dye from each cup onto the skein in front of it, ‘squishing’ the yarn gently as I did so to make sure the inner fibers were receiving dye as well.
I continued up the line until all the yarn was treated and then started back at the beginning again, adding dye until the yarn was fully saturated, being careful not to allow the little pools of dye to mix with each other more than I could help. Having said that, you do want to make sure the little lengths of yarn that connect one skein to another are receiving dye as well!
When the yarn had absorbed as much dye as it could, I pulled up the sides of my cling wrap and used it to wrap the yarn, as one whole package, and I put that package in a microwave safe bowl to keep it from leaking everywhere.
Place the bowl in the microwave and nuke it, one minute at a time, checking in between to see if your dye bath is ‘exhausted’ (that is, if the water is coming out clear, or if it’s still full of dye). Once you’re getting clear water, take it out of the microwave and put it in your sink to cool off.
ONCE THE YARN IS COOL and not before (you’d be surprised how hot it gets) gently open the plastic wrap and give your yarn a cool water rinse with a little mild detergent. Don’t let the water run directly on the yarn if you’re not using superwash – even this can cause felting.
Crappy cellphone shot of my finished work
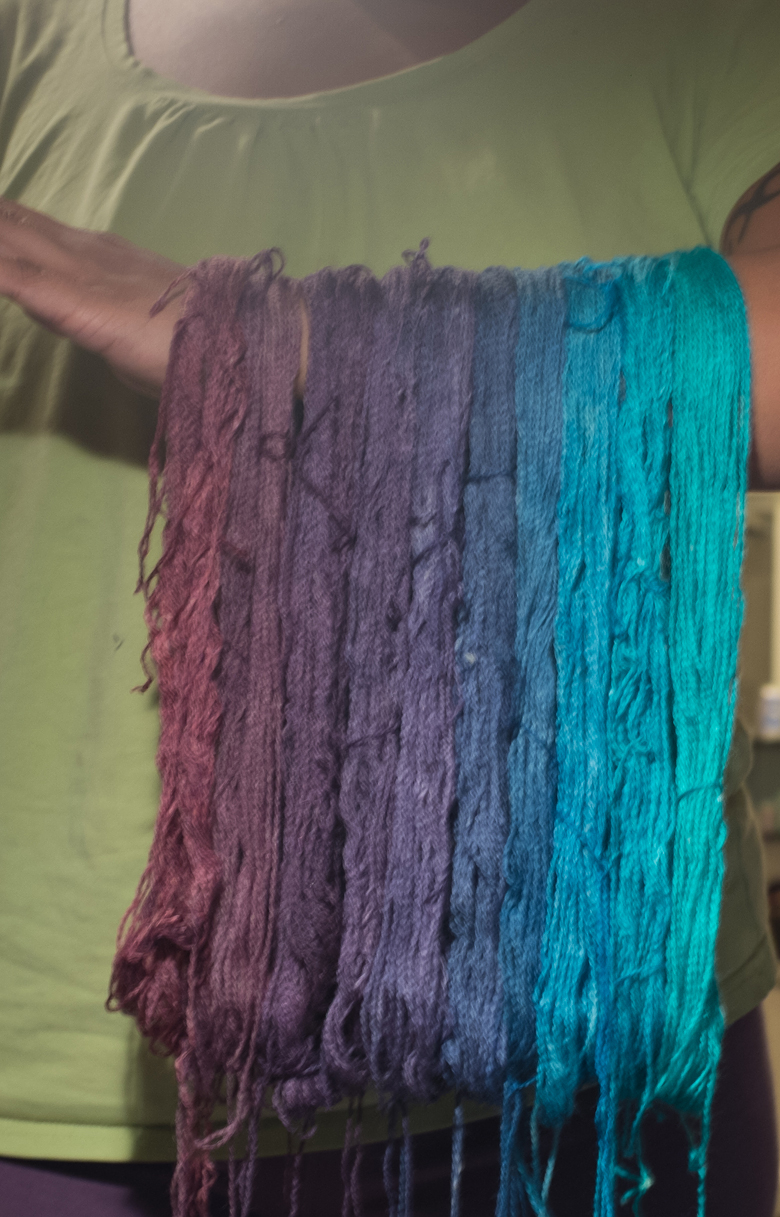
Admire your handiwork. You should be feeling pretty rockstar at this point.
Gently press out the excess water with a towel (that you don’t care about) and hang it to dry. Once dry, undo your little ties and re-wind the mini skeins into one big skein. You’re done!
I decided to give plaid a try on my loom, and discovered that weaving is a great way to stash-bust like a boss. Both these scarves are TFA scraps left over from other projects, in a mix of both aran and dk weight.
The red scarf: Sunset, Grape, Jewel, Charcoal, Natural
The blue scarf: Charcoal, Peacock, Lucky Penny, Frost, Stormy
Each scarf took (get ready to be jealous), less than 6 hours (the blue one took only 4).
I’m using the hemstitch tutorial from the Purl Bee to finish my ends. The results are much nicer than my first piece, where I just sort of hacked it.
Contrary to my knitting instinct, the way to change colours in weaving is simply to leave off with one colour, cut the yarn, leave the heddle in the same place and lay in your next colour, allowing the ends to overlap by a few inches.
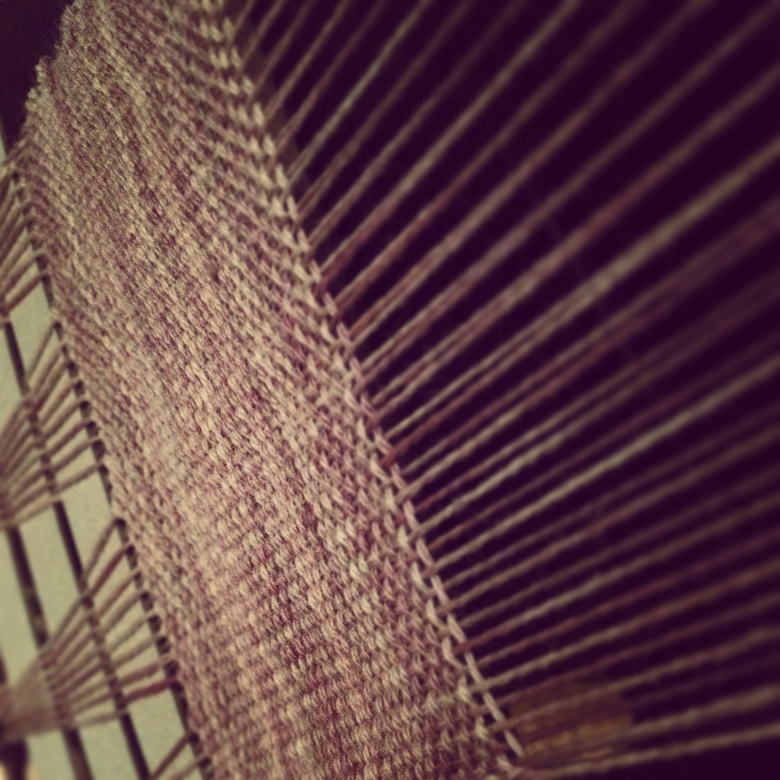
You can see, when compared against my first piece, that my ends are getting neater. The trick to a neat selvage seems to be to lay the yarn in at a 45o angle, and not ‘beat’ the weft in too aggressively. This (in theory) leaves enough yarn for a relaxed and neat selvage. In practice it’s something I just need to learn to be consistent about.
I’m ready to move on something new! I’ve got 4 small throw pillows on the couch, and when I first got a sewing machine they were my first project. It’s time for a change, so I’m going to try and make covers for them in houndstooth and log cabin weave.
I’m already craving accessories, including a 10 dpi heddle for sock weight yarns. I’m picturing light, airy summer scarves, and I’m packing these plaid ones away for next fall :)
This weekend, despite all the social stuff we had planned, I managed to get an entire Zauber Ball through the loom.
I’m so hooked. I’m totally in love. I’m obsessed, and we’re warping up a plan for a plaid scarf now!
I spent a ton of time on google last night and demystified things like what to do with my ends, and how to create different patterns.
The material is surprisingly soft and supple once blocked – not all stiff and canvassy like I was expecting.
Self-striping and crazy yarns that held no interest for me before are now calling my name…
Not to mention it takes great instagram pics :)
I love this loom. I’m so happy we spent the extra money and got the beautiful 20″ Ashford instead of a smaller, or cheaper loom. This thing is beautifully built, a blast to use, and a complete rookie like myself got something gorgeous out of it in just 6 hours from warp to tying off ends.
Last night I brought home my latest toy – from The Black Lamb in Port Hope Ontario, an Ashford Knitters Loom (the 20″ one). I didn’t get home until late at night, but Tito and I set it up together and got a few inches of weaving in before going to sleep.
The loom is super easy to put together. I’ve never done any weaving at all, but the instructions were clear and easy. Getting your warp on (the vertical strands) is also pretty easy, and not as time-consuming as I’d feared.
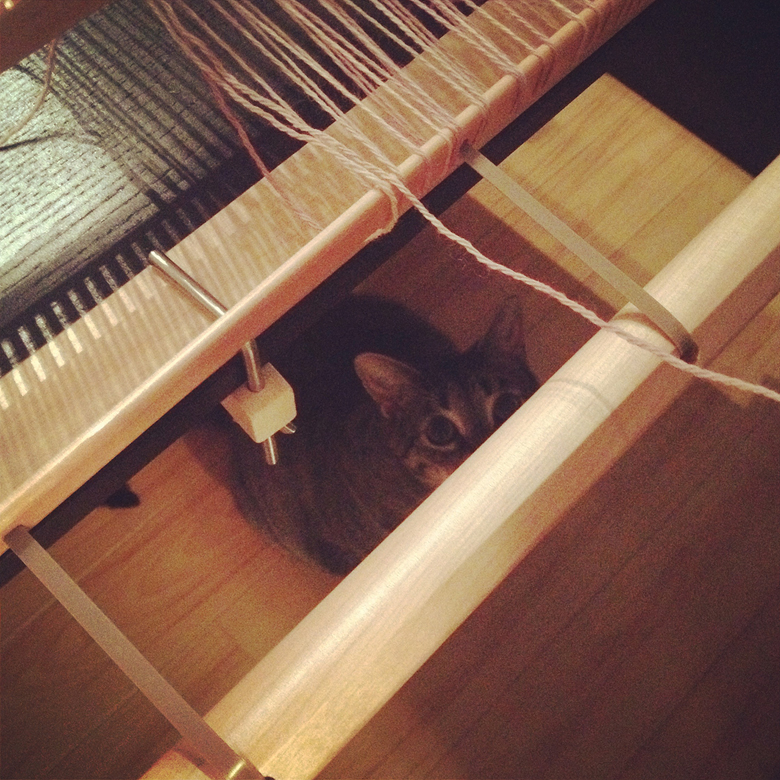
Ollie, the Junior Foreman, supervising the warp.
We were weaving about 45 minutes from taking it out of the bag. I think it’s something that gets faster with experience too. My biggest challenge right now is just getting some experience under my belt and trying to get an ‘even stitch’ (my knitting brain) and get nice even sides (right now they look like someone’s been chewing on them).
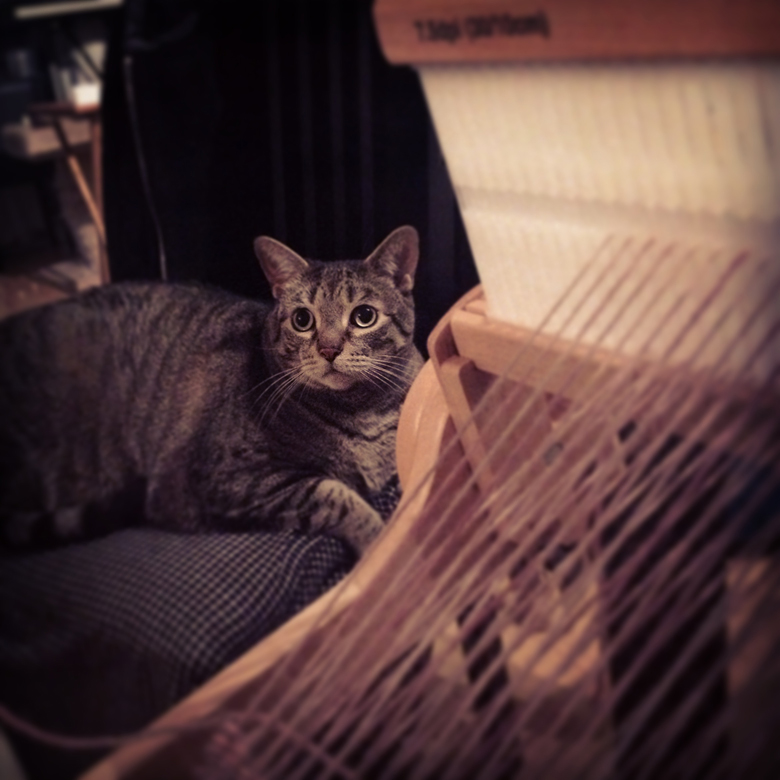
Junior Foreman, supervising the first few inches of weaving.
Once you understand how it works, a loom is like a canal lock – a beautiful mechanism, elegant in its simplicity, that solves a fairly complex problem. I can’t wait to get a little more time on it, and to get comfortable and competent enough to start getting creative with it!
I was chatting with Rayna last night about an amazing new yarn dyer that she’s discovered; Carla, at the Georgian Bay Fibre co. I was drooling over her colourways, and fell in love with the one called ‘granite’. I’ve ordered up 3 skeins of her dk weight, all destined for the Boiseau Wrap, and one skein of sock yarn in her spring colour ‘Spring Skies’ (this colour is only available until June, so if you love it, better get it now!).
Spring Skies, by The Georgian Bay Fibre Co.Granite, by the Georgian Bay Fibre Co.
I’m so pumped to actually get my hands on this gorgeous stuff – Carla is based out of Parry Sound in North Ontario (and is super sweet and friendly in addition to hella talented) – and if you read this blog with any regularity at all you know that North Ontario is my happy place. All her colours are inspired by the unparalleled beauty of the Georgian Bay region, it’s something dear to my heart and definitely one of the reasons I connected with her work right away (it doesn’t hurt that the site is stunning, so as a designer and a photographer I’ve got to give her kudos there too!).
Rossport Beach, North Shore of Lake Superior
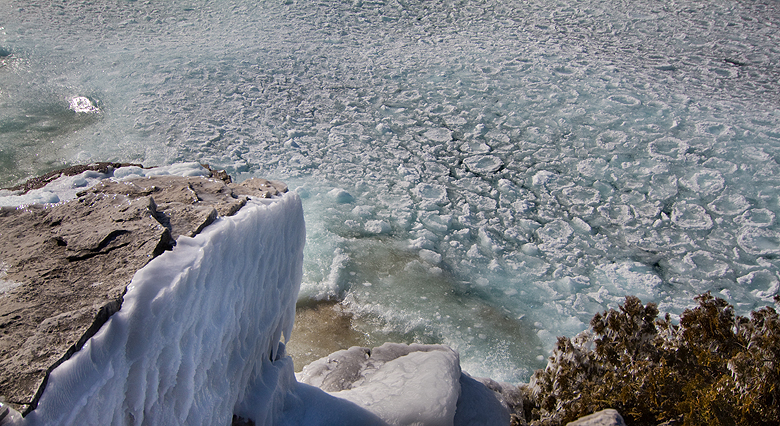
We got to chatting about the granite colour way and why I was so in love with it. I have been lucky enough to have discovered, in my travels, my favourite kind of place. For some folks it’s forests, for others, small towns. For me, the place where my soul really sings are places that are just rocks and water. Barren rock, and blue water – I can sit in a place like that all day and just relax.
Quidi Vidi Lake, St Johns, Newfoundland
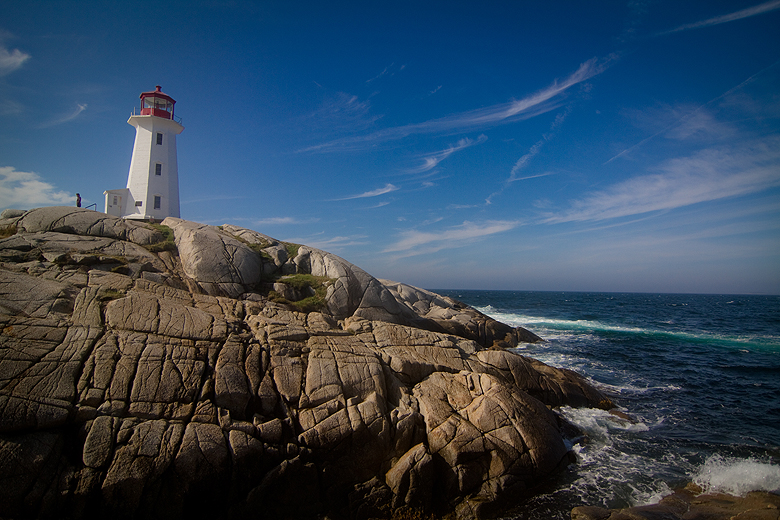
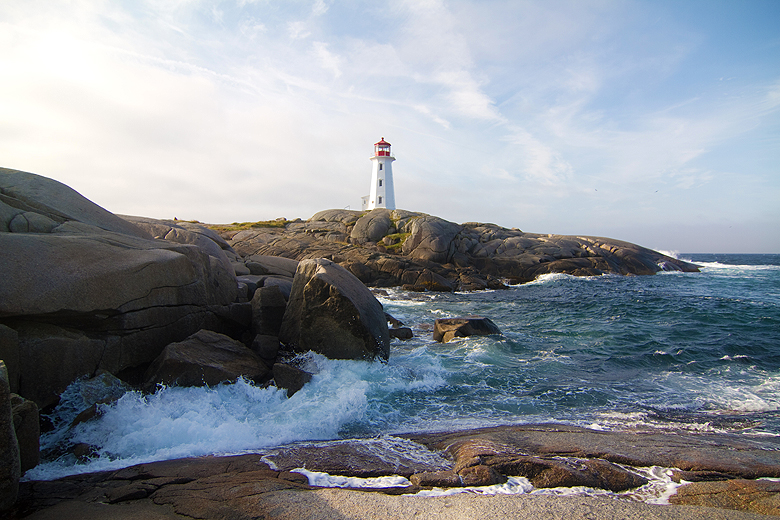
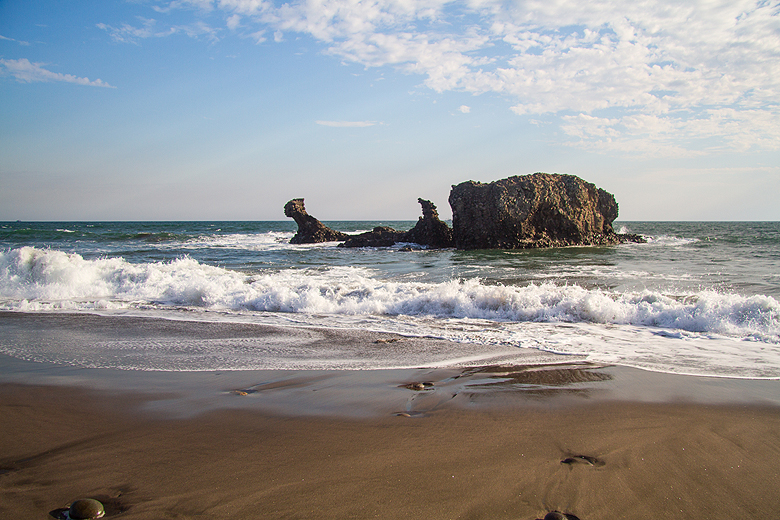
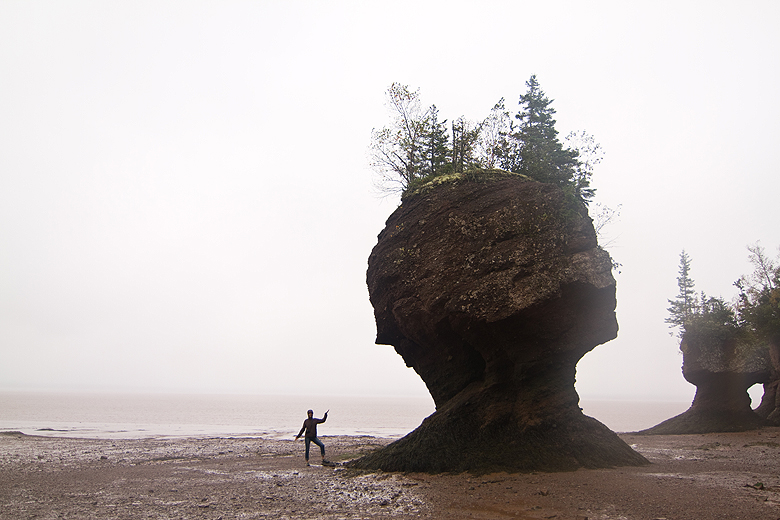
The austere beauty of places where I have found this mixture prompted me to put together a photography collection of the best ‘rock and water’ spots I’ve ever found myself in, and the places I know I’ll be thinking of as I knit up this gorgeous yarn!
Peggy’s Cove, Nova ScotiaPeggy’s Cove, Nova ScotiaCliffs of Moher, IrelandSt Johns, NewfoundlandThe Blue Grotto, Capri, ItalyLake Superior provincial ParkEl Tunco, El SalvadorUculet, British Columbia (yes, that’s a whale breaching!)Long Beach, British ColumbiaHopewell Rocks, Moncton, New BrunswickGeorgian Bay, TobermoryPeggy’s Cove, Nova ScotiaPeggy’s Cove, Nova ScotiaAran Island, Ireland
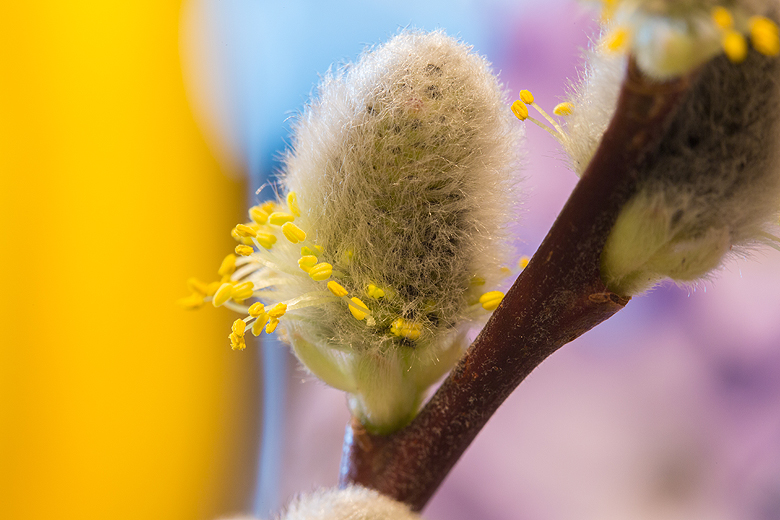
I’m finally working through some gorgeous flowers for a new batch of resin jewellery. Before I started preserving my flowers though, I decided to have a little fun with my macro lens :)