• Shipwrecked in the Deep Freeze

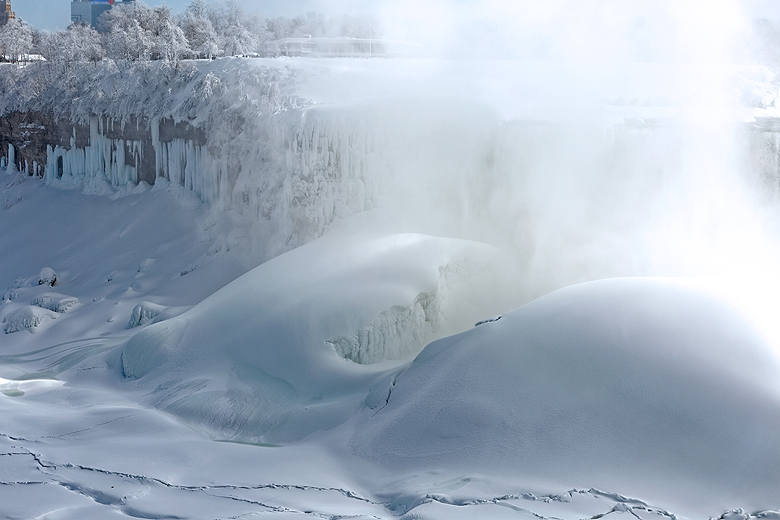
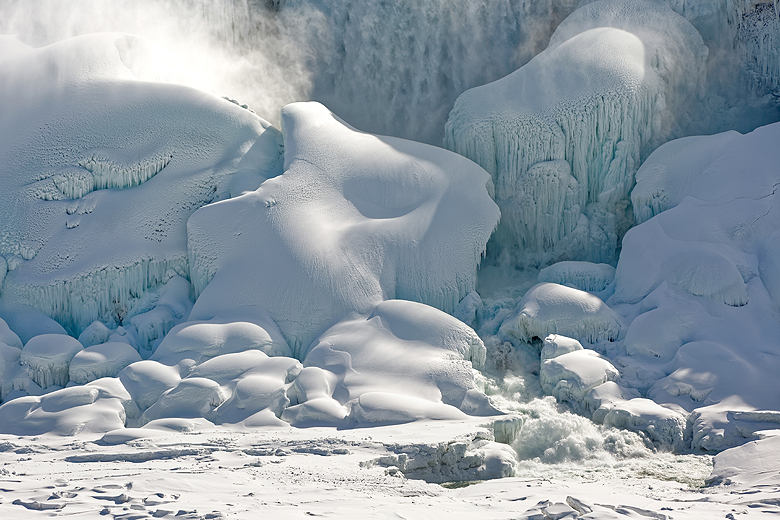
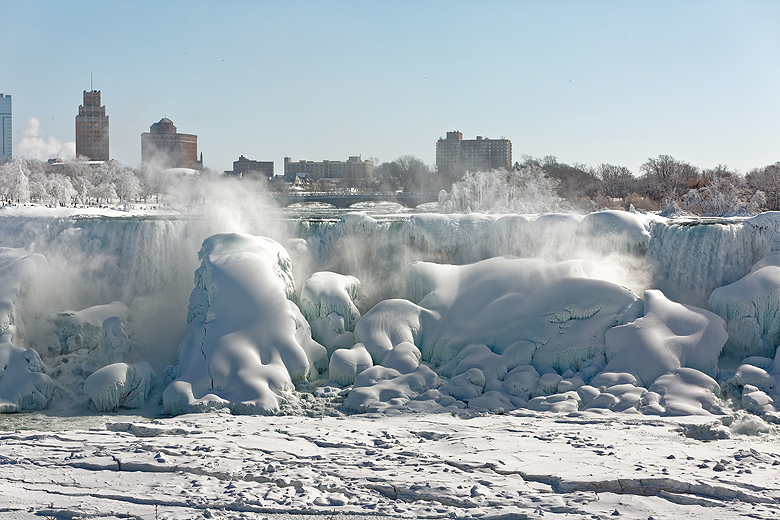
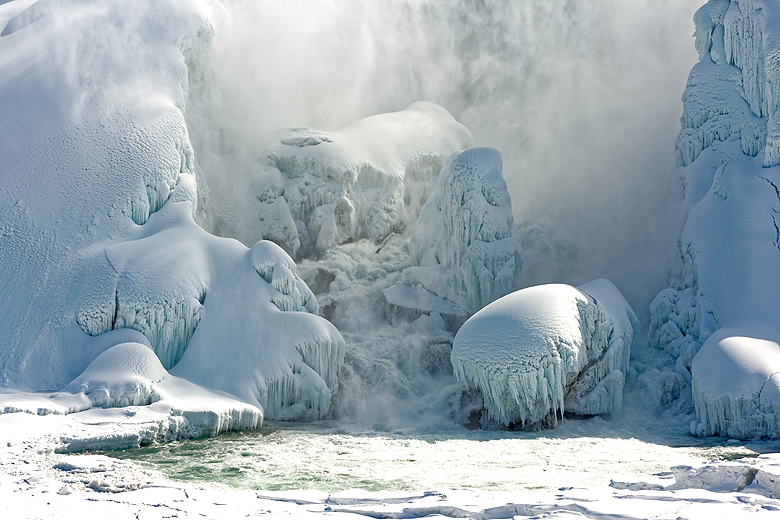
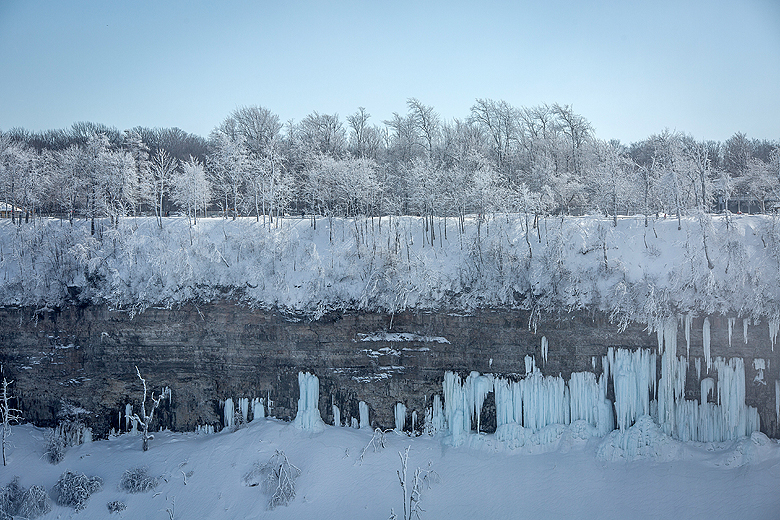
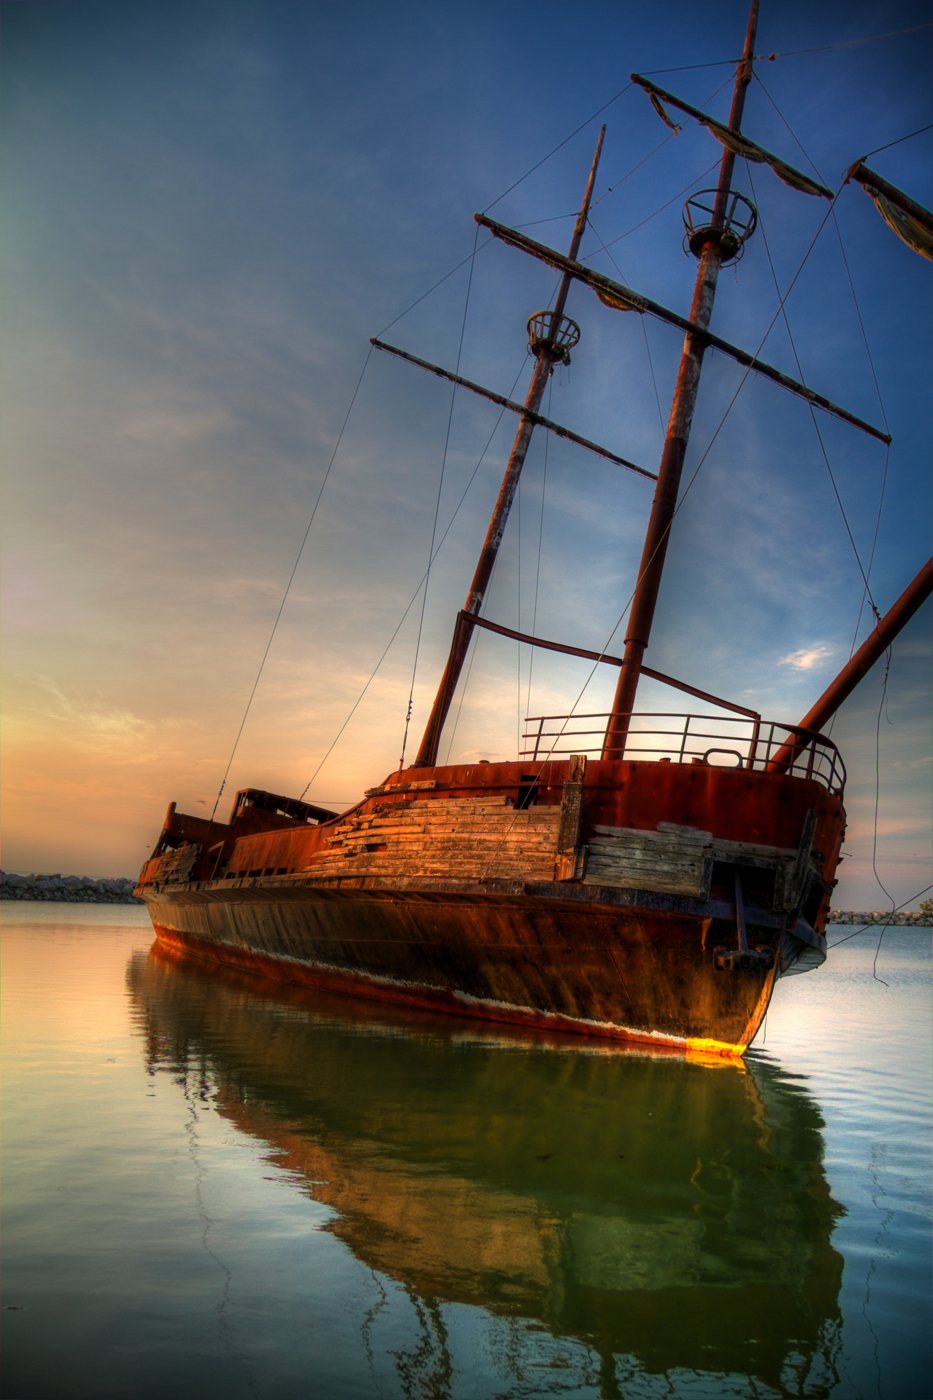
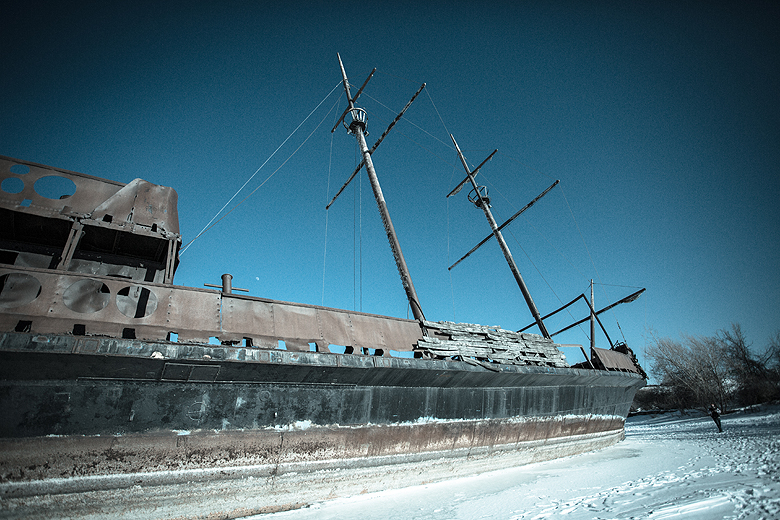
    Last weekend, on our way home from the frozen Niagara Falls shoot, Tito and I decided to make one more stop before Toronto, and pulled off at the Jordan Station shipwreck to see what it looked like in the deep freeze. We’ve shot this old wreck before, here is a shot I took in the summer:

    img_6269-3_-2__tonemapped

    We were in for an unexpected treat; this time, the entire inner harbour was frozen solid.

    3V8A3350

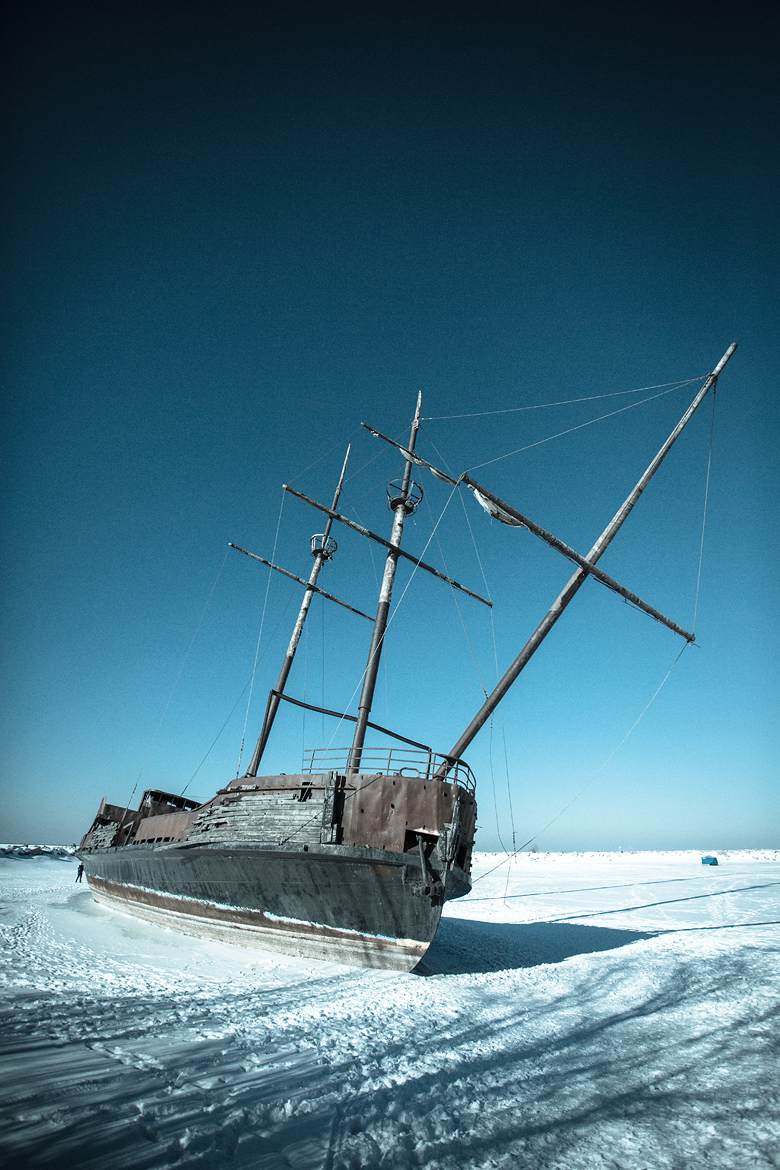
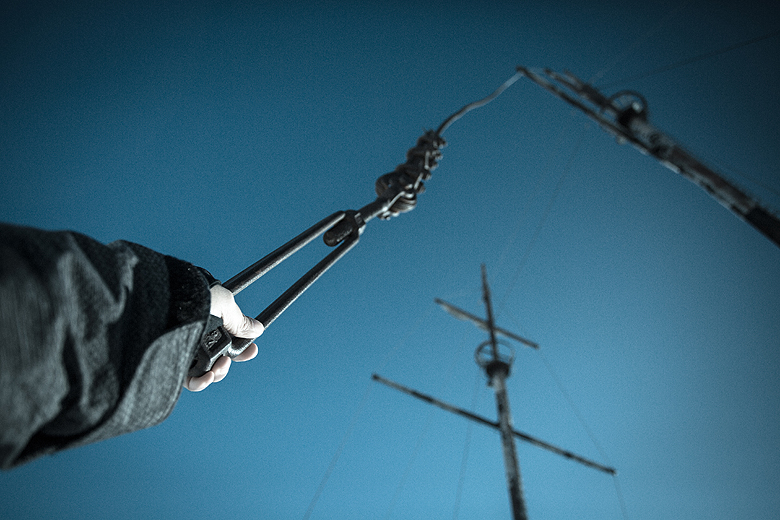
    It was solid enough that there were ice fishing huts on the water, so we knew it was safe enough to get closer, and to even climb onto the ship itself for the first time.

    3V8A3331 3V8A3285 3V8A3309 3V8A3325 3V8A3299

    As you can see, it’s quite abandoned.

    3V8A3302

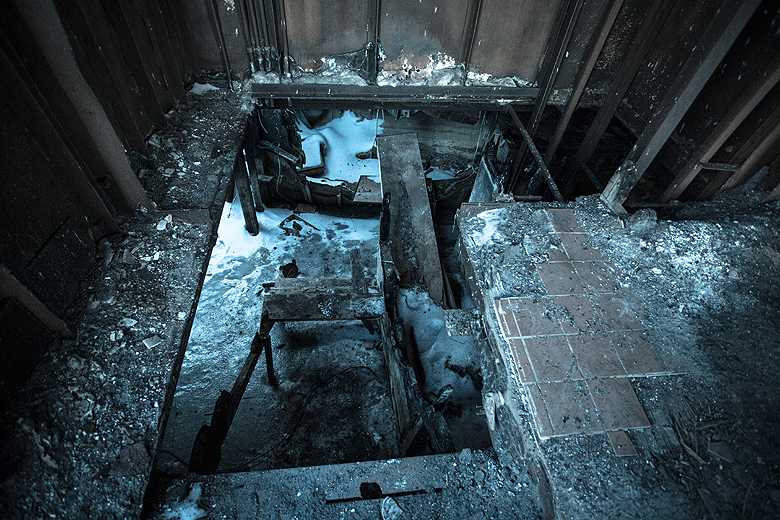
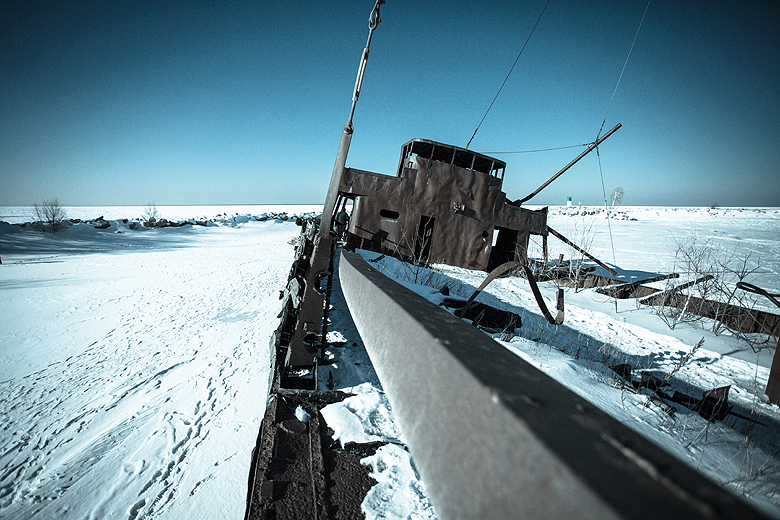
    And the staircases had warped so much they looked like a Dali painting.

    3V8A3281

    The ship was gorgeous up close. So many different textures!

    3V8A3327

    Today it’s a balmy 3 degrees celsius, and we’re not complaining. The lake is unfrozen outside of the inner harbour, and even the harbour ice is breaking up. However, I cannot dispute the perks of very cold weather, getting to see the boat up close was a real treat!

  • Breaking the cold record

    So, it’s official. February 2015 was not only record-breakingly cold… it was the coldest month in Toronto in recorded history. I feel like we all deserve T-shirts to commemorate this, though it hardly seems worth celebrating. A few weekends ago it was actually minus 40, that strange zone where both Fahrenheit and Celsius will say the same thing, and you could actually watch the lake effect from my apartment.

    3V8A2634

    That stuff that looks like steam rising upwards? That’s snow, coming downwards over Rochester. Crazy, right?

    But of course, if you are a photographer then this is a completely different deal. Last weekend Tito and I drove out to Niagara Falls in the morning (the emptiest I’ve ever seen it) and shot the incredible ice and snow formations that now lie at the bottom of the the waterfall with the highest flow rate in the world. Because, despite that volume, it was frozen.

    3V8A2939 3V8A2942_DxO 3V8A3016_DxO 3V8A3029_DxO 3V8A3054_DxO 3V8A2971 3V8A3053_DxO

    Both sides looked extraordinary, but I especially enjoyed the American side which had these giant ice boulders at the bottom. I also love that sculpted ice structure at the bottom of the horseshoe falls, looks like another world!

  • How to work lace on the wrong side of your knitting

    3V8A2702

    In my latest design, ’Sandy’ the lace pattern is worked on both sides of the piece. This can sound intimidating, but working lace on the purl side is really quite easy, promise :) I shot photo tutorials for the pattern to help folks navigate the lace.

    On the front of ‘Sandy’ I use yarn overs (yo) left-leaning decreases (ssk) and right-leaning decreases (k2tog) on the right side. On the purl side, yo becomes ‘yarn around the needle’, the left-leaning decrease is a ‘slip, slip, purl’ (ssp), and the right-leaning decrease is a ‘purl 2 together’ (p2tog). Grab some needles and follow along, it will open up a whole new world in lace patterns!

    tutorial-blank

    Purl 2 together (right leaning, wrong side decrease)
    1. Insert the right-hand needle as if to purl, making sure you go through 2 stitches, as you would for a knit 2 together

    3V8A3480

    2. Wrap the working yarn as if to purl

    3V8A3481

    3. Slide both stitches off

    3V8A3482

    Yarn around needle (wrong side increase)
    1. On the right side you would normally bring the yarn forward, but it’s already forward! What to do?

    3V8A3483

    2. Wrap the working yarn around the right hand needle, counter-clockwise

    3V8A3484

    3. When you work the next stitch you will see the yo increase. Easy!

    3V8A3485

    (This yarn over works on the wrong side of the work, or anytime you find yourself performing a yarn over between 2 purl stitches on the right side. )

    Slip Slip Purl (left leaning, wrong side decrease)
    1. Slip one stitch as if to knit

    3V8A3487

    2. Slip another stitch as if to knit

    3V8A3491

    3. Return these stitches to the left needle in their new, twisted orientation

    3V8A3492

    4. This is the only tricky bit, reach around to the back and Insert your right hand needle into the back loops as if to purl

    3V8A3493

    5. Wrap the working yarn as if to purl

    3V8A3494

    6. Slide both stitches off

    3V8A3495

    Wrong side patterning is used on only 4 rows of the 28-row repeat, but it really adds a lovely touch to the lace, and it’s a handy thing to know!

    3V8A2703

  • Resin Jewelry Book Review and Giveaway!

    BeadingGem.com has posted an awesome review of my book, Resin Jewelry, and is also hosting a giveaway for a free copy of the e-book. Her review made my crafty little heart sing, check it out here! While you’re there, leave a comment for a chance to win a free copy :)

    If you want to learn more, or to purchase a copy of your own (including print option!) check out my Resin Jewelry Page!

    promo2

  • Celebrating with Sandy

    3V8A2660-2

    Happy March 1st!

    To celebrate the beginning of the month that, sooner or later, heralds the end of winter, I am happy to announce that ‘Sandy is finally ready for release!

    Buy on Ravelry  |  Buy on Etsy  |  Buy on Craftsy

    For months you guys have seen sneak peeks of my latest lace piece. Tons of test knits and tiny adjustments have resulted in a shawl that I am truly proud of. The base is Tanis Fiber Arts Silver Lable Mulberry Silk in the gloriously summery ‘Papaya‘.

    DSCF0010

    Here’s the official blurb =D

    Sandy is named after my mom, because my mom loves bright, tropical colours, and silky, luxurious textures. This feminine shawl is light-as-air openwork, worked all in one piece from end to end.

    3V8A2661-2

    Sandy is given in charted form only. The ability to read your knitting will be very helpful, as there is patterning on both sides (don’t be intimidated, it’s only 4 rows out of the 28-row repeat). On pages 7 & 8 you will find photo tutorials on how to increase and decrease on the wrong side of your knitting.

    3V8A2702

    Tanis Fiber Arts Silver Label Mulberry Silk is the perfect yarn for Sandy, giving you a piece that is both delicate and luxurious with incredible drape, but can totally be thrown on over jeans or a sundress to keep the sun off your shoulders.

    3V8A2690-copy

    The 500 yard skein results in a generously sized piece at 62” x 12.5”. Instructions are given for adjusting the size of the piece on page 2.

    3V8A2703

    I have written up and shot photo tutorials for the wrong side increases and decreases, which I will release to the blog in the near future as well. I truly hope you enjoy this piece, and if you start soon, you’ll have something beautiful to drape over your shoulders when the sun returns!

  • Off the needles!

    Proper FO shots, (and the pattern!) for Sandy are coming shorty, but I had to show off the final, blocked piece. It blocked out to a delightful 62″ x 12.5″ with about 5g (<23 yards) of yarn left over. I can’t wait to get it off the blocking wires for a shoot!

    IMG_8900 IMG_8904

  • Review at beadinggem.com!

    Thank you Pearl for the awesome review on Beadinggem.com! Click here to check it out =D
    Thank you also to Aims for talking me up, you’re the best!

    3V8A2160

  • The Zen of Hem(stitching)

    tutorial-blank

    A few people asked, after my post about the Colour Shifting Scarf, if I could share a tutorial on how I hemstitch my ends. I am by no means a weaving pro, so how I do it may not even be the ‘right’ way, but it works for me and I love how it looks!

    IMG_8808

    1. When you have finished weaving your leader, and you’re ready to start with your first colour, pull off a length of yarn that’s at least 4 times the width of your piece.

    1

    2. Weave your first colour, leaving that extra yarn to the side for now.

    2

    3. Work a few inches of weaving to stabilize your fabric, then go back and thread a blunt tapestry needle with the extra yarn.  It sounds silly to point this out, but it’s a mistake I’ve made; don’t advance your fabric until after you’ve hemstitched!

    3

    4. Decide how you want to divide up your warp strands. This number is arbitrary and completely up to you and the effect you’re going for. In my case, I knew there were 16 beige strands, and 12 of every other colour, so I decided to do groups of 4 for the beige and 3 for everything else.

    5. Go under your chosen number of warp threads, in my case 4.

    4

    6. Go around your warp threads, wrapping them.

    5

    7. Go through the fabric – bring the needle up 4 warp threads over, and 3 weft picks up. Again, these are my numbers, but they are a good place to start.

    6

    Pull your thread snug.

    7

    My hemstitching mantra looks like this:
    Under. Around. Through.

    8. Under

    8

    9. Around, and through.

    9

    10. After a bit you will see a pattern. See that gap that’s forming above the hemstitch line? Don’t sweat that gap, it will totally block out when the fabric is washed. Some techniques actually use that gap to create intentional lace, but in our case it’s so small that when the yarn expands and relaxes, it will disappear. 10

    Work your way across the piece, when you reach your last gap pull your working thread through the knot a few times to fasten it, and you’re done!

    Hemstitching at the other end of your piece can seem weird because it’s reversed, but just remember your mantra; go under some warp threads, around to wrap them, and then through the fabric :)

  • Ye Olde Day Job

    … is occupying my every waking moment. Definitely heading into a crunch time, and it’s hard to find time to craft. In honour of huge workloads, I’ve ordered new business cards for my own company, The Blue Brick :) They just arrived!

    IMG_8780

  • TFA Tuesdays!

    My colour shifting scarf has been featured on Tanis’ blog today, check it out!

    DSCF0088 DSCF0085 DSCF0083 DSCF0091