
My colour shifting scarf has been featured on Tanis’ blog today, check it out!


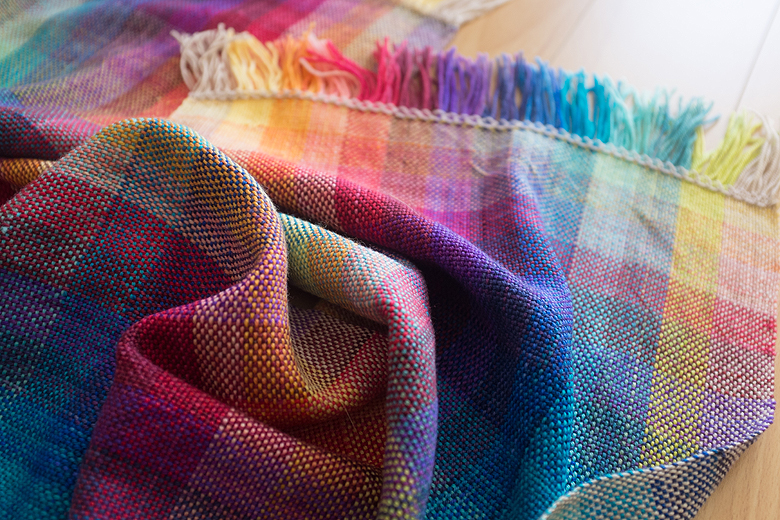

My colour shifting scarf has been featured on Tanis’ blog today, check it out!
This winter has been super cold, grey and monochromatic. So when Tanis Fiber Arts came out with mini-sock yarn skeins I was inspired to weave a colourful rainbow scarf, to give myself a cheerful pop of colour on these grey days. Changing colours as often as I did can be a bit fiddly, but oh-my the results are worth it, this is the perfect grey day scarf!

In Newfoundland they say ‘There is no such thing as bad weather. There is only inappropriate clothing’. Well, it’s -40 out there today, that strange, cold place where celsius and fahrenheit say the same thing. I think that the spirit as well as the body needs to be armed against weather like this, and this scarf is the answer. 
You will need:
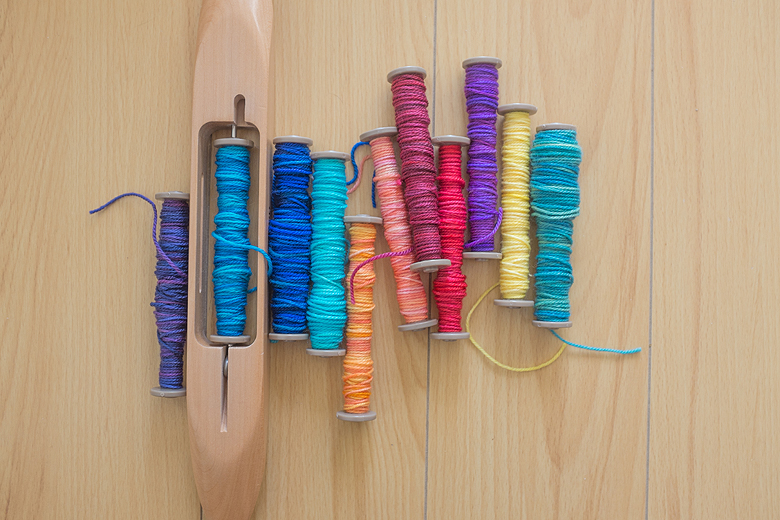
*Most looms come with stick shuttles, but because you’ll be changing colours frequently, a boat shuttle with enough extra bobbins to give you one bobbin per colour is much easier. Also, a boat shuttle gives you a smoother pass through the shed, and because the bobbin spins freely it doesn’t do that awful snag thing when you’ve passed your stick shuttle though without a long enough length of yarn. If you enjoy weaving, it’s a worthwhile investment.
**//EDIT//**
I made another one of these later on, and I made a few tweaks that really improved the design. I used a 10-dent heddle instead of 12 which greatly improved the drape and allowed me to warp to 80”, which meant that after I cut off the loom waste Tanis was left with a more generous sized scarf at 65” long and about 15” wide. Because I had fewer dents to work with, I warped 6 threads of each colour instead of 7, and when weaving I wove 12 picks of each colour instead of 14. She loved it :)
Click here for the hemstitching tutorial I wrote while weaving this scarf.
1. Open up the packs of yarn. Enjoy how ridiculously happy it makes you.

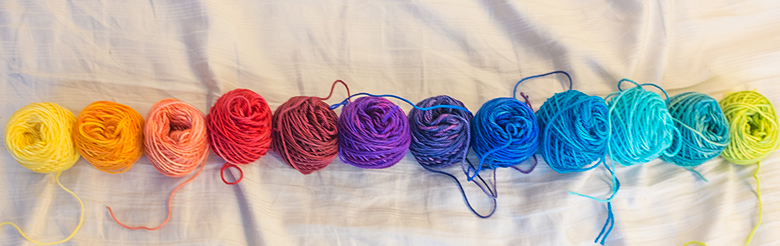
2. Wind up the yarn into little balls and work out the order that you’d like your colours to appear in the warp. I went for something close to a natural spectrum. You will use one ball of each colour for your warp, and one ball of each colour for the weft, so keep the 2 sets separated.
3. Do some math. You can change this to suite your preferences, but mine looked like this:
Because a warp is under tension, pieces often seem shorter than you’re expecting when they get cut off. To account for this, I gave myself a buffer of 7”, increasing my total distance between the back apron rod of the loom and the warping peg to 85”.
Each mini skein is approximately 34 yards. With an 85” warp, this should let you fill about 7 slots of the heddle with each colour (remember, that means 14 warp ends per colour).
4. I chose to frame my scarf with a neutral colour, which has the added benefit of making it wider. This is optional, but if you choose to do the same thing then begin warping your loom with the neutral colour. I warped 8 threads of the neutral, and then proceeded to the first colour in my rainbow. Work your way across the loom, warping the colours in the order you set out in step 2, filling 7 slots with each colour.
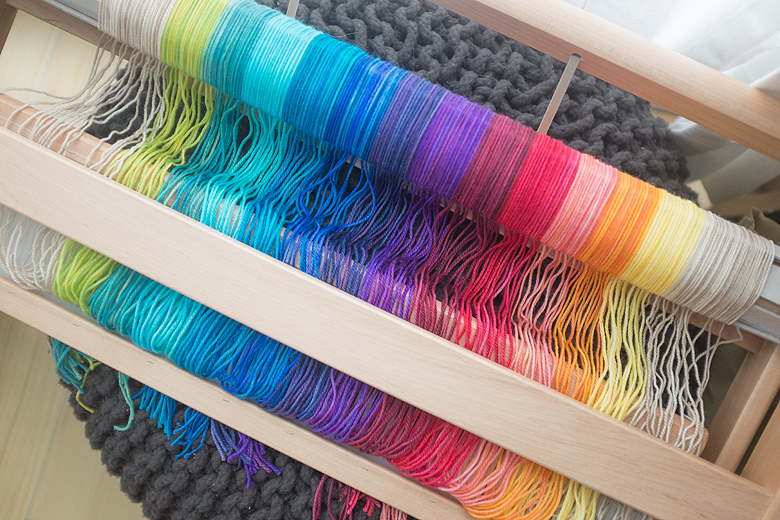
5. Now grab the other set of yarn cakes. Pre-wind your bobbins, one with each colour.
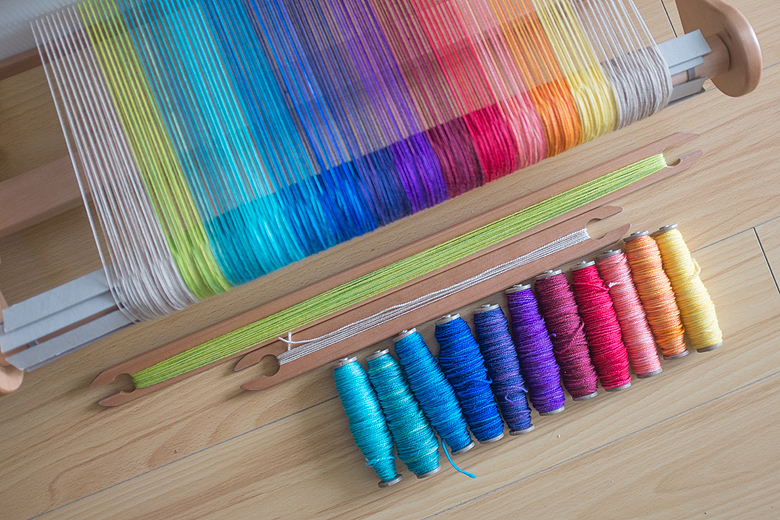
6. Begin weaving. After you weave the leader, weave a few picks with the neutral colour and leave a tail at least 4 times the width of your piece. (You will use this to hemstitch the piece after weaving a few inches. This is my favourite hemstitching tutorial). Starting with the first colour in your rainbow, weave 14 picks. Using the visual guide below, change to the next colour, staying in the order you set out in step 2.

Tip: Changing colours:
7. When you get to your last colour, simply start again with the first colour. Continue weaving to the end of your warp. End by weaving a few picks of the neutral colour and hemstitching. On my scarf, this meant 3 full repeats of my 12-colour rainbow, and a little less than half of a 4th repeat before I ran out of warp.
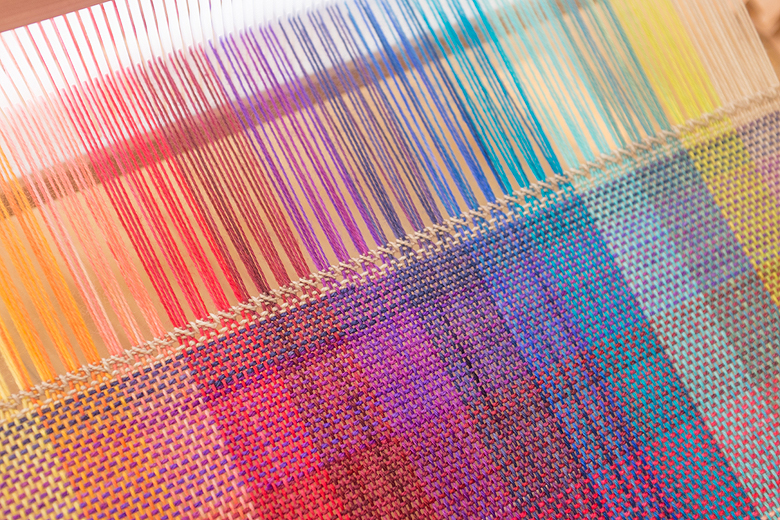
8. Cut the scarf off your loom, wet-block, trim your fringe and buffer both body and soul against Old Man Winter!


Sorry for the radio silence, I have been hit with a crazy bad flu – sickest I’ve been in years.
I think I’m finally on the mend though, but alas there is very little to show for the time I was sick except for one dyeing experiment and the progress I’ve made on the lace shawl (which I am now naming ‘Sandy’ after my mom, because this is totally moms colour and mom loves shiny, feminine things).
I present the skein of ‘That looks just like all your other sh$@t’:


And the progress on ‘Sandy’ which passed the halfway mark of the skein at 28 inches by 12.5 (blocked) so I’m proceeding with more confidence knowing that the final blocked size of the scarf will be a respectable 56×12.5 inches. I’m hoping to cruise to the end of the sample knit in the next 2 weeks, after which I can get the wrap size version on my needles!


I’ve been working on a new design for a few weeks now, and I think I’ve finally nailed it. Designing is a long process, with countless test knits, chart updates, and fiber tests, but it’s also very gratifying when you finally get there. This is my latest piece, designed to be knit both as a shawl and a generous wrap.
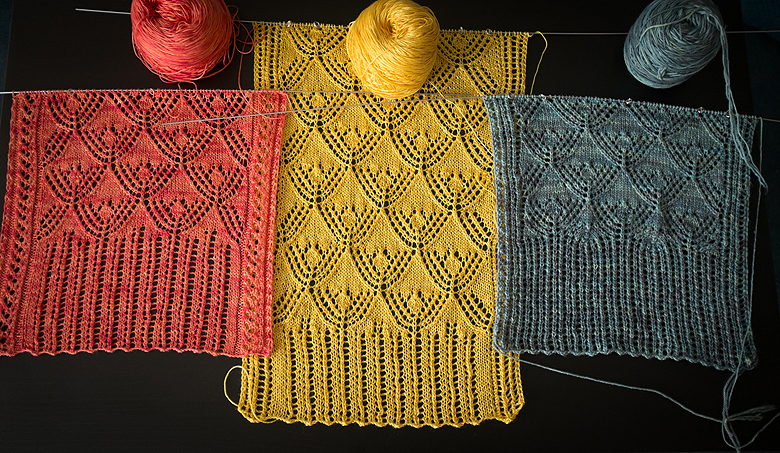
The yellow and blue ones are prototypes, but I wasn’t happy with the side panels (see how it’s kinda ragged at the bottom corners of the yellow one?) and the blue one has a different border entirely that just wasn’t working out for me. The blue one also has the drawback of coming from a 420 yard skein, and a little math told me it would not yield a shawl that was long enough for me.

This pink one is Tanis Fiber Arts, Silver Lable Mulberry Silk in a colour called ‘Papaya’. I am normally a blue-green person all the way, but this is the colour of the hour for me. The silver label base is luxurious, and happily, it comes in a 500 yard skein. It’s hot, and tropical, saturated and shiny, and you can imagine how welcome that is when the view outside at the moment looks like this:

I’m working away on the sample knit, and dreaming of summer while I’m at it :) More details as soon as it’s done!
Psst, my Etsy sale is still on, head on over to check out my floral resin jewellery!


It’s been a long time since I did an update of jewellery for sale on Etsy, but I’ve been enjoying my new techniques so much I thought it was time to share :) Here is a selection of the pieces currently for sale on my Etsy site:

First up is my collection of sea and sky themed pieces. The gradients were all created in polymer clay. The one on the right has real forget-me-nots, two of them have a starfish charm and one of them has a gold hummingbird.

These two were inspired by a story called “The Flight of the Hummingbird” which I found incredibly moving. I encourage you to check it out if you haven’t, it’s a very beautiful story. These are polymer clay with image transfers and charms which sit proud of the resin, but are securely embedded within.
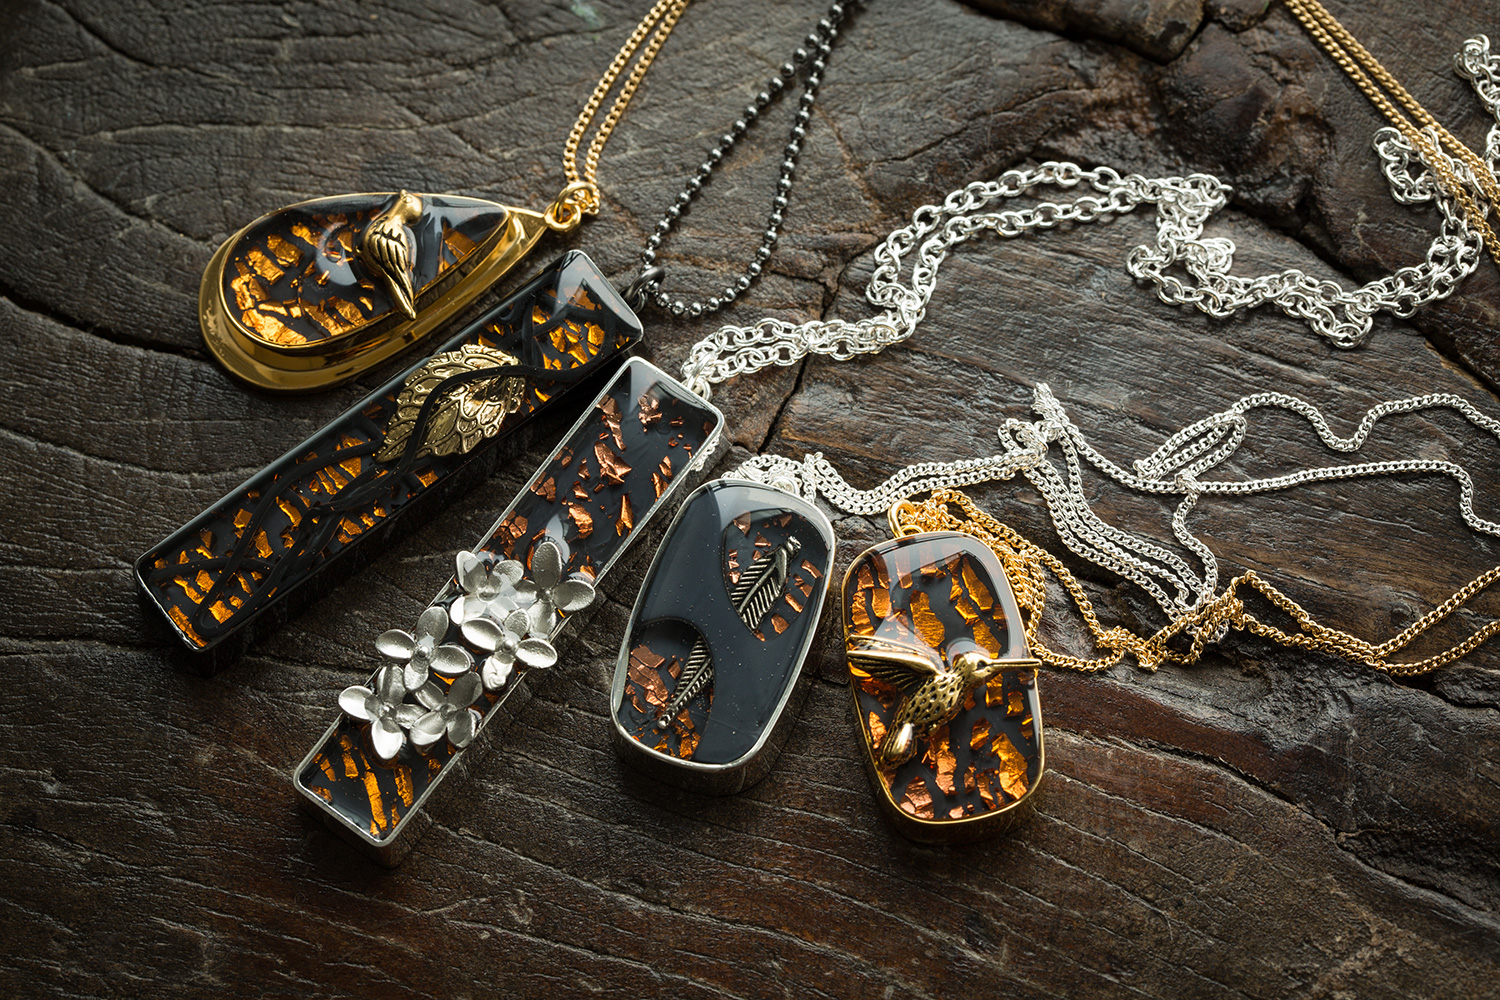
I couldn’t get enough of these! This is gold leafing on black polymer clay. I love playing with the idea of metal embellishments and reveals within the polymer clay. They just seem so…. shiny.

Of course I had to do some flowers as well! I dug deep and pretty well cleaned out my selection of velvet trumpet flowers – I can’t wait until the summer when I can get my hands on more!

These lovely teardrops are made with tulips and wild geraniums.

And finally, another wild geranium (bottom) and tulip (top).
I’m pleased as punch with this latest batch of jewellery! The long rectangles are $45 CDN each and come on 30″ chains, and all the other pieces are $40 CDN each, and come on 16″ chains. If you like what you see please check out the store!
Of course, if you like what you see so much that you’d rather be making them, check out my book on resin jewellery which covers everything you need to know to make gorgeous, unique pieces of your own :)

Just having a bit of fun with the phone camera while the real gear was tied up in some interview work. I’m learning to use our brand new DJI Ronin for smooth tilting and panning action while on the move, and so far this thing is a 10. The new lens is working out great =D Of course, it’s -29 out, but we’re not going to talk about that.


I was having an off week, and this was the proverbial straw:

I was helping some friends out with a shoot, and went to change the cameras position on the tripod. We had taken the strap off earlier so we could mount the camera to a gimbal, and when I fumbled the camera I reached for a strap that wasn’t there. The camera fell, 6 feet, onto a concrete floor. Amazingly, the lens took the entire brunt of the fall, breaking in half and leaving the bottom barrel still wedged in the camera. I carefully unscrewed it to reveal that miraculously, the lens contacts (and indeed the entire camera) were completely undamaged.

I finished the shoot, using another lens, got home, and freely confess that I treated myself to a good long cry. Tito was super supportive, and reasoned that we could break out a little from our wedding savings to replace the lens (see why I’m marrying him?) so on Saturday I treated myself to this:

That is Canons 100mm prime f2.8 L-series lens. It’s gorgeous, fast and sharp. I haven’t really had a chance to test-drive it yet, but I’m shooting in (and blogging from) beautiful downtown Montreal this week so it’s time to take it for a spin!
It’s probably the saddest I’ve ever been while purchasing a lens, but it died while bravely protecting a 5D Mark III from harm, and you can’t ask for a better end. In memory of that lens, here are some of the best pics I ever took with it.


If you follow me on Instagram you might have seen a few photos of a lace swatch I’ve been working on:

This is the test knit for my as-yet-unnamed new pattern – a light and lacy oversized shawl, perfect knitting for someone who’s dreaming of summer. The shawl will take up one generously sized skein of Tanis Fiber Arts Pink Label (and if you follow the link you’ll get a sneak preview of the colour I plan to work up the sample in!). It will make perfect winter knitting for me, and come summer it will be the perfect protect-your-shoulders, stuff-in-your-purse, light-as-air wrap. I’m stoked!


Sencilla Cowl Knitting Pattern
Purchase on Ravelry | Purchase on Etsy
Today I wanted to show off some photos of my Sencilla pattern worked up in Tanis Fibre Arts ‘Olive’, to show how the pattern works when paired with a more variegated yarn.

Olive is a complex, layered colour way, and it shows beautifully on the luxurious Amber Label (a merino, cashmere, silk blend, be still my beating heart).

The yarn is unbelievably soft and cosy, while still lending great stitch definition to the cowl, helping all those little details to pop while still showing off the super colourful yarn.

The cowl is coming in handy this winter – it’s a balmy -18 today with the windchill! I love how the cowl creates warmth without bulk and covers that awkward gap where my jacket doesn’t quite cut it!


I cast these babies on over the labour day weekend, for a drive to NYC. I managed to get through turning the heel before the end of the trip, and there the project sat for weeks on end.

I finally picked them up again about a month ago, and raced through the end of the first sock. The second sock got onto the needles right away, and (A Christmas Miracle!) were finished and blocked by Christmas eve, ready for me to give to my mama.

Designed by my dear friend Rayna, Petty Harbour is a gorgeous, free, easy sock pattern. Did I say free? I definitely recommend checking it out! It’s my first sock with an actual leg attached to it (I’ve only ever achieved ankle socks) so I feel pretty proud of my bad self.
Pattern: Petty Harbour by First Light Handcrafts
Yarn: Georgian Bay Fibre Co., Kilcoursie Fingering, Colour: Tobermory Shoreline

